Bot Designer
BOT Designer enables to design chatbots as per requirement. It offers the capability to design conversation stories for different intents with response and action parameters. BOT Designer also provides the capability to navigate to other stories.
Designer helps to create master bots which can invoke child bots and to create bots which work based on KB services.
Creating a Bot Project
To create a BOT project, perform the following:
-
Access Conversation Designer from SmartOps home page. This displays the Dashboard page of Conversation Designer.
-
Click
 available in the home page and select New BOT Project. This displays Create New Project screen.
 -
Define the configurations as per your BOT project.
-
Project Name: Enter the name of the project.
-
Description: Enter the description for the project.
-
Select if this is a masterbot: Enable the option if the bot is to be created as the masterbot.
-
If masterbot, click here click here
-
Add Slave Bots: Select the required bots to be available as slave bots within the masterbot.
Import Data From: Select the type of data source. Available options are Existing Projects and JSON file.
Select Language: Select the language of the training data.
Select Predefined entity models for the project: Select the required entity model(s) from the list of pre-defined entity models.
Select custom entity models: Select the required entity model(s) from the list of custom entity models.
-
-
If Slavebot or not a masterbot, click hereclick here
-
Import Data From: Select the type of data source. Available options are Existing Projects and JSON file.
-
Do you want to integrate with a Knowledge Base Project?: Enable the option if you want to integrate with a knowledge base project.
-
Select Language: Select the language of the training data.
-
Select Predefined entity models for the project: Select the required entity model(s) from the list of pre-defined entity models.
-
Select custom entity models: Select the required entity model(s) from the list of custom entity models.
-
-
-
Click CREATE PROJECT to create the project.
-
To reset the configurations, click RESET.
Designing a Chatbot
Chatbot is a software application that enables conversation between user and the application through textual input. Conversation Designer platform of SmartOps provides NER capabilities to effectively converse through chatbots.
To create a chat bot through Conversation Designer platform, ensure to identify the purpose of the bot and the actions related to the domain it serves. Also prepare a list of possible intents and entities.
To create a chatbot, perform the following steps:
-
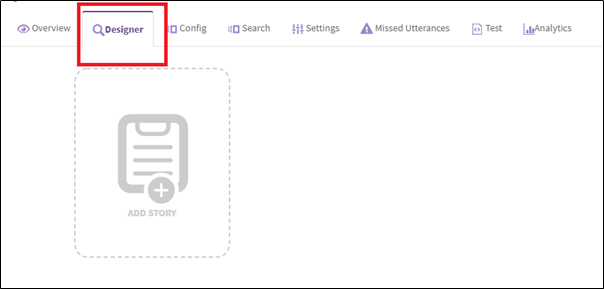
Navigate to Designer tab of the BOT project created as shown in FigureFigure.
-
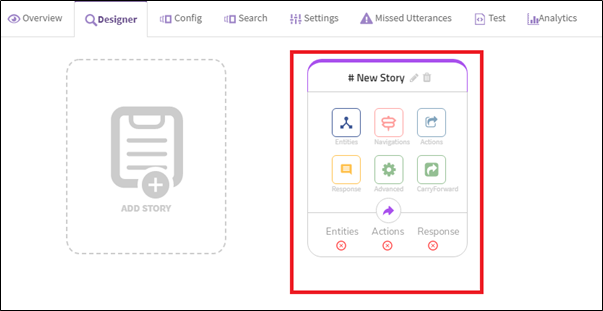
Click ADD STORY to add a new story. This displays the template to create a new story as shown in FigureFigure.
-
To edit the default name of the story click
 icon against # New Story. You can select the intent corresponding to which the bot needs to be mapped as shown in Figure. Figure.
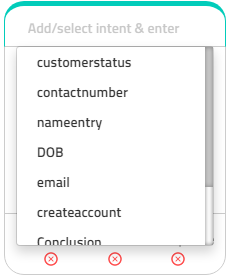
-
Create intents, add utterances and entities through Config tab. For details, refer Project Configuration.
-
In the Designer template, you may perform the following:
-
Adding EntitiesAdding Entities
To add an entity, perform the following steps:
-
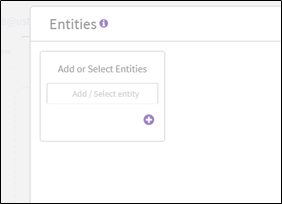
Click on Entities icon. This displays the window to add entities as shown in FigureFigure
. 
-
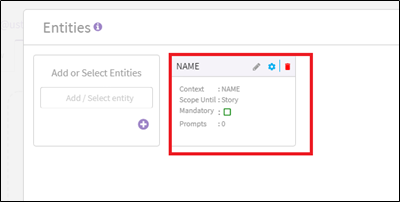
Type the name of the entity in the Add or Select Entities text box and press Enter. The entity is available in the window for additional configurations as shown in FigureFigure.
-
Click
 icon against the entity. The Entity window is refreshed as shown in FigureFigure.
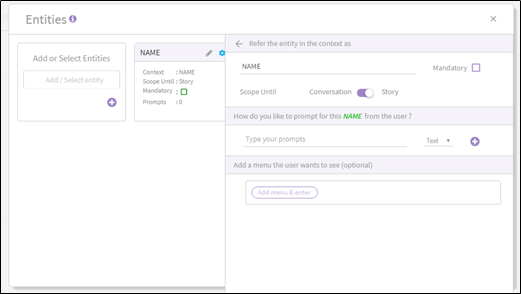
-
Edit/Define the configurations.
-
Edit the name of the entity, if required.
-
Select Mandatory check box, if the entity is to be marked as mandatory.
-
Select the scope or validity of the entity, as per requirement (Conversation/Story).
-
Type the prompt text, for this entity, to be shown to the user, if the mandatory enity input is not available and press Enter.
-
Add the additional menu the user needs to see with respect to the entity in the Add a menu the user wants to see (optional) field.
-
-
-
Click
 icon against the entity. This displays the Add Rules window as shown in FigureFigure.
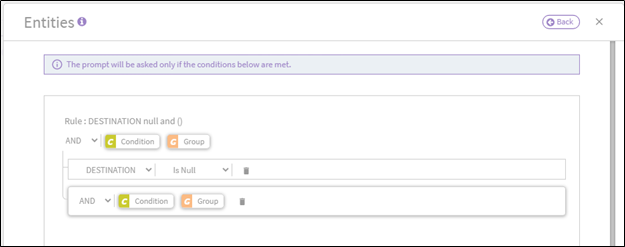
Define the rules, as per requirement.
-
-
To add rules, perform the following steps:
-
Click on Navigations icon. This displays the window to add rules.
-
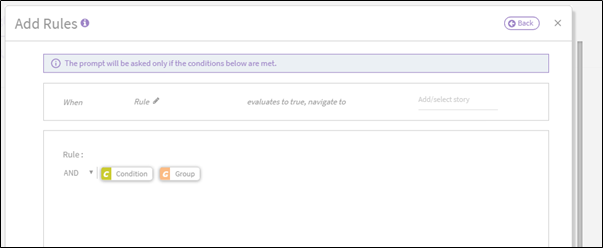
Click on Create Rules. This displays the window to add rules as shown.
-
Configure the rules or establish connection as per requirement. The rules indicates the bot to execute corresponding story if it satisfies the rule.
-
Click on the
 icon against When field. Type the name of the rule.
 -
Select the story to be navigated to, if the evaluation criteria is met, in the Add /select story field.
-
Click on the
 icon to define the rules.
 -
Click on the
 icon to add more conditions.
-
-
Configuring ActionsConfiguring Actions
You may configure external APIs using Actions window. For example, if the user story is related to flight booking enquiry on a specified date, an external API call is required to fetch the flight details. To configure Actions, perform the following steps.
-
Click on Actions icon. This displays the window to configure actions.
-
Configure the Action, Response Mapping, and Alternate Flow (if required)
-
To configure Actions, perform the following steps:
-
Enable GET/POST API.
-
Enter the API end point URL.
-
Configure the Headers and Request Body.
Example of configuration is explained in FigureFigure.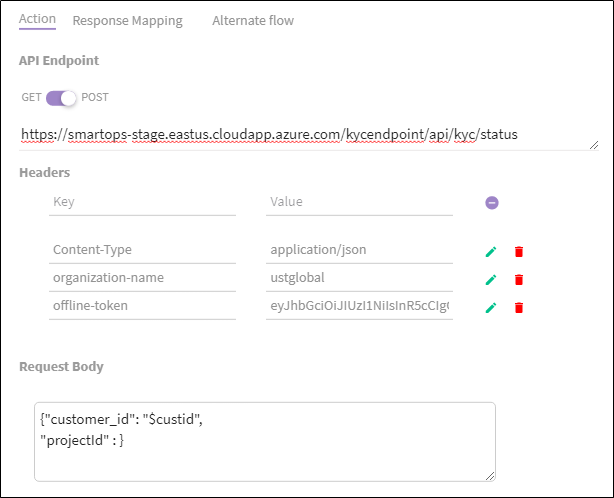
-
-
To configure Response Mapping, perform the following steps:
-
Enter the response parameter and corresponding context variable to be mapped and click on
 icon as shown in FigureFigure.
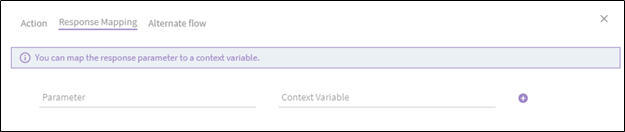
-
-
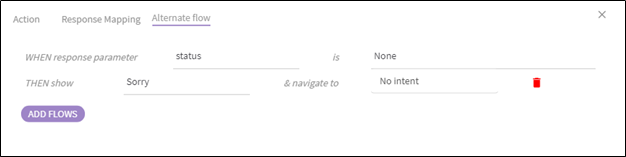
To define an alternate flow, perform the steps as shown in FigureFigure.
-
-
Configuring Response ParametersConfiguring Response Parameters
You may configure response parameters if response is required based on the actions specified. For example, responding back to the user with flight details. To configure the response, perform the following steps:
-
Click on Response icon. This displays the window to configure response as shown.
-
Configure the response in Add A Response field.
-
Select and configure the Response Template. Response Templates available are:
-
Carousal: Enables to add prefix text and images to responses.
-
Text: Enables to display response as text.
-
List: Enables to display response as a list.
-
Contact: Enables to display address and contact information as response.
-
Image: Enables to display response as images.
Add any connection questions, if required.
-
-
Select Yes/No from the Do you want to continue based on response from user? field, as per requirement.
-
-
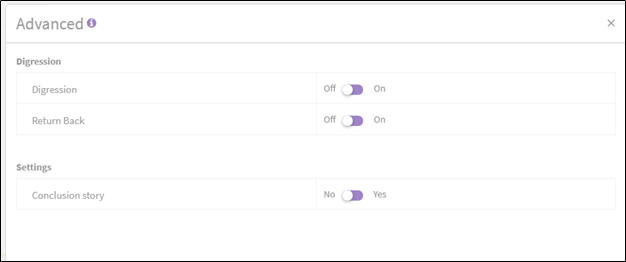
Configuring Advanced ParametersConfiguring Advanced Parameters
To configure advanced parameters, perform the following steps:
-
Click on Advanced icon. This displays the window to configure advanced parameters as shown in FigureFigure.
-
-
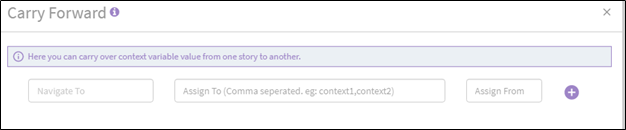
Configuring Carry Forward ParametersConfiguring Carry Forward Parameters
-
Click on Carry Forward icon to carry over context variable value from one story to another as shown in FigureFigure.
-
-
See Also:
Designing a Chatbot - Scenario
Related Topics: