Understanding NER Dashboard
The NER projects created will be listed in Conversation Designer homepage. The project consists of the following tabs:
-
Overview
-
Config
-
Search
-
Missed Utterances
-
Test
Viewing Project Overview
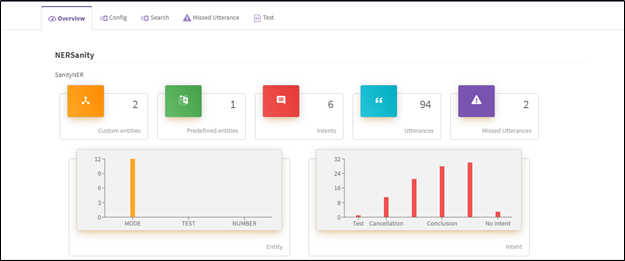
Overview tab provides an Insights view of the NER project created. The dashboard provides the following information as shown in FigureFigure:
-
Total number of Custom/Pre-defined entities
-
Total number of intents
-
Total number of utterances
-
Total number of missed utterances
-
Graphical representation of Entity vs Count
-
Graphical representation of Intent vs Count
Project Configuration
Configuration tab enables to configure the attributes related to a project such as Intent, Entity, Phrases and so on.
Following configurations can be done using Config tab of Conversation Designer.
Adding an Intent
An intent represents the action to be performed for a user input. An utterance should be mapped to an intent so that your application can understand the user's input and take necessary action. If you do not map an intent, I.C.E Custom Language Modelling Platform will assign the default value 'No Intent' to it.
Conversation Designer framework provides a list of pre-defined intents that can be used as per requirement. In addition to pre-defined intents, custom entities can also be defined.
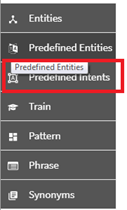
Adding Predefined Intents
Predefined intents are those intents that are already available by default under specific categories.
English
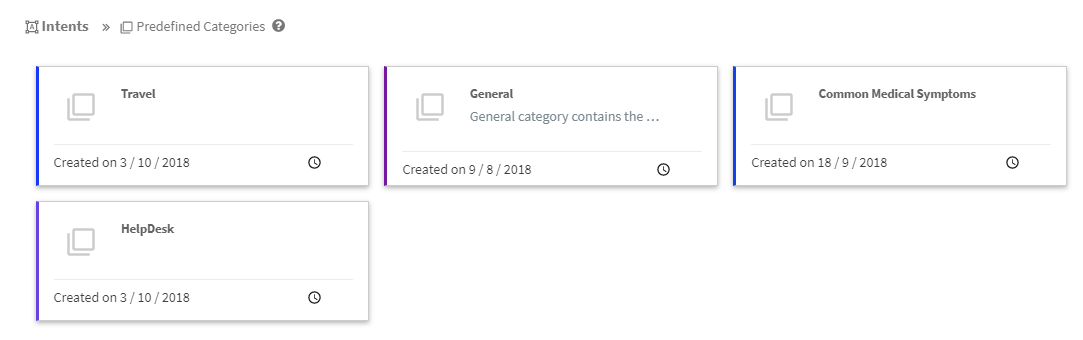
There are predefined categories such as General, Travel, HelpDesk and Common Medical Symptoms. For example, General includes predefined intents like -
-
Greeting - Marks the beginning of a conversation
-
Conclusion - The user wants to end the conversation in a neutral or positive tone
-
Positive Feedback - Indicates that the user is happy with the experience
-
Negative Feedback - Indicates that the user is not happy with the experience
-
Switch to Agent - Indicates that the user wants to connect to a human agent
-
Positive Response - Indicates that the user is happy with the experience
-
Negative Response - Indicates that the user does not want to proceed with the option suggested
-
Weather - Indicates that the user wants to know about the weather
Spanish
There are predefined categories such as Viajar, General, Mesa de ayuda and Síntomas médicos comunes. For example General includes intents like -
-
Saludo - Marca el comienzo de una conversación.
-
Conclusión - El usuario quiere terminar la conversación en un tono neutral o positivo.
-
Retroalimentación positiva - Indica que el usuario está contento con la experiencia.
-
Retroalimentación negativa - Indica que el usuario no está contento con la experiencia.
-
Cambiar a agente - Indica que el usuario quiere conectarse a un agente humano
-
Respuesta positiva - Indica que el usuario desea continuar con la opción sugerida.
-
Respuesta negativa - Indica que el usuario no desea continuar con la opción sugerida.
-
Clima - Indica que el usuario quiere saber sobre el clima.
To add a predefined intent, perform the following:
-
Click Predefined Intents menu from the list of menu available in the Config page as shown in FigureFigure.
-
This displays the list of predefined entity categories as shown in FigureFigure.
-
Select the required category. This lists the intents available within the selected category as shown in FigureFigure.

-
Click the
 icon against the required intents to add to the project.
Adding Custom Intents
To add an intent, perform the following:
-
Click on the
 icon available in the Config page as shown in FigureFigure.
-
Enter the name of the intent in the Intent field.
-
Enter a meaningful description for the intent in the Description field.
-
Click the Save icon available on the top right hand corner of the window.
Adding Entities
Entities represent the data necessary for performing an action in your application. Entities could be name of places, things, people, or any other data relevent to the intent of the user's input. For example, a flight booking application may have the entities ' from_location', 'to_location', 'date', 'flight_name', 'travel_class' which are necessary to perform a flight booking operaion. Named entities are often not smply singular words, but could be chunks of text as well.
Conversation Designer provides a set of pre-defined entities and also capability to create custom entities.
Adding Pre-Defined Entities
Predefined entities are those entities that are already available by default when the project is created.
English Language
I.C.E Custom Language Modelling Platform supports 3 predefined entity models i.e.
-
SSVM(MITIE)
-
CoreNLP
-
SPACY
Spanish Language
I.C.E Custom Language Modelling Platform supports 3 predefined entity models i.e
-
SSVM(MITIE)
-
SPACY
-
CoreNLP
To add pre-defined entity, perform the following:
-
Click Predefined Entity menu from the list of menu available in the Config page as shown in FigureFigure.
This displays the list of Predefined entities as shown in FigureFigure.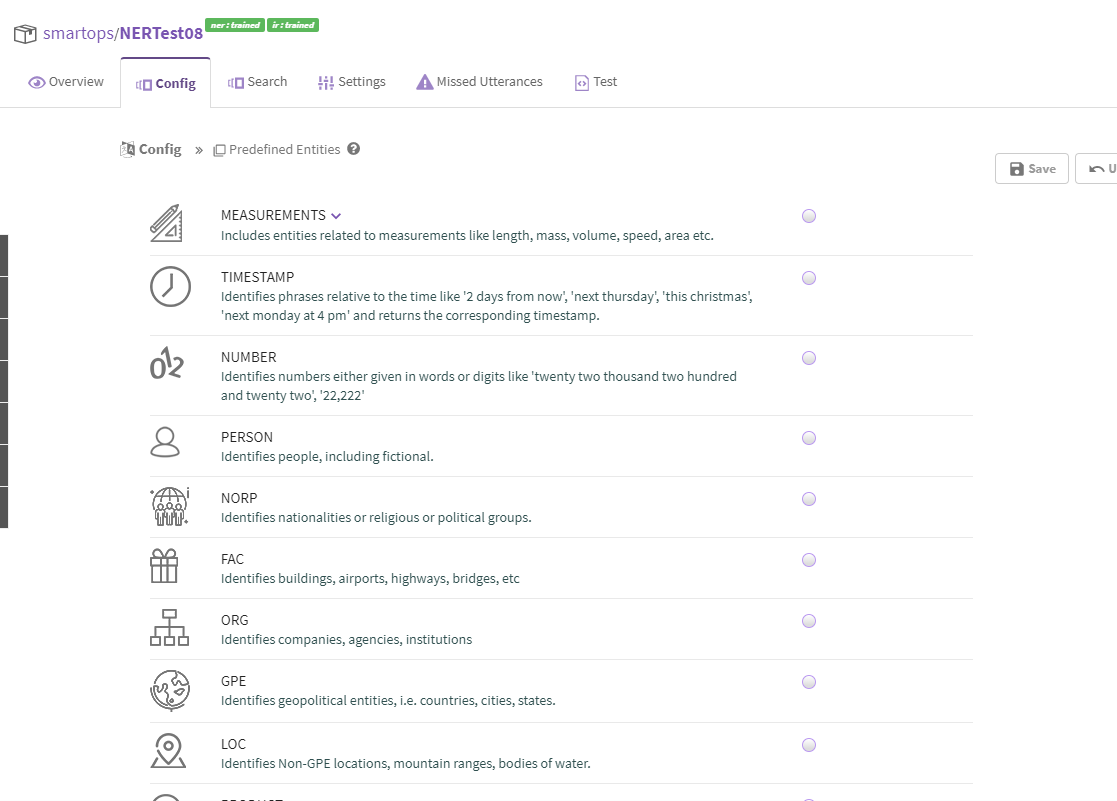
-
Select the required entities and click Save.
-
To undo the changes, click Undo.
For more details on Predefined entities, see Predefined Entities.
Creating Custom Entities
Custom entities are those entities that are defined and mapped by users.
English Language
I.C.E Custom Language Modelling Platform supports 3 custom entity models for English i.e
-
SSVM(Mitie): It has high accuracy and works well with limited training data and when number of entities increases, the RAM usage as well as the time for training increase exponentially. It is recommended when there is less training data and no. of entities not greater than 6.
-
CRF: Though accuracy is slightly lower than MITIE, it works well on large volumes of data efficiently. The efficient memory utilization and performance makes it a better choice over MITIE for most of the Entity Recognition problems.
-
CoreNLP: This has industry wide acceptance. But is licensed and would require the client to purchase the license if this is to be used.
Spanish Language
I.C.E Custom Language Modelling Platform supports 3 custom entity models for Spanish i.e
-
SSVM(Mitie)
-
CRF
-
CoreNLP
Custom entities are those entities that are defined and mapped by users.
To add a custom entity, perform the following:
-
Click Entity menu from the list of menu available in the Config page as shown in FigureFigure.
This displays the Entities window as shown in FigureFigure.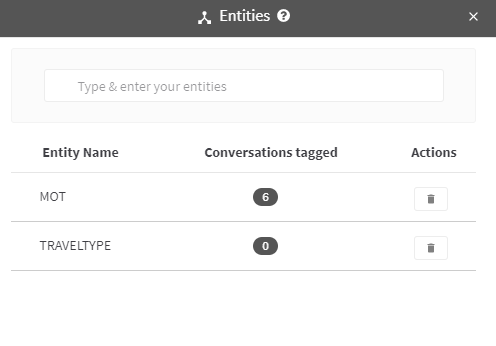
-
Type the name of the entity and click Enter .
Adding Phrases
A Phrase is comma separated words standing together as a single unit. You can provide a group of words which will be tagged in your utterances. For example, if you add the phrases 'New York, California, Boston, Chicago, Washington' with name cities, then each time when any of these words appear in your utterance will get tagged as cities.
By default I.C.E Custom Language Modelling Platform contains three predefined phrases - Colors, Continents, Common Languages.
To add a phrase, perform the following:
-
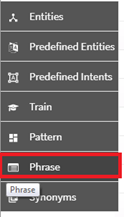
Click Phrase menu from the list of menu available in the Config page as shown in FigureFigure.
-
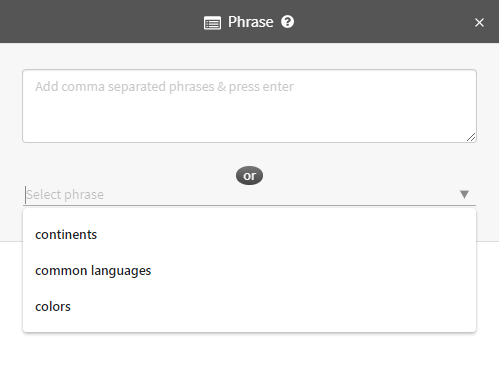
Click on Add Phrase. This displays the window as shown in FigureFigure.
-
Type the phrases or words (comma separated) in the text box and click Enter tab and enter the phrase name in the Phrase Name field. Or
Select the phrase from the list of phrases available and add the phrases.
Once you add the phrase, the utterance will get tagged automatically.
Adding Patterns
Patterns are special sequence of characters that helps you match or find other strings or sets of strings, using a specialized syntax. The advantage of patterns is utterances with entity having similar format of patterns will get mapped. By default I.C.E Custom Language Modelling Platform contains two predefined patterns, DATE and EMAIL. For example the pattern for PAN is [A-Za-z]{5}\d{4}[A-Za-z]{1} , where first 5 characters should be an alphabet (A-Z or a-z), next 4 characters should be a digit (0-9) and last character should be an alphabet. If an utterance contains a word in similar format, it will be tagged as PAN.
To add a pattern, perform the following:
-
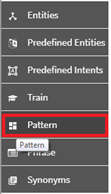
Click Pattern menu from the list of menu available in the Config page as shown in FigureFigure.
This displays the window as shown in FigureFigure.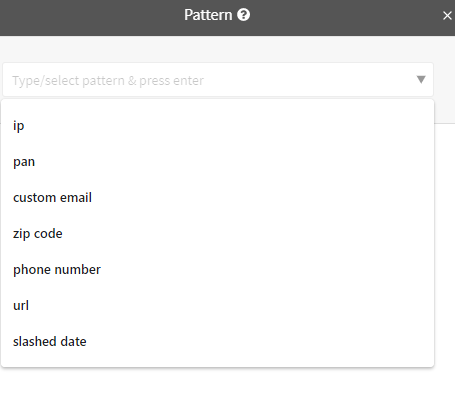
-
Type the pattern in the text box and click Enter tab and enter the pattern name in the Pattern Name field.
By default I.C.E Custom Language Modelling Platform contains 14 predefined patterns - IP, PAN, Custom Email, Slashed Date, Zip Code, Phone Number and URL. You can add these patterns from the dropdown list. The pattern is listed in the left side of the page.
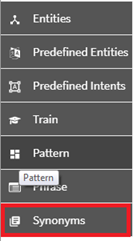
Adding Synonyms
Synonym feature helps in identifying the correct intent behind the user's text even if the user is not using the same words on which the model was trained but instead using synonyms of those words.
To add synonym, perform the following:
-
Click Synonym menu from the list of menu available in the Config page as shown in FigureFigure.
-
Type the synonym(s) in the text box and click Enter tab and enter the synonym name in the Synonym Name field.
Adding Utterances
An utterance is a conversation or a sentence in order to create a custom language model. Utterances can be mapped to entities and enables to identify the intent.
To add utterances, perform the following:
-
Navigate to the Config page.
-
Click on the required intent. If intent is not available, create intents. For more information on creating intents, see Adding an Intent.
-
Type in your utterance required in the Add Utterance text box and press Enter.
-
You may also import utterances using Import link.
-
To edit an utterance, click
 icon against the corresponding utterance. The utterance is refreshed in edit mode.
 -
To delete an utterance, click
 icon against the corresponding utterance.
 -
To view the training status, click
 icon against the corresponding utterance.
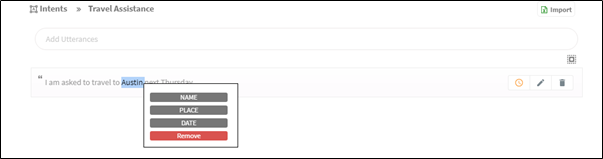
Enabling Tagging
Tags are the basic keywords which will define the task that can be accomplished by that chatbot. Also, they are the keywords which are expected in user's request. For example: one chatbot has been created for booking a flight ticket. The "Tag" field may have values like "booking, travel ticket, airline ticket, flight booking, flight, airline, travel, travel booking" and more.
Tagging is the capability to tag entities, patterns and phrases to keywords in utterances. Tagging in Conversation Designer can be classified as Auto Tagging and Custom Tagging.
The predefined entities, patterns and phrases will be automatically tagged to the clause in the utterances. You can remove the predefined entities, as per requirement. Custom entities can be tagged manually to utterances as per user requirement.
Enabling Manual Tagging (Custom Tagging)
To enable custom tagging, perform the following:
-
Navigate to the Config page.
-
Click on the required intent. If intent is not available, create intents. For more information on creating intents, see Adding an Intent.
-
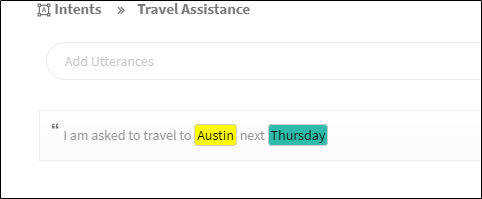
Select and Right-click on the clause for mapping the entity as shown in FigureFigure.
-
Select the entity to be mapped. The entity is mapped and highlighted as shown in FigureFigure.
Deleting Intents and Entities
You may delete an intent or entity, as per requirement.
Note: All related attributes needs to be unmapped prior to deleting an intent or entity.
Deleting an Intent
To delete an intent, perform the following:
-
Navigate to the Search tab.
-
Select Intent from the Toggle bar. By default, Intent is selected.
-
Type the name of the intent in the Search box. Intents will be available as drop-down as you type in the words. The utterances with related mapping is displayed.
-
Click Unmap Intent. A message “Are you sure you want to remove the intent from all the utterances?” is displayed. Click Confirm to unmap the intents from the utterances.
Deleting an Entity
To delete an entity, perform the following:
-
Navigate to the Search tab.
-
Select Entity from the Toggle bar. By default, Intent is selected.
-
Type the name of the entity in the Search box. Entities will be available as drop-down as you type in the words. The utterances with related mapping is displayed.
-
Click Untag Entity. A message “Are you sure you want to remove the entity from all the utterances?” is displayed. Click Confirm to untag the entity from the utterances.
Training Intents and Entities
You can train your project from the tab listed in the left side of the page. I.C.E Custom Language Modelling Platform provides you the choice of training the entity and intent or both. If you need to train the project for entity or intent or both, you can check the corresponding checkbox as true and train it. Once you start the training, the status of the project will be changed from new to pending.
When the training is completed, then status will be changed to trained. When the project is trained successfully, a test tab will be available.
To train intents and/or entities, perform the following steps:
-
Click Train menu from the list of menu available in the Config page.
-
Select the check box against Entity or Intent as per requirement.
-
Click Train to initiate training of intent and/or entity.
Note: Once you start the training, the status of the project will be changed from new to pending. When the training is completed, then status will be changed to Trained.
Searching Intent or Entity
To search for an intent or entity, perform the following:
-
Navigate to the Search tab.
-
Select Intent/Entity from the Toggle bar. By default, Intent is selected.
-
Type the name of the intent or entity in the Search box. Entries will be available as drop-down as you type in the words. The utterances with related mapping is displayed.
Predicting NER
The test tab contains the rest endpoints for your published NER project as well as for your chatbot.
Named Entity Recognition
You can obtain the rest endpoint of your project under this sub tab. It also consist of sample request and sample response for your project, which can be tested in the test interface available in the test tab.
The request json contains your utterance, serviceid, pos, intent and entity. The fields, intent and entity is set to true, if the utterance is mapped to some intent and entity. The field pos is set to true to find out the parts-of-speech for the particular utterance.
The response is a json containing the utterance, intent, entity and POS. The response json contains the following field:
-
top_intent field - the intent to which the utterance is mapped
-
confidence_level - contains the score by which it is similar to other intents
-
start - start index
-
tag - entity value
-
end - end index
-
score – score
-
entity - entity type
Managing Missed Utterances
You can view the utterance which could not be mapped to any intents. Such utterances can be mapped with intents.
To view the missed utterances, perform the following:
-
Navigate to the Missed Utterance tab. You can view the missed utterances as shown in FigureFigure.
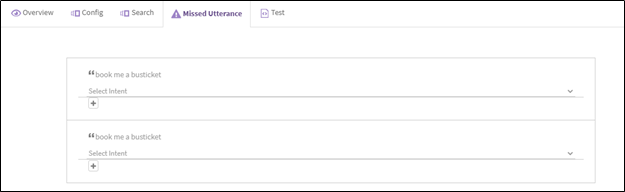
-
Select the required intent from the Select Intent drop-down list.
-
Click on the
 icon to save the intent utterance mapping.
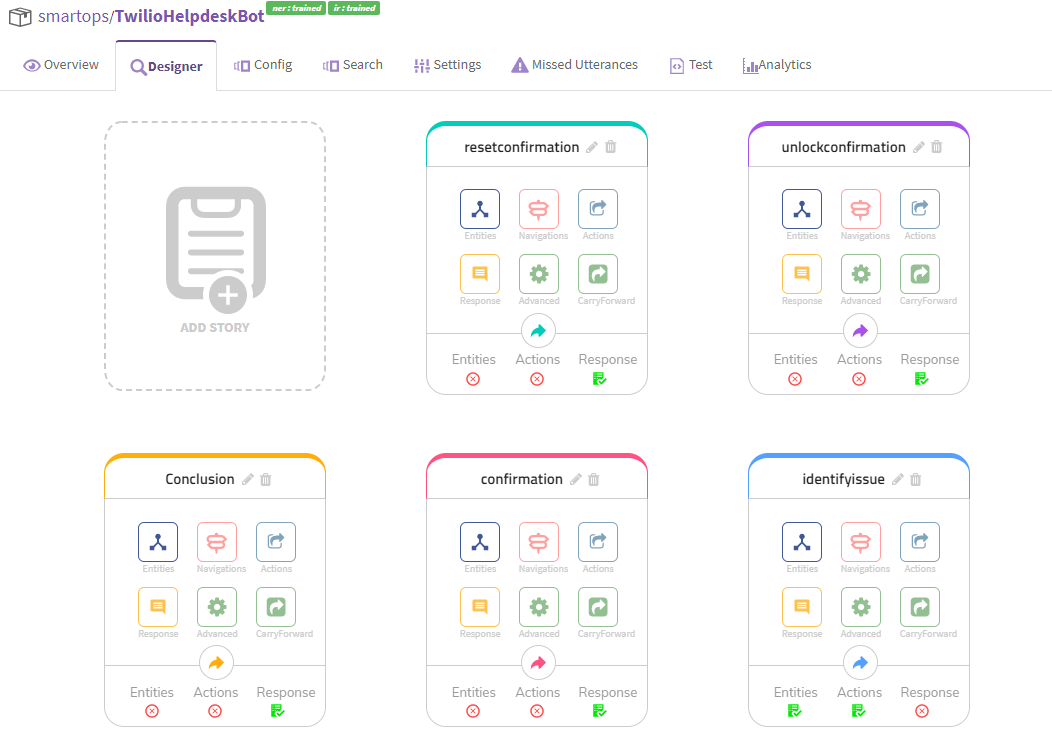
Stories
Start building conversation as stories. A story is made up of entities, actions, navigation and Response. It is the building block of conversation.Story names corresponds to the intent of a conversation.You can add a new story name or select one from a list of intents by clicking edit symbol.