Annotating Fields of Interests in Documents 
DU Trainer enables to upload the training document sets and annotate the required fields of interests for both headers and tables. User can perform individual as well as bulk upload of documents. Uploaded documents will be listed and user will have the provision to view and edit the document for annotation.
User can perform annotation for single/multiple line of text, and tabular line items. Multi-page document annotation is also supported. User will also have the provision to view a summary of all annotations.
Contents
Annotating Fields of Interests (FOIs) in document(s)
FOIs can be annotated for both textual line items and tabular line items.
Annotating Textual Line Items
To annotate fields of interests (text line items) in the documents, perform the following:
-
Access the required document by clicking the
 icon corresponding to the document in the Project Listing page. For information on setting up a project and uploading documents, see Setting up a DU Training Project. This displays the Document View as shown in FigureFigure.
-
Click on the value corresponding to the field, to add the field of interest, as shown in the FigureFigure.
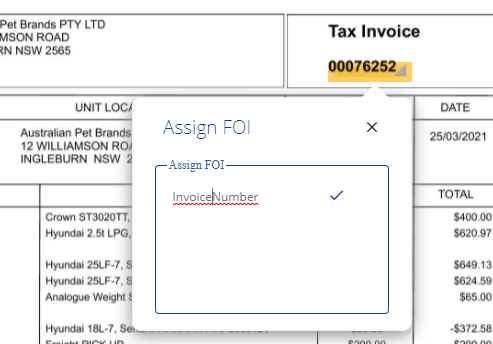
Type a name in the Assign FOI field and click on icon. The
FOI assigned will be available in the right hand side of the screen as shown in FigureFigure.
icon. The
FOI assigned will be available in the right hand side of the screen as shown in FigureFigure.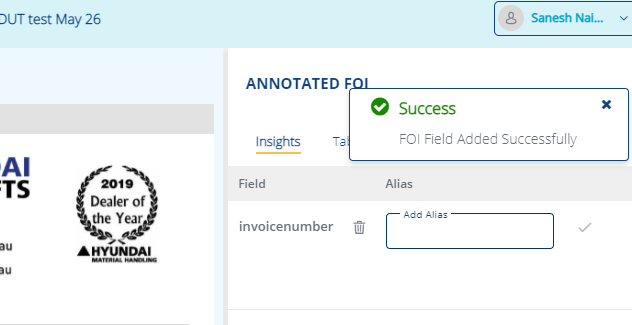
You may add aliases/synonyms for the fields, as per requirement. -
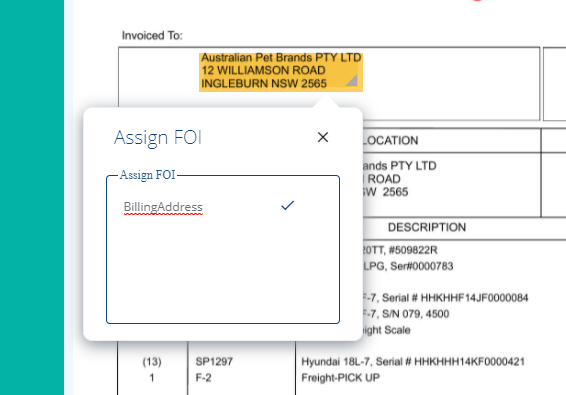
Similarly user can annotate multiple line of text, by selecting the entire text as shown in FigureFigure.
Annotating Tabular line items
To annotate fields of interests (tabular line items) in the documents, perform the following:
-
Access the required document by clicking the
icon corresponding to the document in the Project Listing page. For information on setting up a project and uploading documents, see Setting up a DU Training Project. This displays the Document View as shown in FigureFigure. -
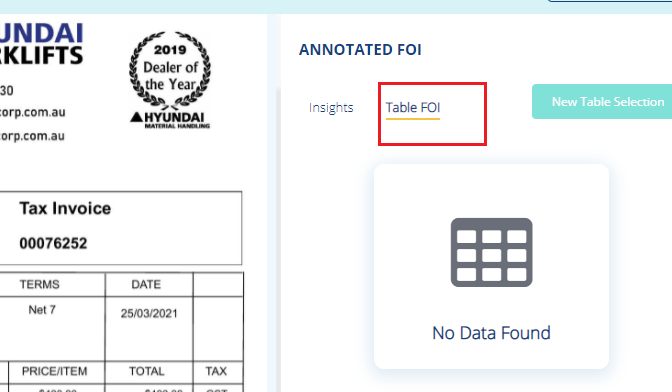
Select the Table FOI option available on the right hand side of the pane as shown in FigureFigure.
-
Click on any corner of the table to be annotated. Drag and adjust to select the table, as per requirement, using Table Rebounding feature.
-
Click on the
 icon available on the table to create columns. User can drag and adjust the line to draw columns as shown in FigureFigure.
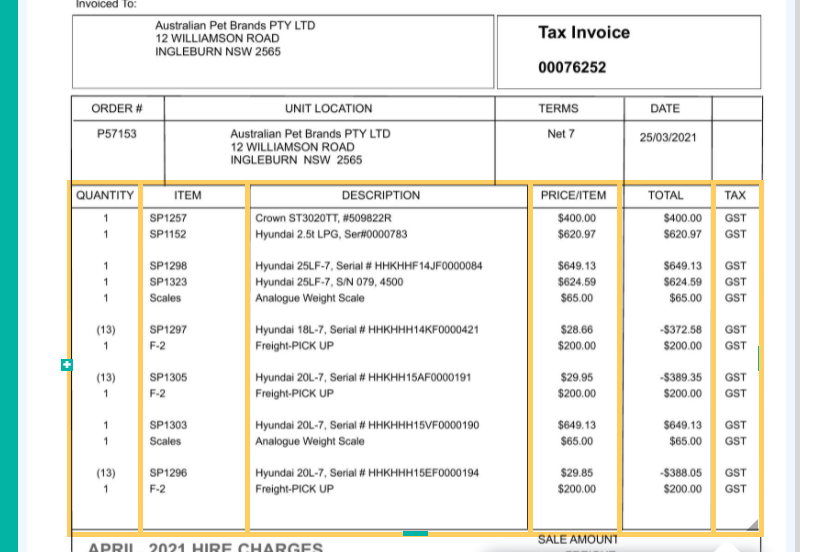
-
Type a name in the Confirm Table Selection field and click on
icon. The Table FOI assigned will be available in the right hand side of the screen as shown in FigureFigure.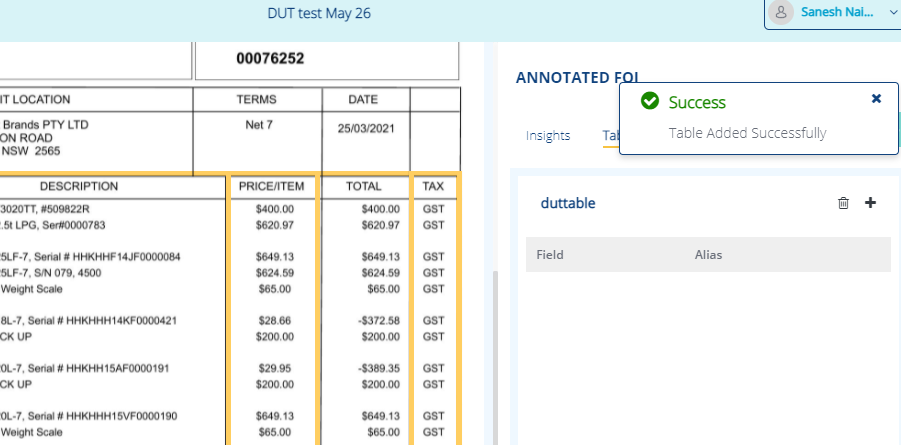
To add fields/column headings, click on the icon in the Table FOI tab.
Enter the field name and aliases (if available) in the Add Field field and click on
 as shown in FigureFigure
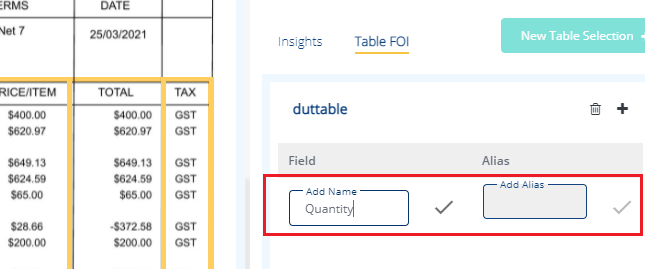
Note: User may add 'n' number of fields, as per requirement. -
User may delete a table using the Delete table
 option. The table will be detached, and can be accessed later selecting the table from the name suggestions displayed while drawing a table.
Related Topics: