Managing AP Supervisor Dashboard
Contents
Viewing Invoice Listing Page
-
Login to SmartOps as an AP Supervisor User.
This displays the project listing page as shown in FigureFigure.
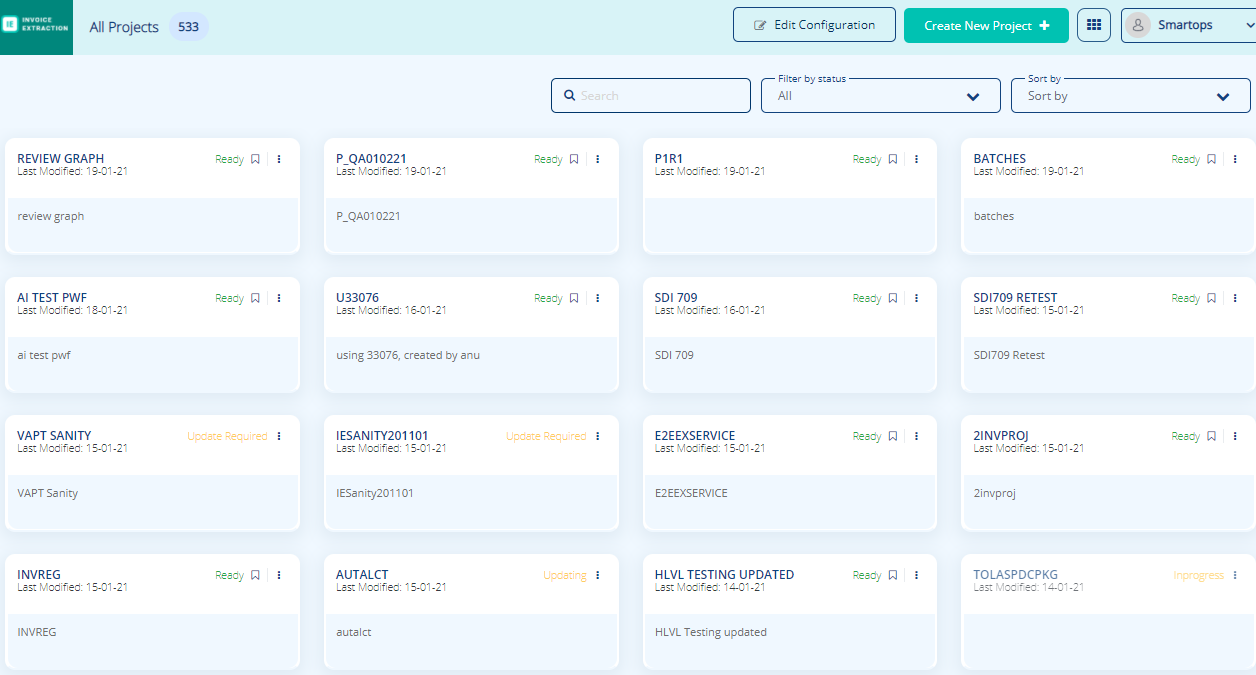
You may search for the required project from the Search by project name field.You may filter the required project based on status from the Filter By status field.
You may sort the projects based on “modified date” or “project name” from the Sort By field.
-
Select the required project. This displays the Invoice Extraction project dashboard as shown in FigureFigure.
Note: An error flag is enabled in cases where error in invoice count has occurred while extracting the invoices as shown in FigureFigure.
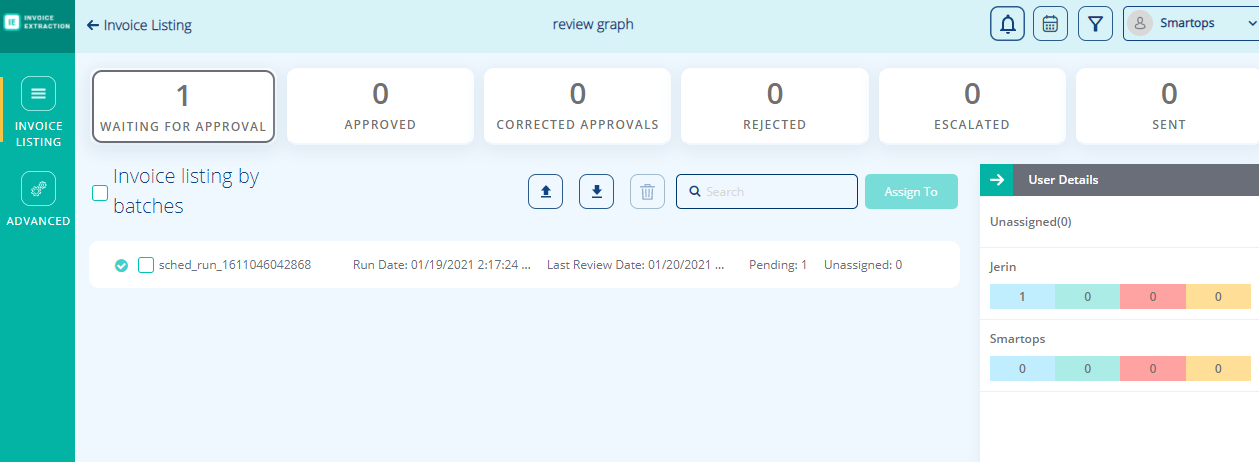
The Invoice Extraction screen consists of the following details:-
Approved: Number of approved documents. This provides the count of automatically and manually approved documents. For example: 1 / 2 means; 1 automatically approved and 2 manually approved.
-
Waiting for Approval: Number of documents to be approved.
-
Corrected Approvals: Number of documents corrected (data changed) and approved.
-
Rejected: Number of rejected documents.
-
Escalated: Number of escalated documents.
-
Sent: Number of invoices exported.
Note: Auto approval condition is set as the below:
Total Amount mentioned in the invoice should be less than USD 5000 and Confidence score should be above 50 for all extracted fields.
This condition can be edited by modifying the appropriate workflow. -
-
Dashboard lists invoices grouped under different runs.
-
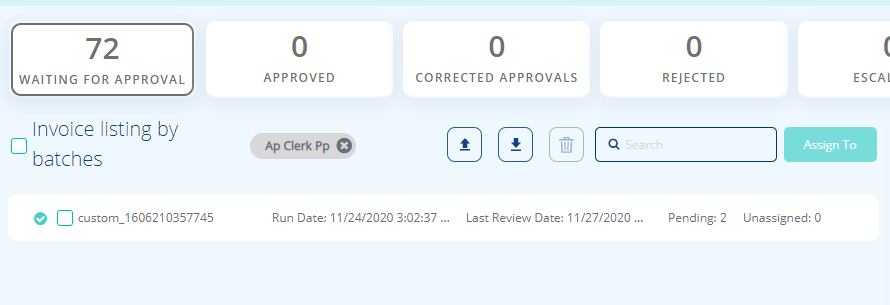
To search for an invoice by invoice name, type the name of the invoice in Search field and press Enter.
-
To filter invoices assigned to users, select the user from the
 field. Specify the parameters as explained:
Field
Description
Select a Source
Select a source for invoice listing.
-
Batch
-
Invoice
Status
Select the required status for the Batch/Invoice.
Calendar
Select the required date range.
Select User
Select the user for Invoices.
-
-
To assign an invoice to a user, select the required invoice and click Assign To. Select the required user and click Submit.
-
To delete an invoice, select the invoice and click
 icon.
icon.
-
Invoice Distribution by Users
-
Login to SmartOps as an AP Supervisor User.
This displays the project listing page as shown in FigureFigure.
You may search for the required project from the Search by project name field.You may filter the required project based on status from the Filter By status field.
You may sort the projects based on “modified date” or “project name” from the Sort By field.
-
Select the required project. This displays the Invoice Extraction project dashboard as shown in FigureFigure.
Note: You may view the status of the invoices for all users in User Details block.Number of invoices based on status is highlighted with various color codes as shown.

-
To view the invoice, click on the link corresponding to each users. This displays the corresponding invoice as shown in FigureFigure.
By default, Invoices with "Waiting for Approval" status is enabled. You may navigate to other status. -
To distribute invoices based on specific users, select the invoice and click Assign To button.
-
Click on Assign radio button corresponding to the user and click Submit.
Managing/Reviewing Invoices
To review an invoice, perform the following:
-
To review the invoices for a run, expand the run group. This displays the details as shown in FigureFigure.
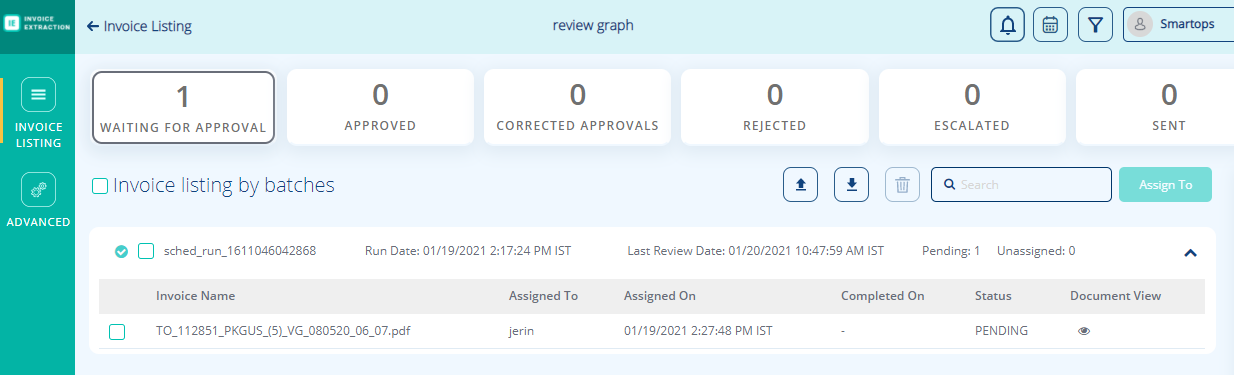
The details related to invoice includes:
-
Invoice Name: Name of the invoice.
-
Assigned To: Name of the assigned user.
-
Assigned On: Date on which assigned.
-
Completed On: Date of completion of the approval process.
-
Status: Current Status.
-
-
Click on the Document View
 icon corresponding to the invoice. This displays the Preview screen as shown in FigureFigure.
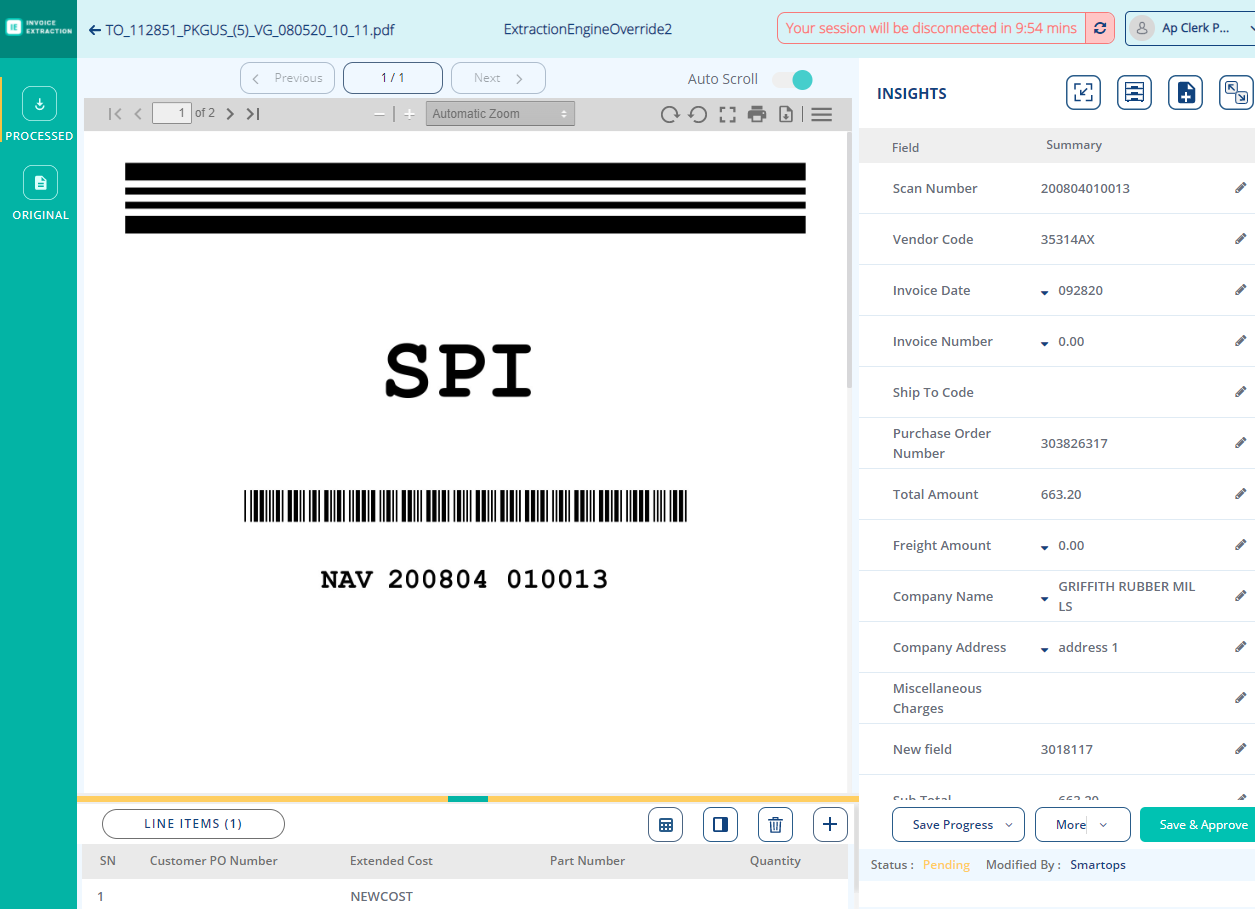
Note: The screen will be locked for a specified timeframe for the logged in user. Any other users loggin in will not be able to edit invoices. -
To view the Original invoice, click Original button available on the left hand side of the screen. By default Processed view of invoice is displayed.
-
To save and approve the invoice, click Save & Approve.
-
To reject the invoice, click Reject from More drop-down list.
Editing an Invoice
-
You may edit the Insights tab (displayed by default) if the data extracted is not accurate or incorrect.
-
To edit the Insights fields, click on the
 icon corresponding to the entry and update the Summary column.
 -
You may also select from possible value suggestions (if any) as shown in FigureFigure:
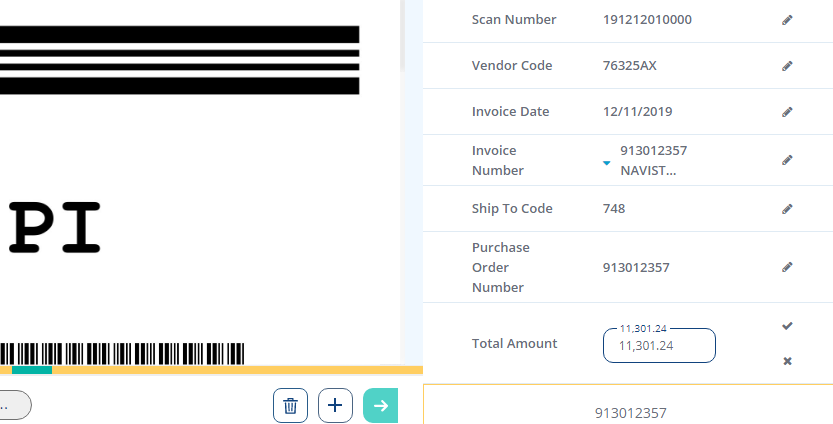
Note: Value with the highest confidence score will be selected by default and field will be highlighted in the document. -
To point and select a field, select the the required field, click on
 icon and select the required content from the document view.
-
-
To split the invoice based on page numbers, click on
 icon and specify the page range as shown and click Split as shown in FigureFigure:
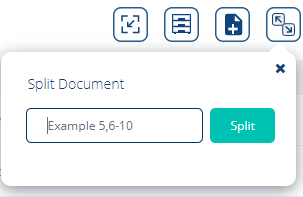
-
To save and approve the changes, click Save & Approve.
-
Edit the Line Items tab based on requirement. To edit the line items, select Line Items from the toggle bar and click on the required entry to edit and Save.
-
To add any additional line items, click
 icon and define the attributes.
 -
To save and approve the changes, click Save & Approve.
-
To save the In Progress data, click on Save Progress button. Enter a name for custom save and click Submit.
Provision to extract tabular data based on user inputs
Invoice Extraction Package Workflow is enabled with the provision to mark and extract tabular data. The feature also provides the capability to:
-
Rebound table boundaries: Table boundaries can be defined as per requirement.
-
Split / re-adjust columns: Splitting or readjustment of columns within a table is also enabled.
-
Draw new tables: User also has the capability to draw new tables as per requirement.
To extract tabular data, perform the following:
-
Navigate to the required page of the invoice and click on
 icon. The tabular content available in the page will be highlighted. You may readjust the table and corresponding columns
within the table, as per requirement as shown in FigureFigure.
icon. The tabular content available in the page will be highlighted. You may readjust the table and corresponding columns
within the table, as per requirement as shown in FigureFigure.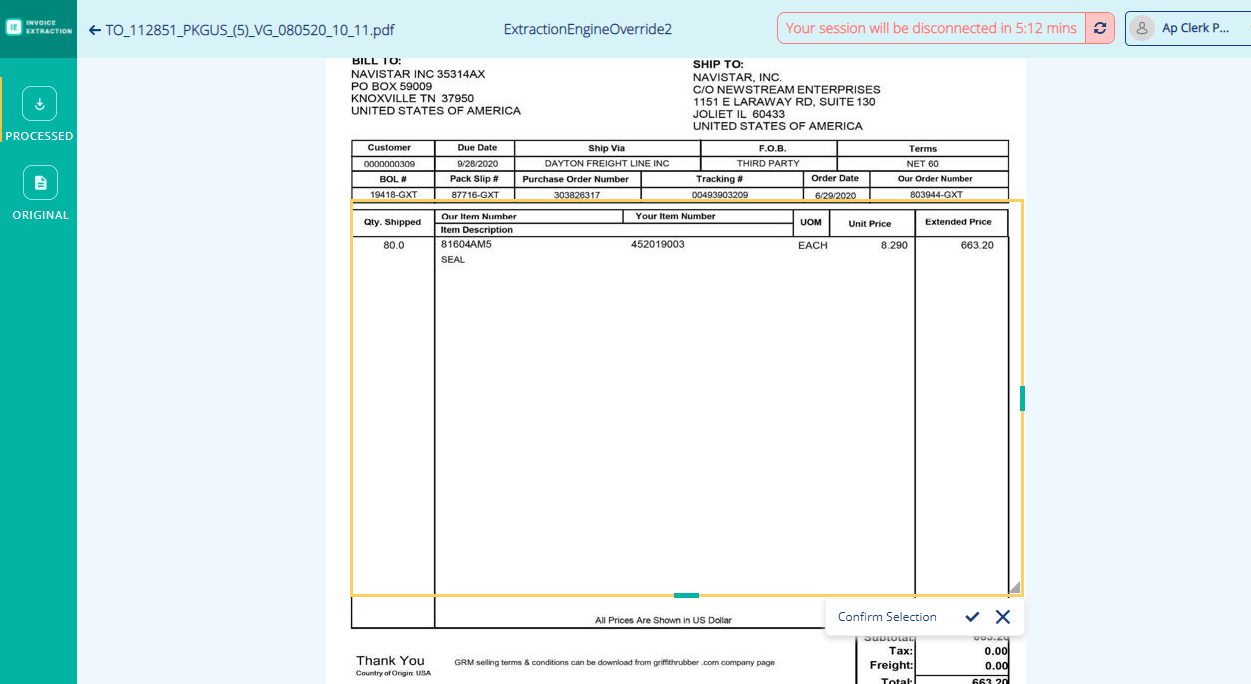
-
To drag the drawing pane, use the "Hand" icon to move the pane accordingly.
-
To align the table borders, use the option as shown:
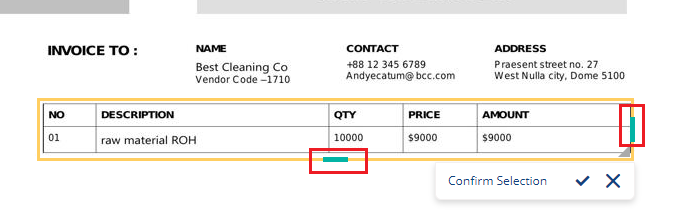
-
-
Once the tabe border is alligned, click on Confirm Selection. This displays the data, in tabular format, as shown in FigureFigure.
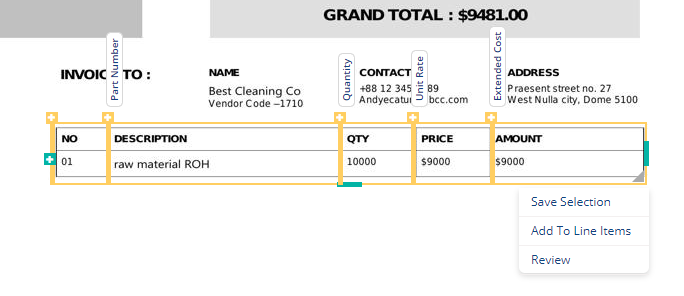
You may align the columns using the "Hand" icon available on the table border. -
To save the selection, click Save Selection.
-
To add the data to line items, click Add to Line Items.
-
To review the tabular data extracted, click on Review and Add to Line Items.
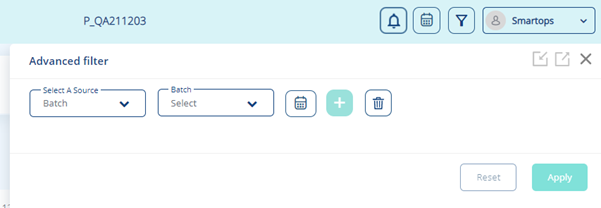
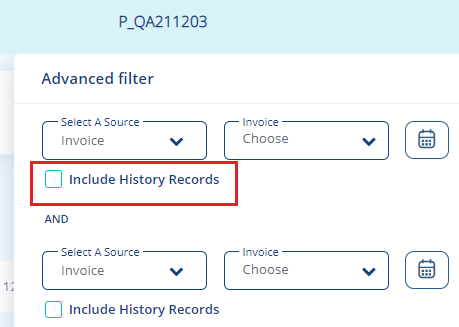
Advanced Search for Reporting
Advanced Search option for Reporting is enhanced with following features:
-
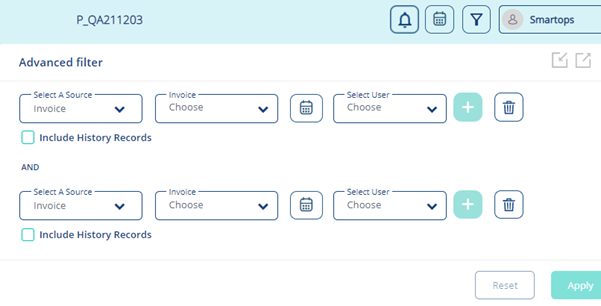
Provision to filter batches / invoices based on the status, datetime, user: User may filter invoices based on source, status, date/time, and user.
-
User can build the search criteria; concatenation supported up to 3 levels: Search criteria can be build upto three levels.
-
Provision to include history records in the search: Search can be recorded to include in Search History of Records.
-
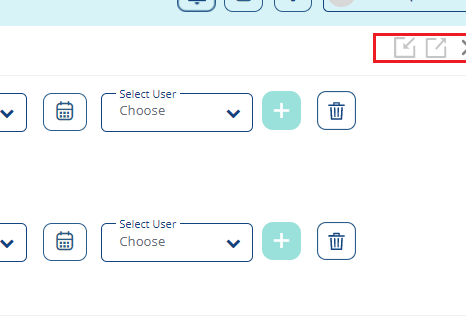
Minimize & Maximize options for Advanced Search window: Advanced Search option is available with minimise and maximize buttons.
-
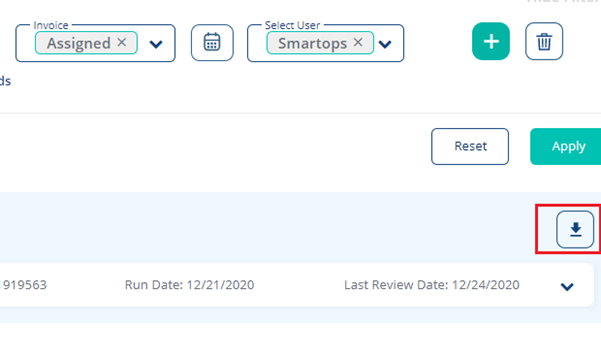
Provision to download advanced search results into excel: Search results can be downloaded in excel format.
See Also: