Defining Project Configuration
General Configuration
To configure additional configurations related to a project, perform the following:
-
Enter the General Configuration parameters in the Project Configurations> General Configuration tab of Create Project screen as shown in FigureFigure.
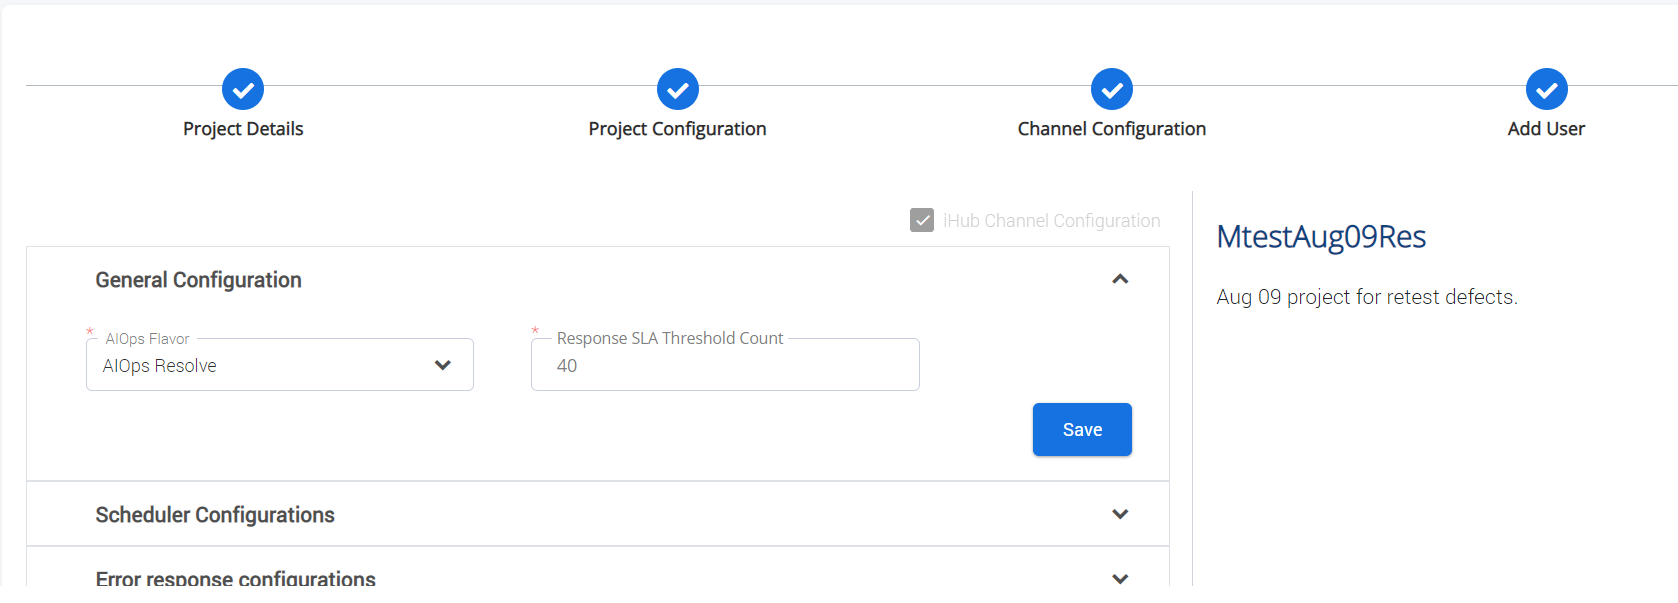
Field
Description
General Configuration
ITOps Flavour
AIOps flavour to be selected. Following are the options available:
-
AIOps Resolve
-
AIOps View
-
AIOps Desk
Response SLA Threshold Count
Threshold count of response SLAs
-
-
Click Save to save the configurations.
Scheduler Configuration
To configure scheduler parameters related to a project, perform the following:
-
Enter the scheduler configuration parameters in the Project Configurations> Scheduler Configurations tab of Create Project screen as shown in FigureFigure.
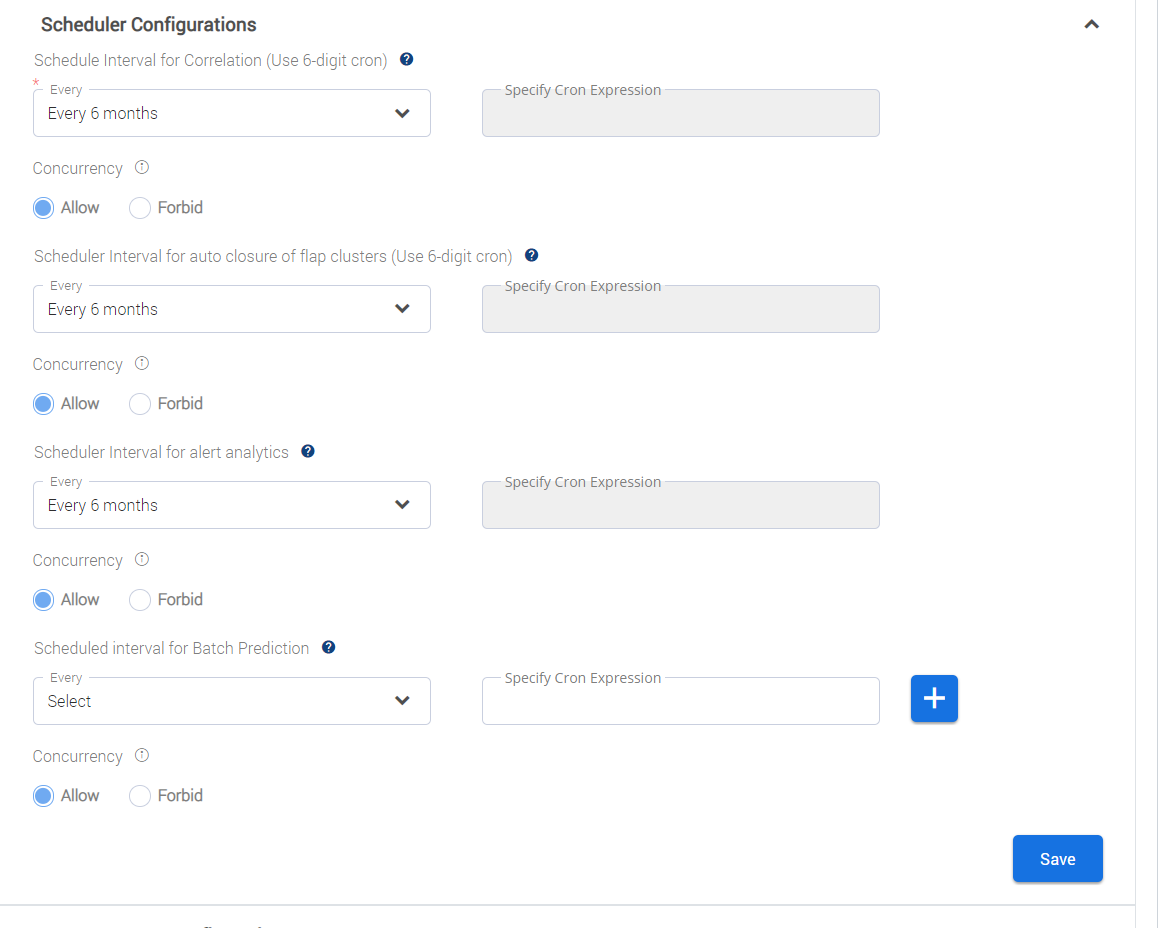
Field
Description
Scheduler Configurations
Schedule Interval for Correlation (Use 6-digit cron)
Frequency for correlation. For example: Every 5 min.
Alternatively, you may specify the cron expression for schedule interval in Specify Cron Expression
Concurrency
Enter the concurrency timout (in seconds), if Forbid is selected.
Scheduler Interval for auto closure of flap clusters (Use 6-digit cron)
Frequency at which auto closure of flap clusters to be performed.
For example: Every 5 min.
Alternatively, you may specify the cron expression for schedule interval in Specify Cron Expression
Scheduler Interval for alert analytics
Interval for fetching alert count.
Scheduled Interval for Batch Prediction
Interval for checking the ticket dump changes in the ftp location specified.
-
Click Save to save the configurations.
Error Response Configuration
To configure error response details related to a project, perform the following:
-
Enter the configuration parameters in the Project Configurations> Error response configurations tab of Create Project screen as shown in FigureFigure.
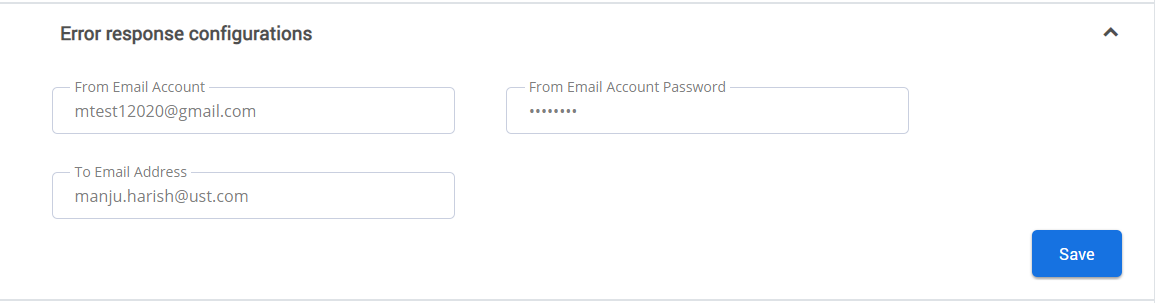
Field
Description
Error Response Configurations
From Email Account
E-mail id from which error message needs to be triggered.
From Email Account Password
Password corresponding to the e-mail id.
To Email Address
E-mail address to which error message is to be sent.
-
Click Save to save the configurations.
Surge Configuration
To configure surge parameters related to a project, perform the following:
-
Enter the configuration parameters in the Project Configurations> Surge Configurations tab of Create Project screen as shown in FigureFigure.
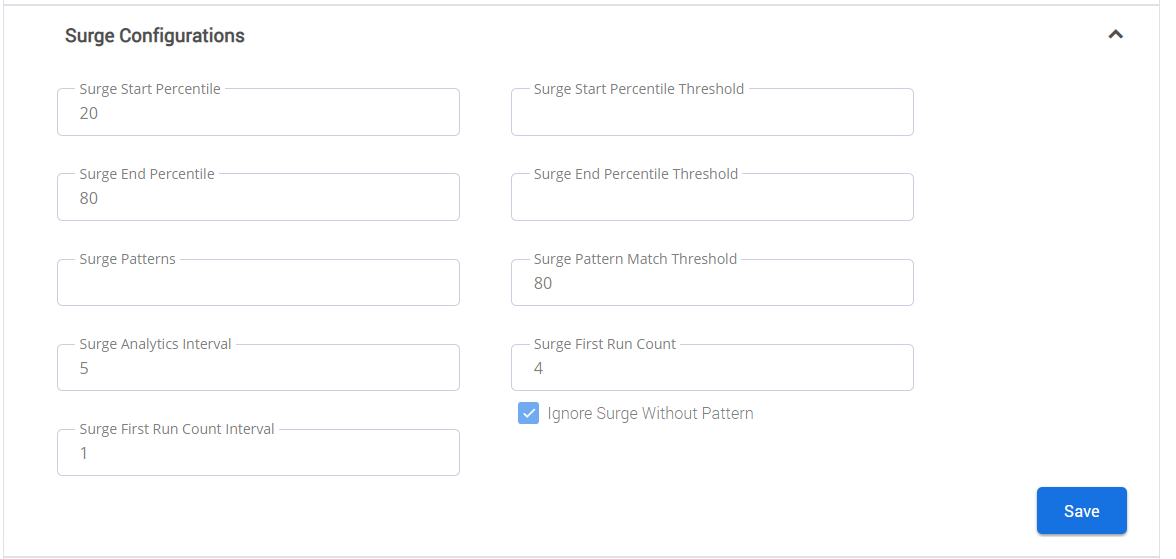
Field
Description
Surge Configurations
Surge Start Percentile
A numeric value that determines the percentile of alert count to be monitored for detecting surge start. e.g. 50 stands for 50th percentile
Surge Start Percentile Threshold
A numeric value that determines the threshold value for surge start percentile. If the start percentile calculated at a point of time exceeds this, surge is detected.
Surge End Percentile
A numeric value that determines the percentile of alert count to be monitored for detecting surge end. e.g. 20 stands for 20th percentile
Surge End Percentile ThresholdThe threshold value for surge end percentile. If the end percentile calculated at a point of time when surge is ON exceeds this, surge comes to an end.
Surge Patterns
Individual alert fields or combination of fields that may be identical in alerts that contribute towards surge. Combination of fields can be specified by separating each field with |. Multiple patterns can be given here separated by comma. e.g. - field1, field1|field2, field3|field4, field5
Surge Pattern Match Threshold
A numeric value that determines the percentage of alerts that should have identical surge pattern so that ITOps detects a pattern among surge alerts. e.g. 80 means 80% is the threshold
Surge Analytics Interval
The time interval in minutes over which the percentile calculations are done. Defaulted to 10.
Surge First Run Count
The minimum number of records [on alert count] that should be captured before surge check can effectively happen. Defaulted to 10.
Surge First Run Count IntervalAlert count is calculated for the time interval that the scheduler ran last and the current time. For the first run, since we do not have a previous run, the user has to specify the time interval in minutes for which alert count should be calculated. This should ideally be the same as the interval given for analytics scheduler.
Ignore Surge Without Pattern
Checkbox that determines how to handle the alerts during a surge if no pattern is detected. User can choose to consider all alerts coming in during the surge window as surge alerts or treat them all as normal alerts.
-
Click Save to save the configurations.
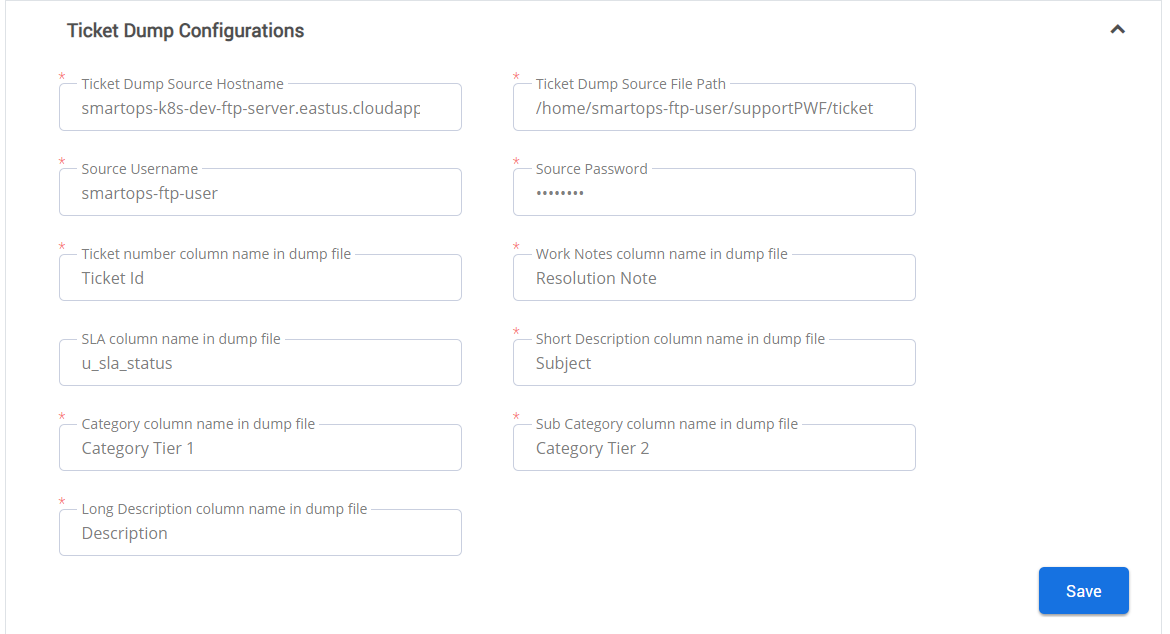
Ticket Dump Configurations
To configure ticket dump details related to a project, perform the following:
-
Enter the configuration parameters in the Project Configurations> Ticket Dump Configurations tab of Create Project screen as shown in FigureFigure.
Field
Description
Ticket Dump Configurations
Ticket Dump Source Hostname
Host name of the source for fetching the ticket dump.
Ticket Dump Source File Path
Path where the ticket dump file is located.
Source Username
Username for accessing the source
Source Password
Password for accessing the source
Ticket number column name in dump file
Column name corresponding to the Ticket number in the selected dump file.
Work Notes column name in dump file
Column name corresponding to Work Notes in the selected dump file.
SLA column name in dump file
Column name corresponding to SLA in the selected dump file.
Short Description column name in dump file
Column name corresponding to the Short Description in the selected dump file.
Category column name in dump file
Column name corresponding to Category in the selected dump file.
Sub Category column name in dump file
Column name corresponding to Sub Category in the selected dump file.
Long Description column name in dump file
Column name corresponding to Long Description in the selected dump file.
-
Click Save to save the configurations.
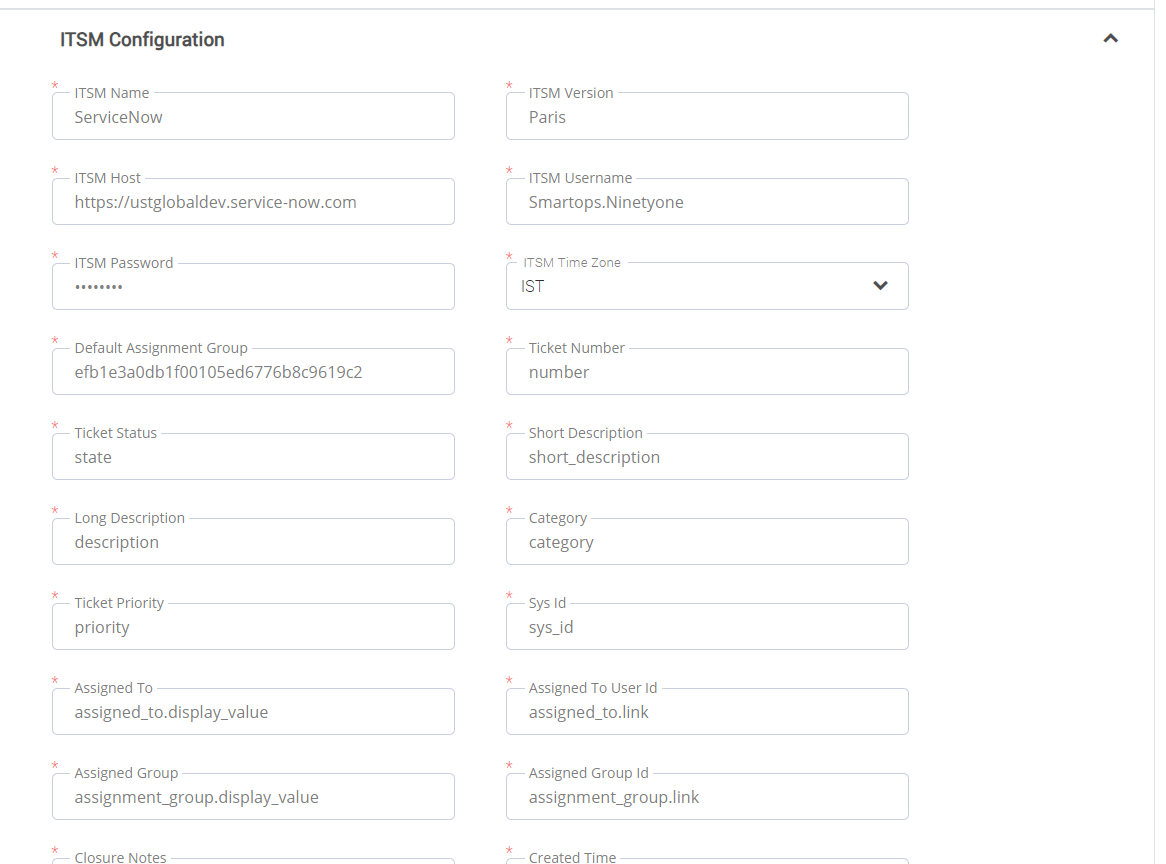
ITSM Configuration
To configure ITSM details related to a project, perform the following:
-
Enter the configuration parameters in the Project Configurations> ITSM Configurations tab of Create Project screen as shown in FigureFigure
. 
|
Field |
Description |
|
ITSM Configuration |
|
|
ITSM Name |
Name of ITSM tool. For example: ServiceNow |
|
ITSM Version |
Version of the ITSM tool. |
|
ITSM Host |
Host name of the ITSM server. |
|
ITSM Username |
Username for accessing the ITSM server. |
|
ITSM Password |
Password for accessing the ITSM server. |
|
ITSM Timezone |
Timezone applicable for the ITSM server. |
|
Default Assignment Group |
Default assignment group for all tickets, unless customized via templates. |
|
|
ITSM field for ticket number. |
|
|
ITSM field for ticket status |
|
|
ITSM field for Short Description |
|
|
ITSM field for Long Description |
|
Category |
ITSM field for Category |
|
Ticket Priority |
ITSM field for Ticket Priority |
|
|
ITSM field for Sys Id |
|
|
ITSM field for Assigned To |
|
|
ITSM field for Assigned To User Id |
|
|
ITSM field for Assigned Group |
|
|
ITSM field for Assigned Group Id |
|
|
ITSM field for Closure Notes |
|
|
ITSM field for Created Time |
|
|
ITSM field for Updated Time |
|
|
ITSM field for Created By |
|
|
ITSM field for Updated By |
|
|
ITSM field for Resolved By |
|
|
ITSM field for Resolved Time |
|
Comments |
ITSM field for Comments |
|
|
ITSM field for Sub Category |
|
|
ITSM field for Caller Id |
|
Urgency |
ITSM field for Urgency |
|
|
ITSM field for Ticket Severity |
|
|
ITSM field for Ticket Business Duration |
|
|
ITSM field for Ticket Business Time Left |
|
|
ITSM field for Work Notes |
Click Save to save the configurations.
See Also: