Azure Load Balancer for iHub Lite
Pre-requisites
Steps for configuring Azure Load Balancer assumes below prerequisites are in place in your Azure Subscription.
-
A Virtual Network is created and available to spin up Azure resources within the same.
-
Address space must be decided by respective Azure subscription owners.
-
A dedicated subnet for Azure Application Gateway inside your VNET.
-
Region of the VNET must be decided by respective Azure subscription owners.
-
Scope of VNET is within one Region
-
Network Latency, resource specification, capacity / usage limits etc must be considered while selecting a Region
-
Reference Document on how to check subscription limits.
-
The user should have ‘Contributor’ access on ‘Subscription’ scope.
-
-
-
The user who is configuring Azure Load Balancer has ‘Contributor’ access in the Subscription.
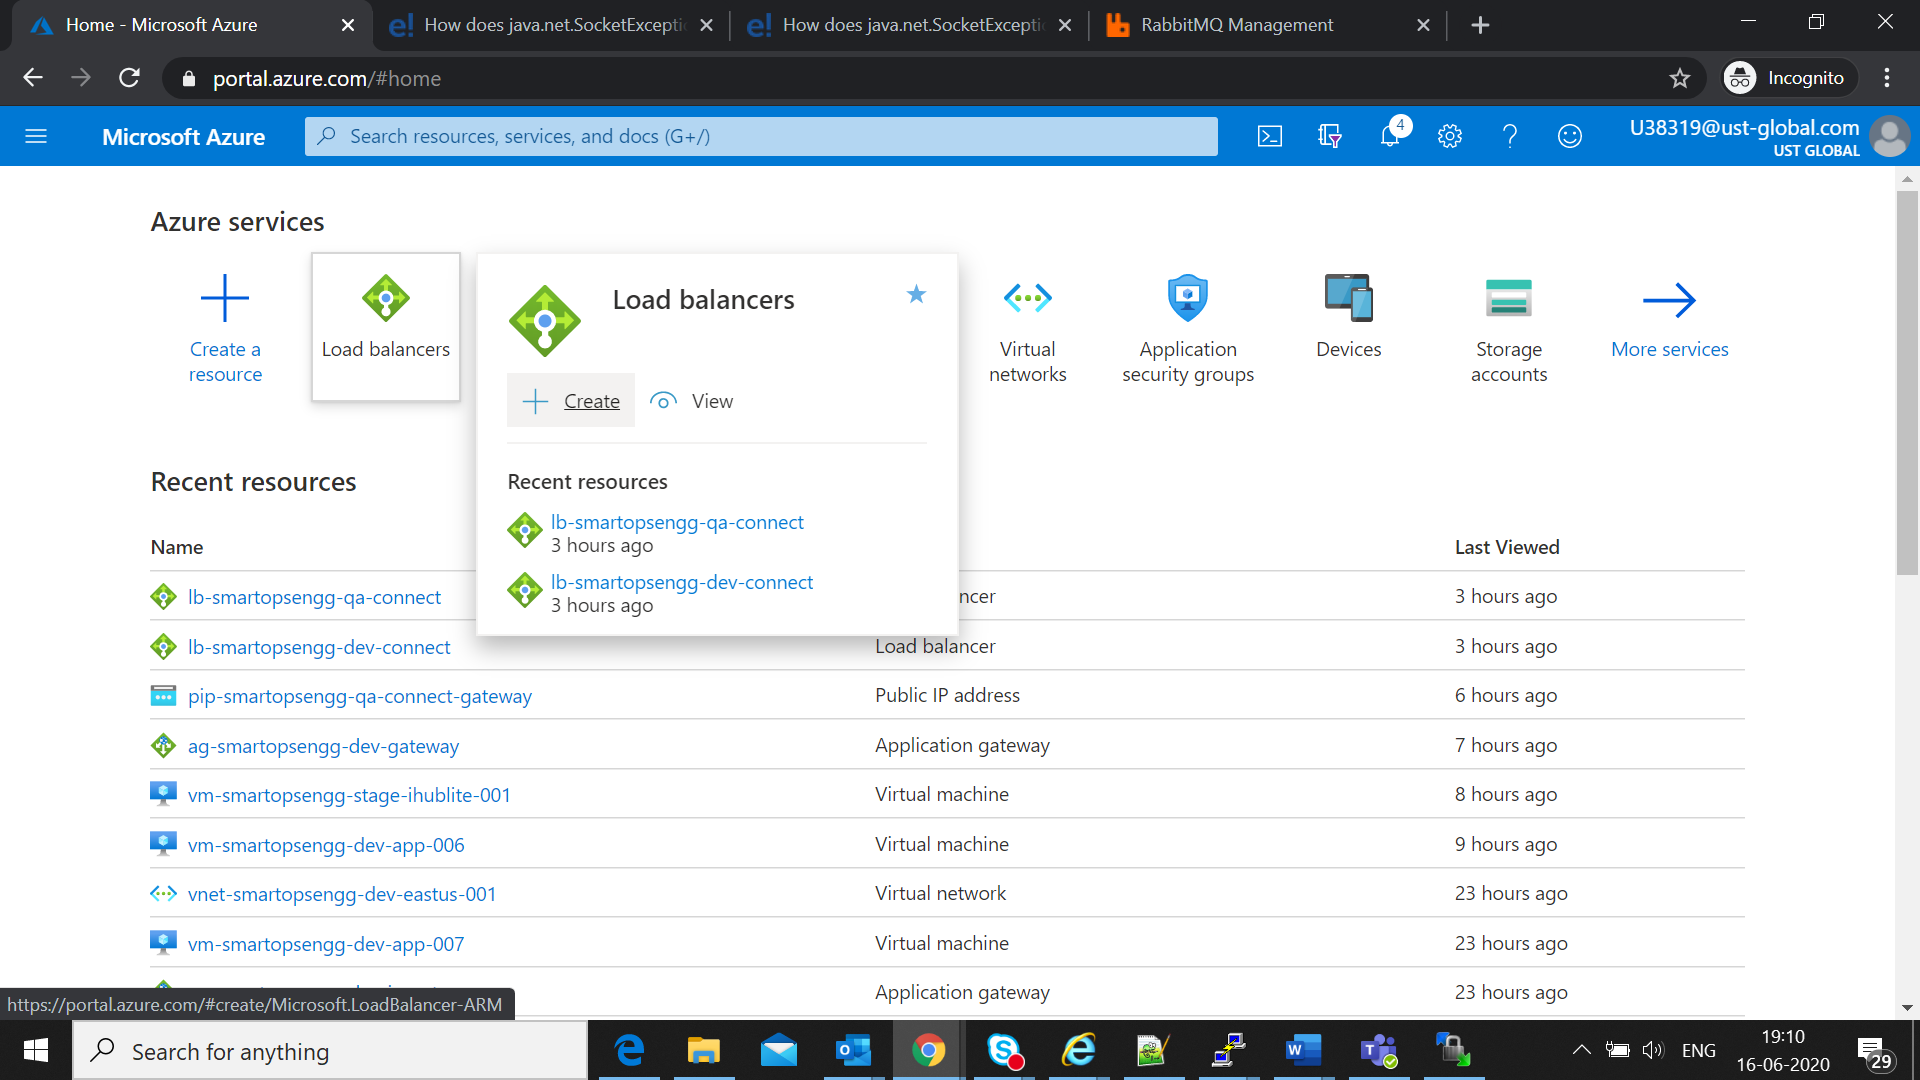
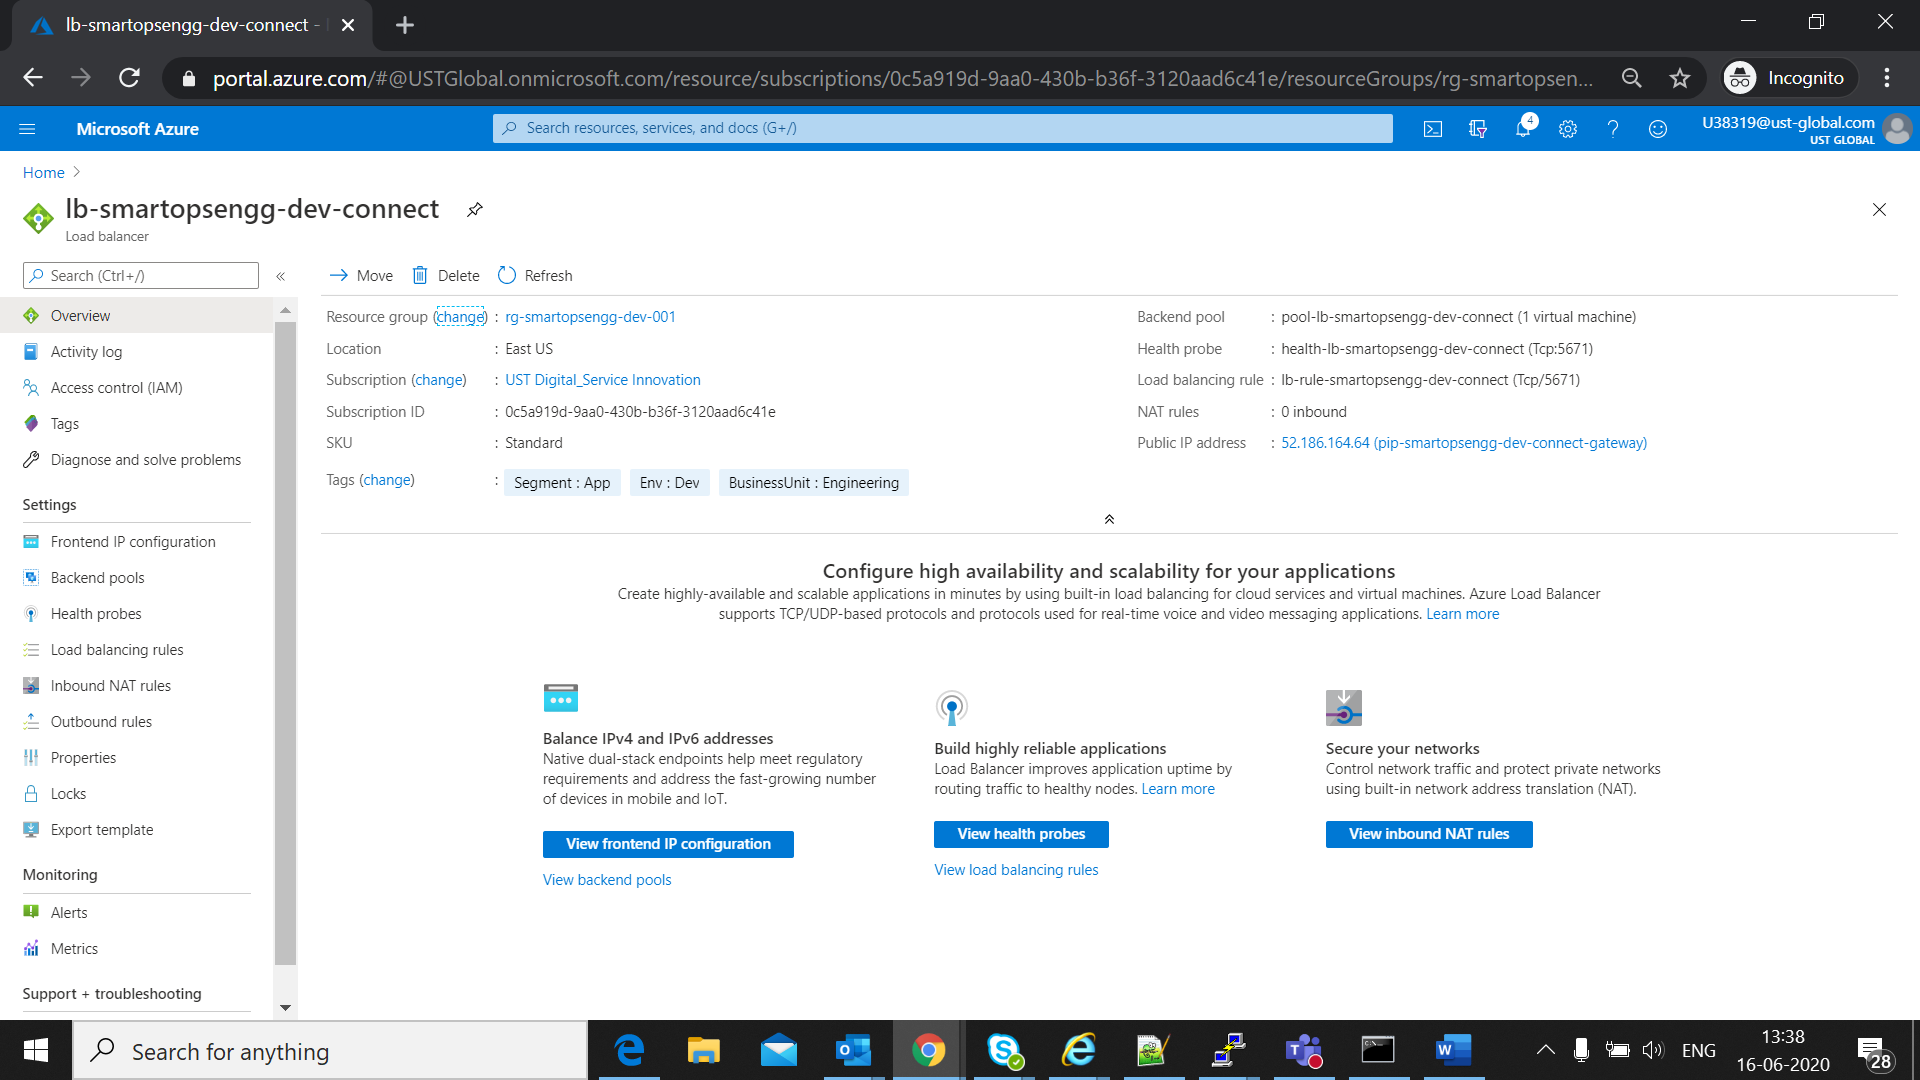
Accessing Load Balancer
-
Login to Azure Portal
-
From ‘All Services ‘ search ‘ Load Balancer ’, select ‘ Load Balancer ’
-
Click on ‘+’ button(Add button)
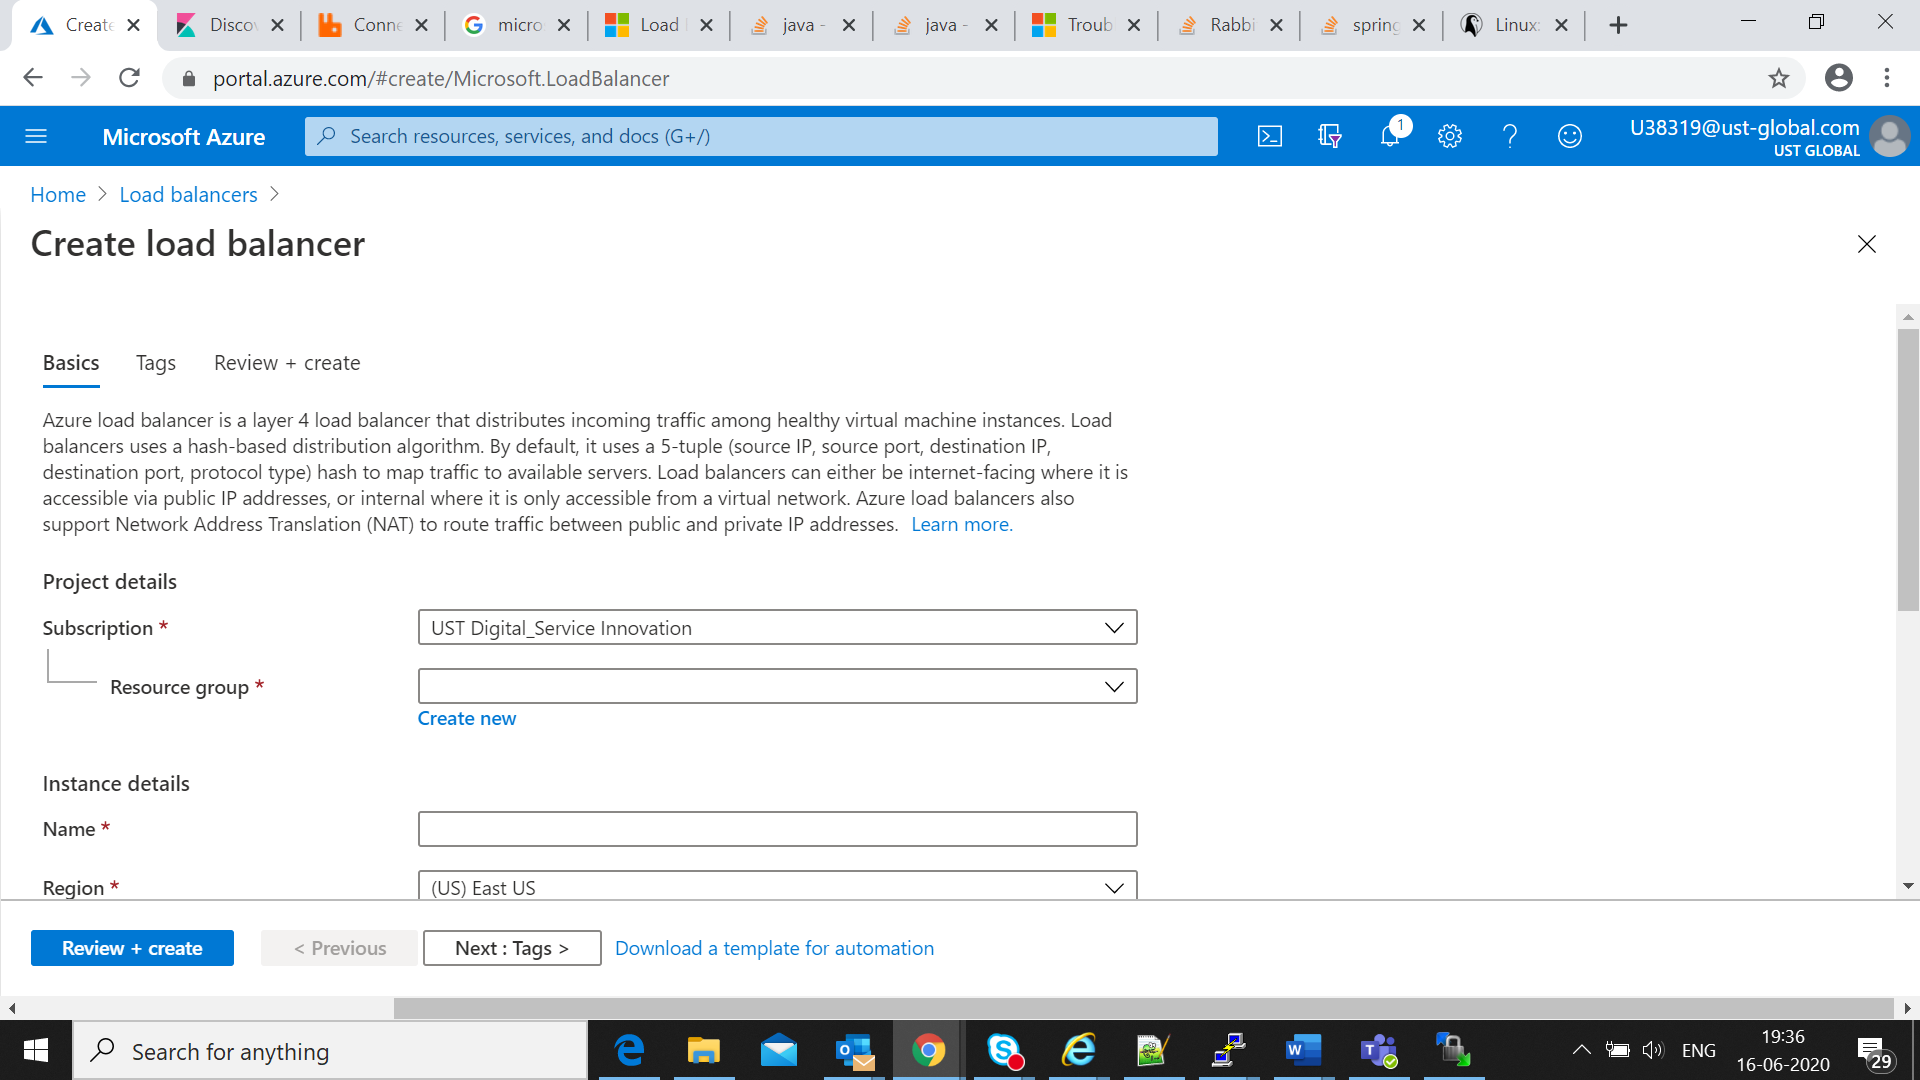
Creating Load Balancer
-
Update the Create load balancer wizard with appropriate entries
Continued…………………..
|
Project Details |
|
|
|
Subscription |
Select Subscription Name |
Varies with respective to client |
|
Resource Group |
Select Resource Group |
Varies with respective to client |
|
Instance Details |
|
|
|
Load Balancer Name |
Set an Load Balancer name |
E.g: lb-smartop-dev-connect |
|
Region |
Select Region |
Varies with respective to client |
|
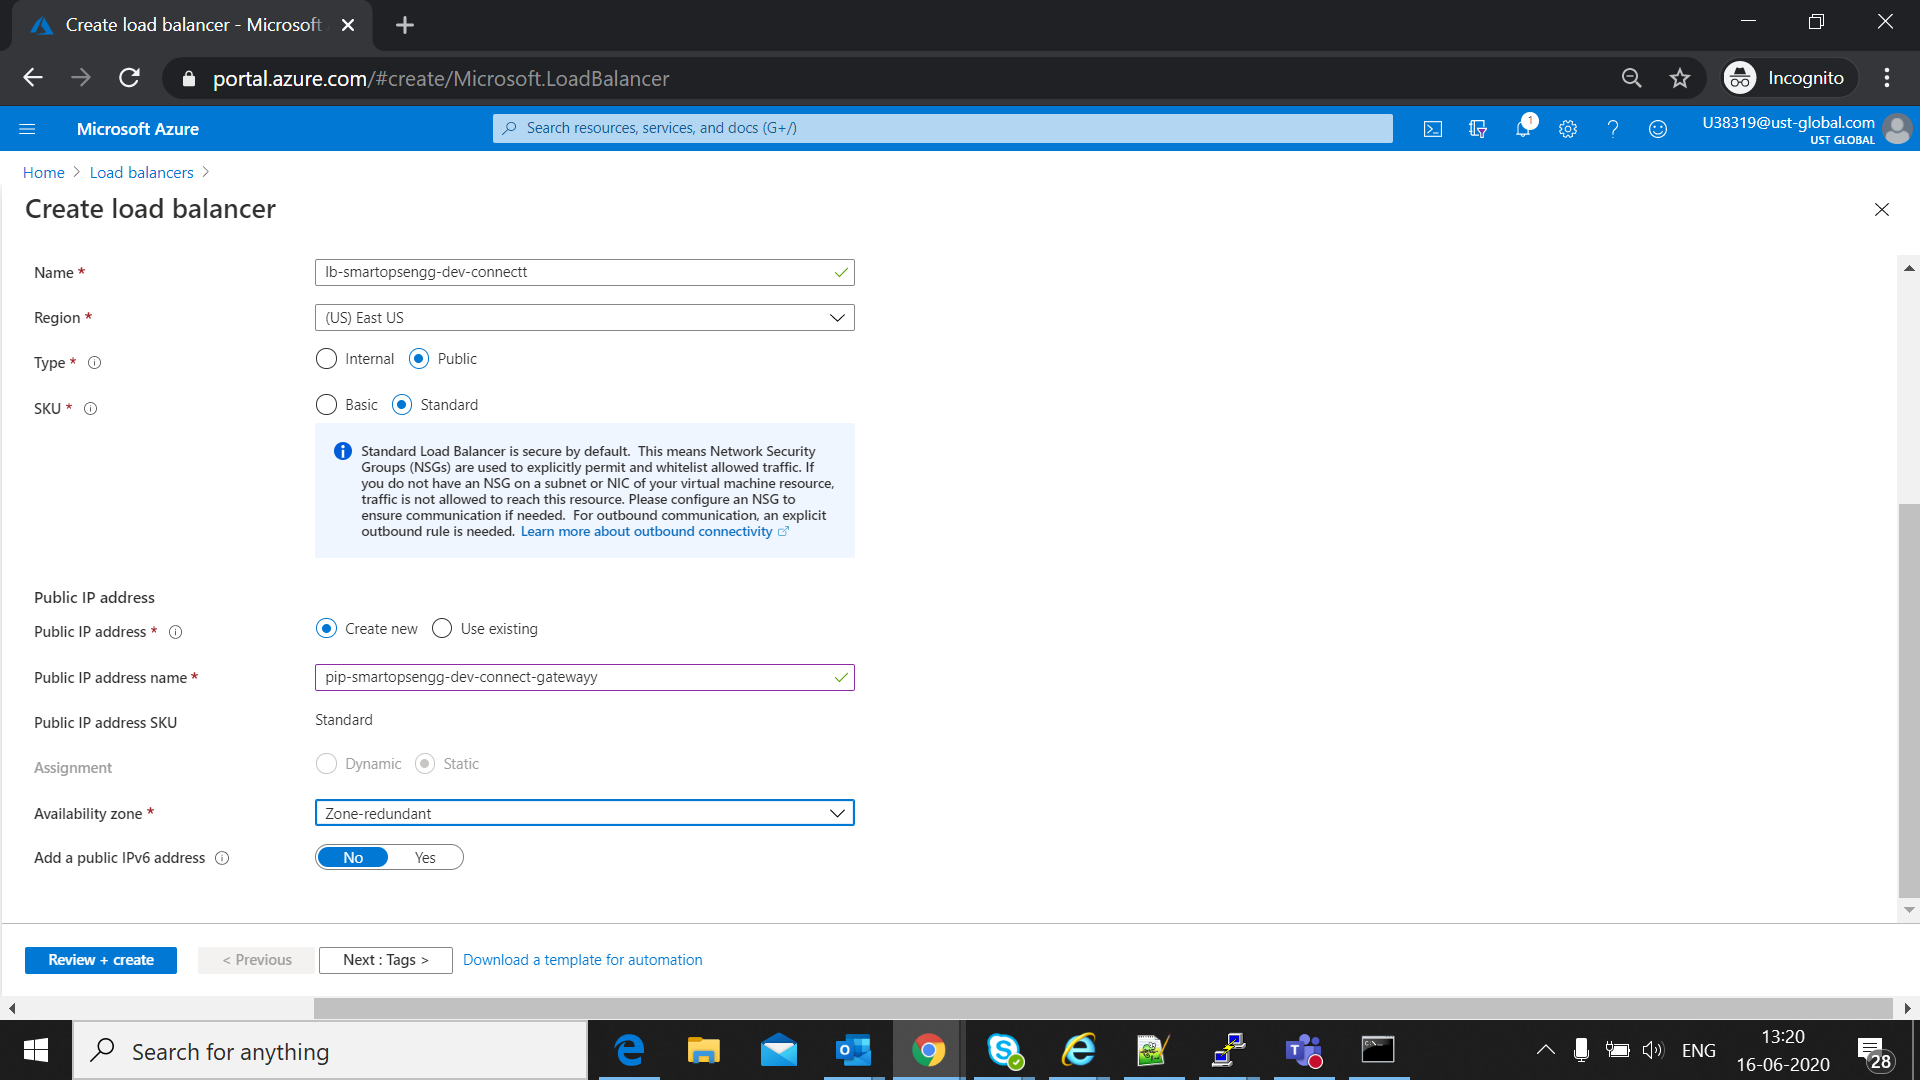
Type |
Public |
|
|
SKU |
Select Standard |
|
|
Public IP address |
Select Create new. |
|
|
Public IP address name |
Type name in the text box. Microsoft recommends using Standard for production workload |
Eg: pip-smartops-dev-connect-gateway |
|
Availability zone |
Select Zone-redundant to create a resilient Load Balancer. |
|
|
Add public Ipv6 Address |
Select No |
|
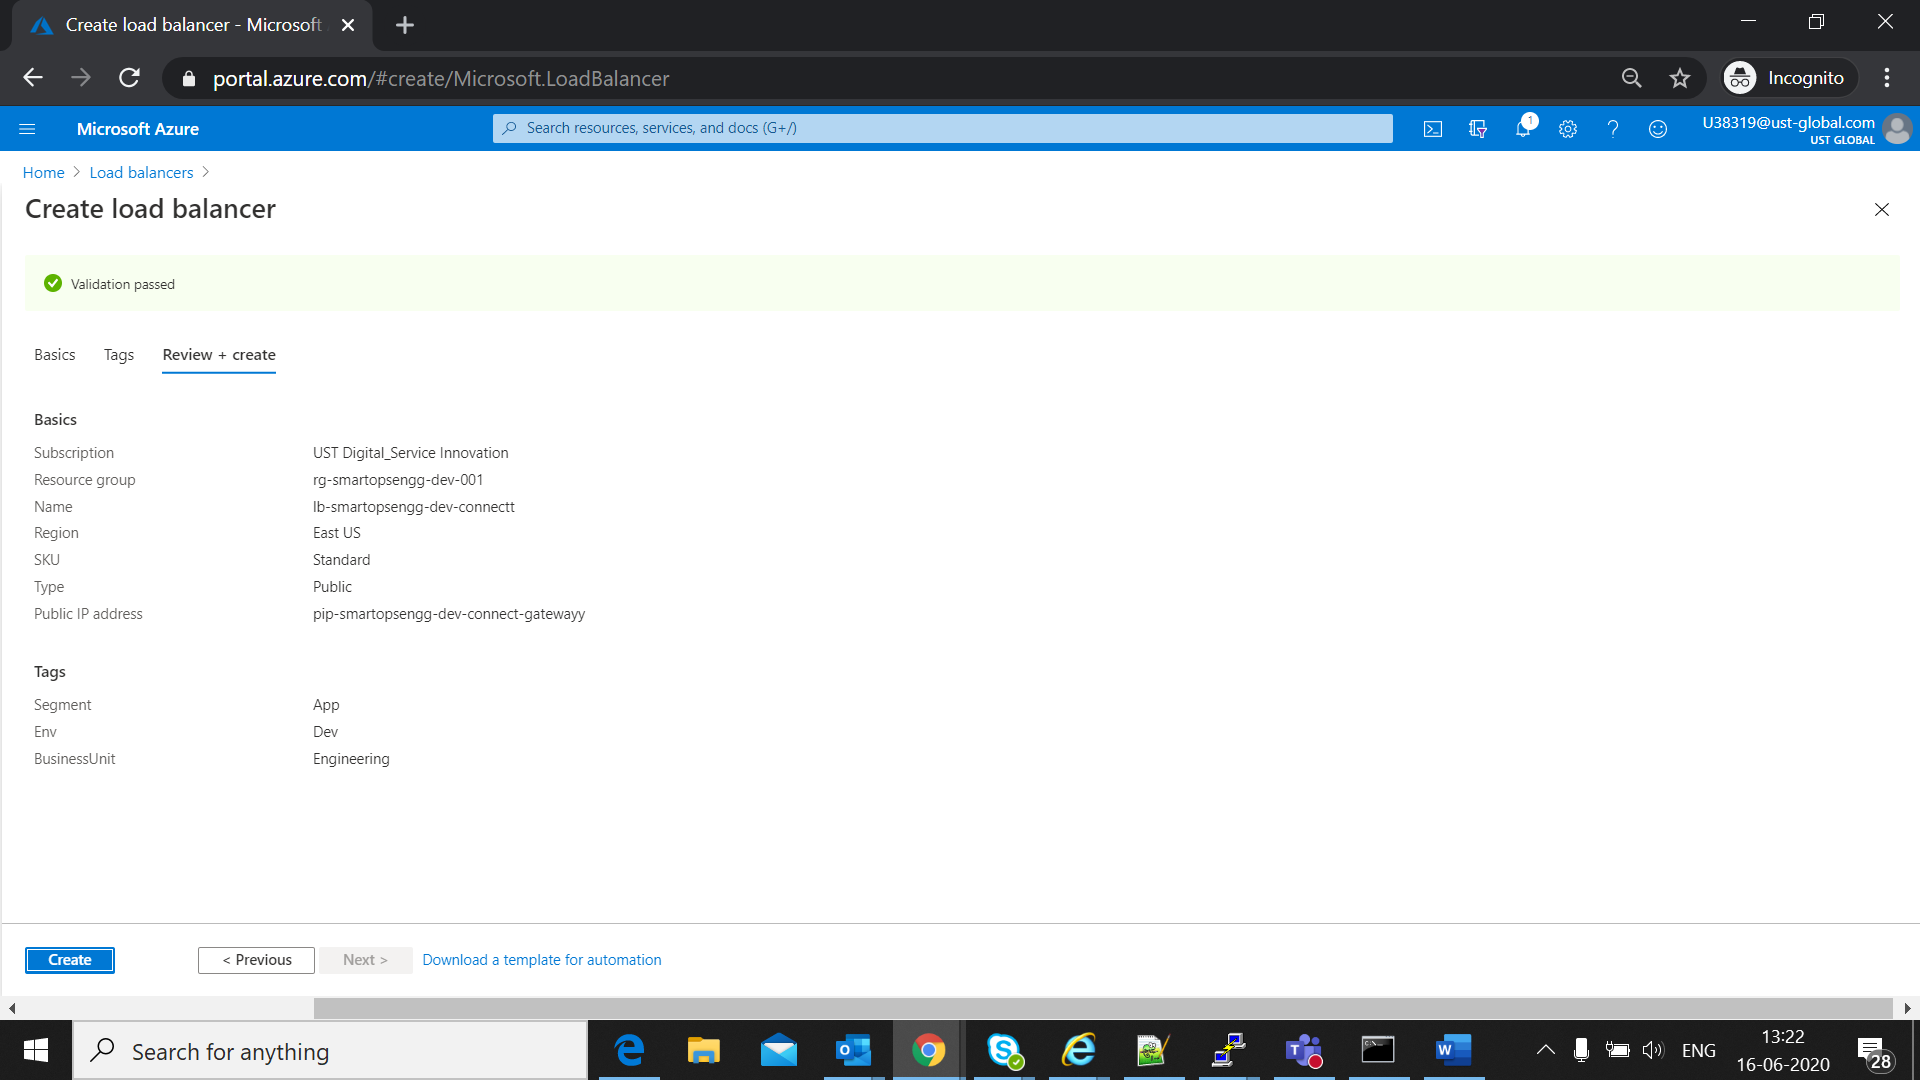
Review + create
-
Click on Create.
-
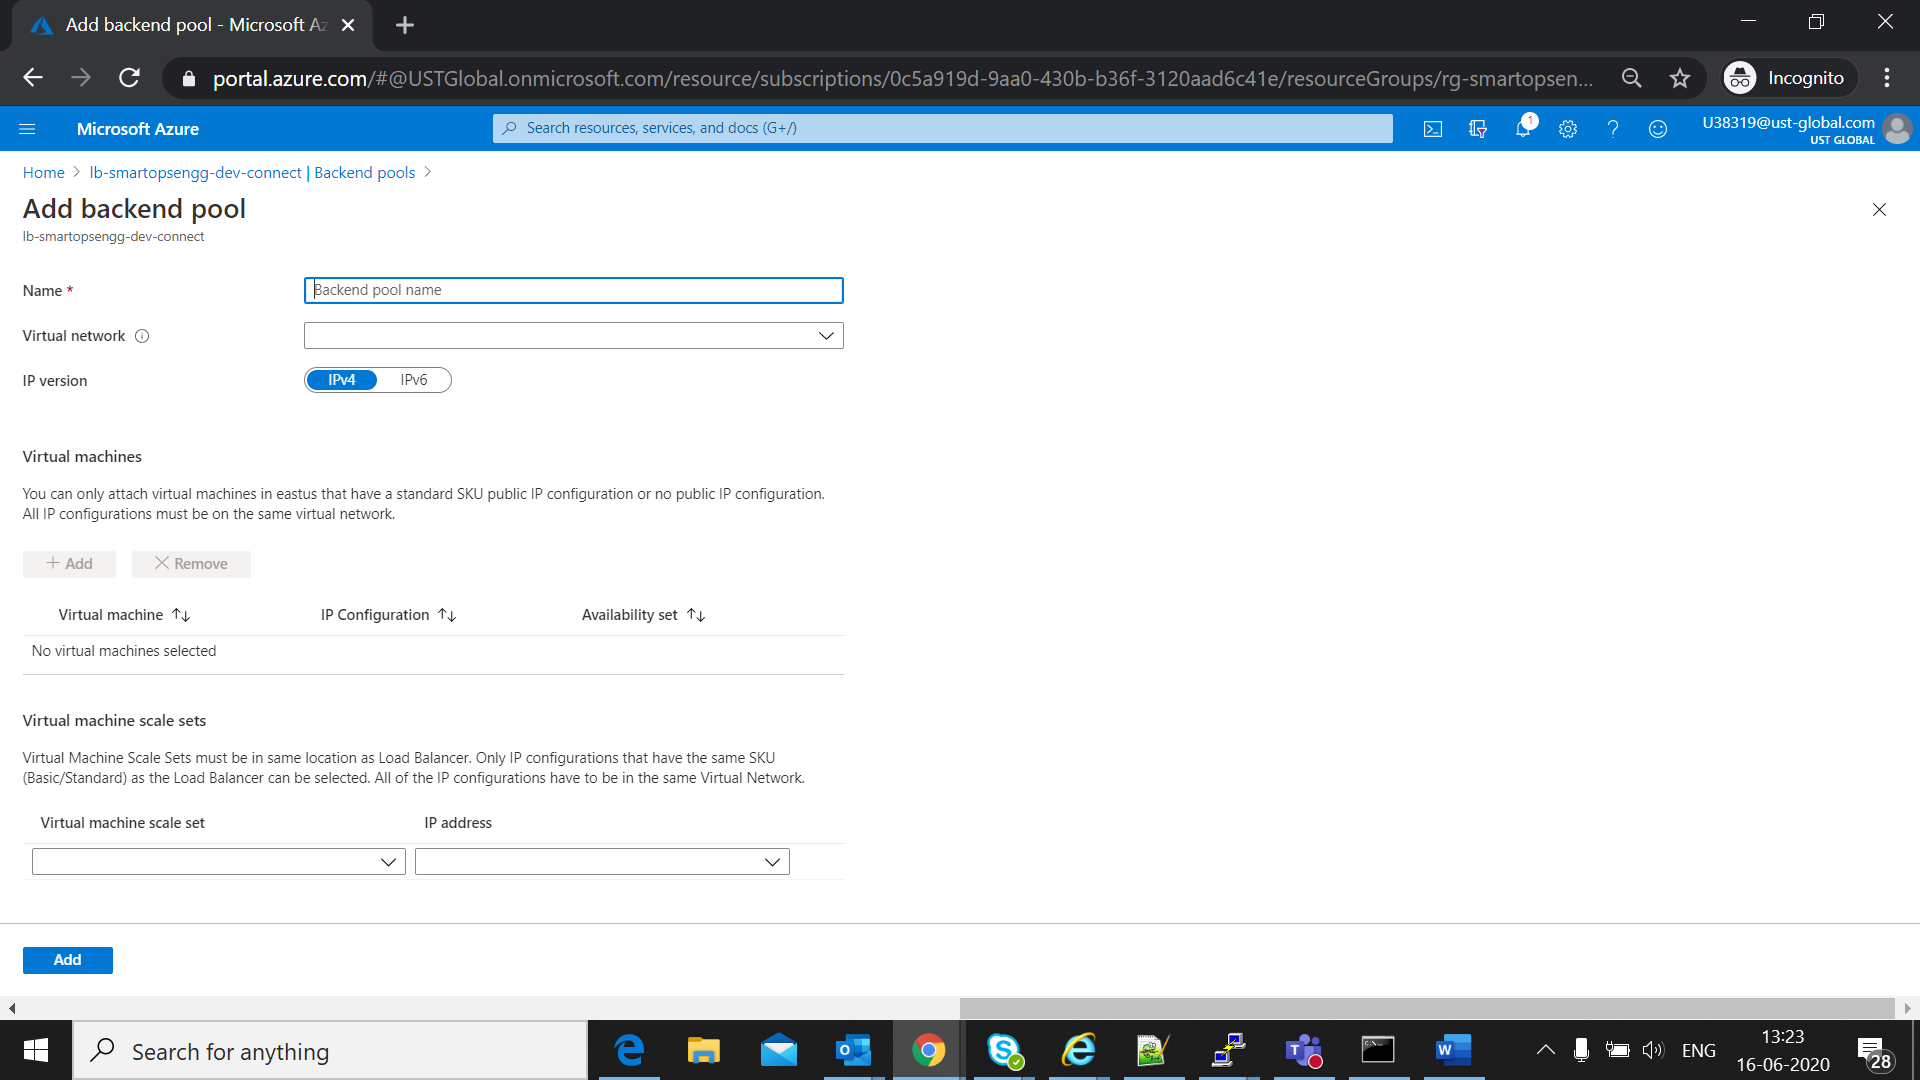
Once created Configure back end pool by clicking on ‘Back end Pool’ in left menu.

-
Update values with ‘Add backend Pool’ wizard
|
Backends |
|
|
|
Name |
Set a name for the backend pool accordingly |
E.g.: pool-lb-smartops-dev-connect |
|
Virtual Network |
Select the vnet from dropdown where the Load balancer and VM belongs to |
|
|
IP Version |
IPv4 |
|
|
|
|
|
|
Virtual Machines |
|
|
|
Target Type |
Virtual Machines |
Select all infra nodes here as for RabbitMQ |
*Here the traffic needs to get routed from Azure Load balancer to rabbitMQn node. So, we have to select and add the Node where rabbitMq is deployed as Target VMs [ PFB sample screenshot after configuration]
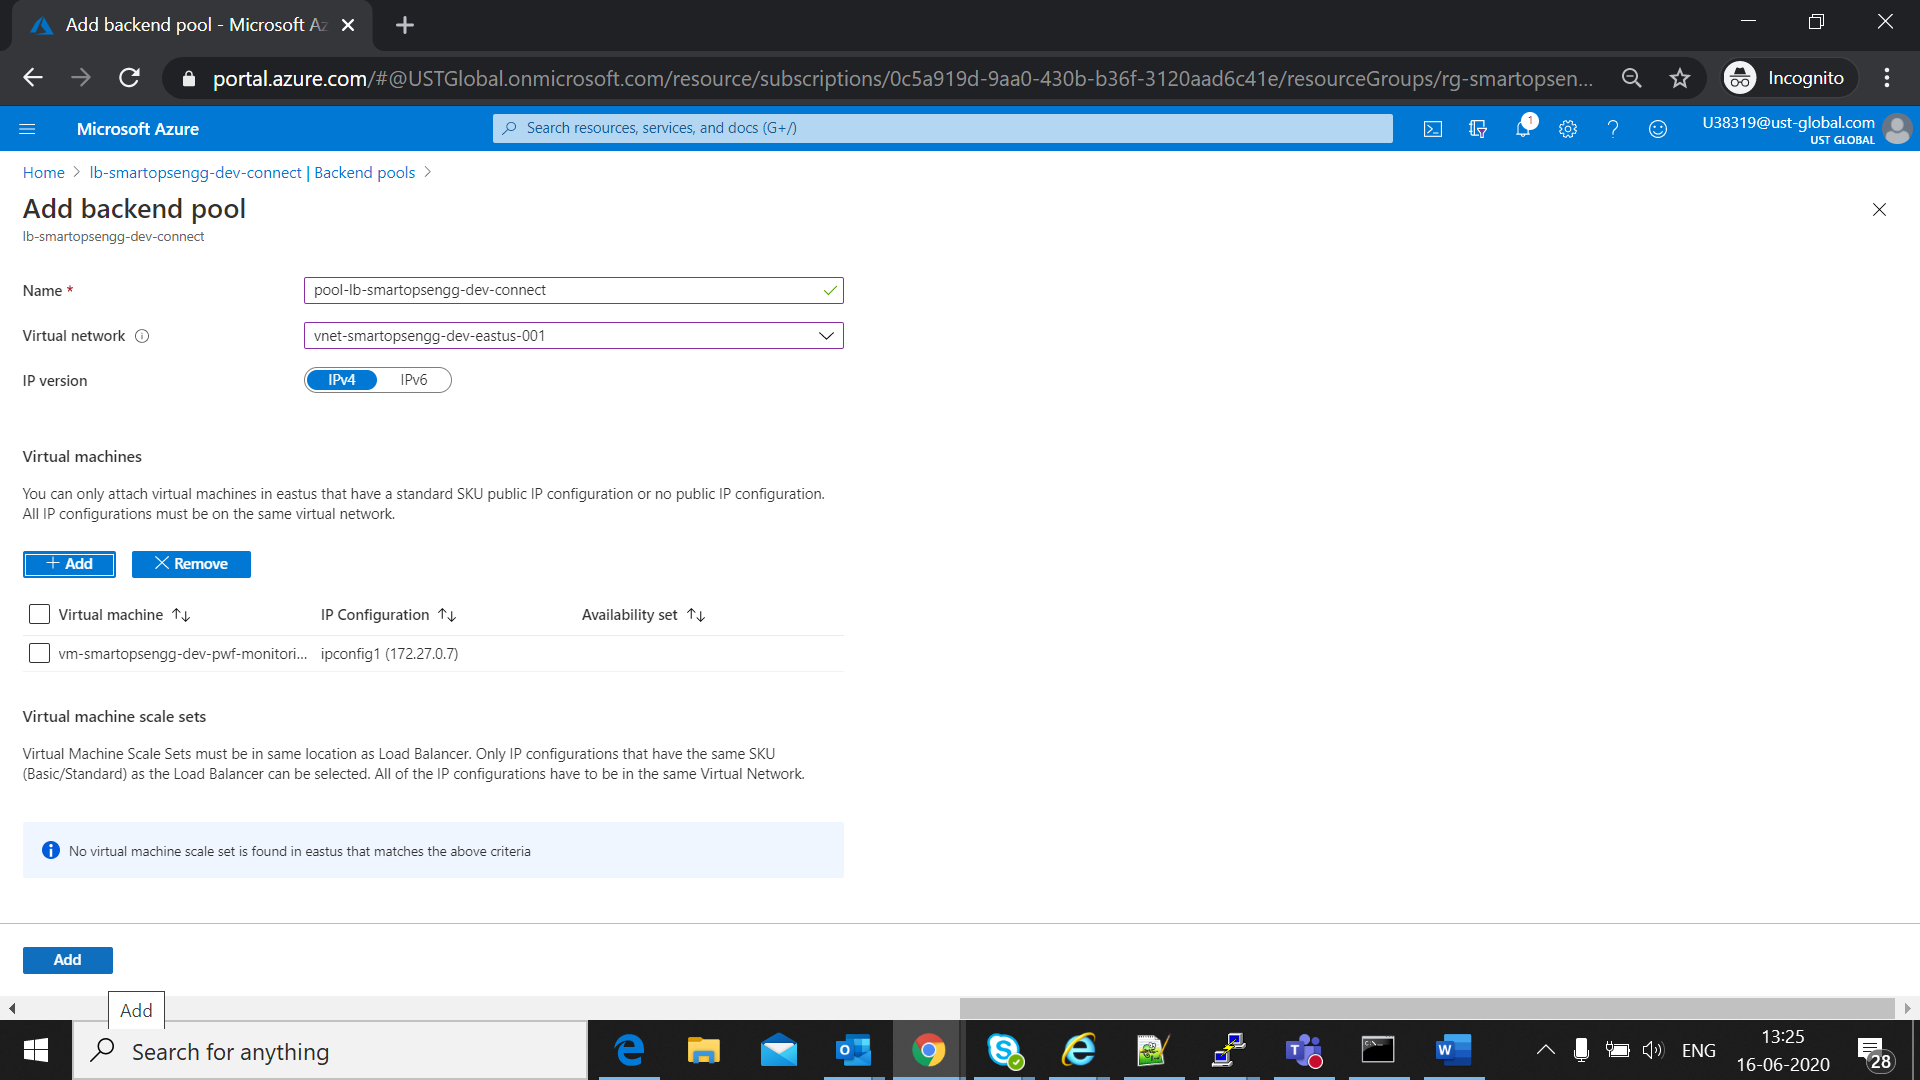
Created backend pool as in below screenshot.
To allow the Load Balancer to monitor the status of your app, you use a health probe.
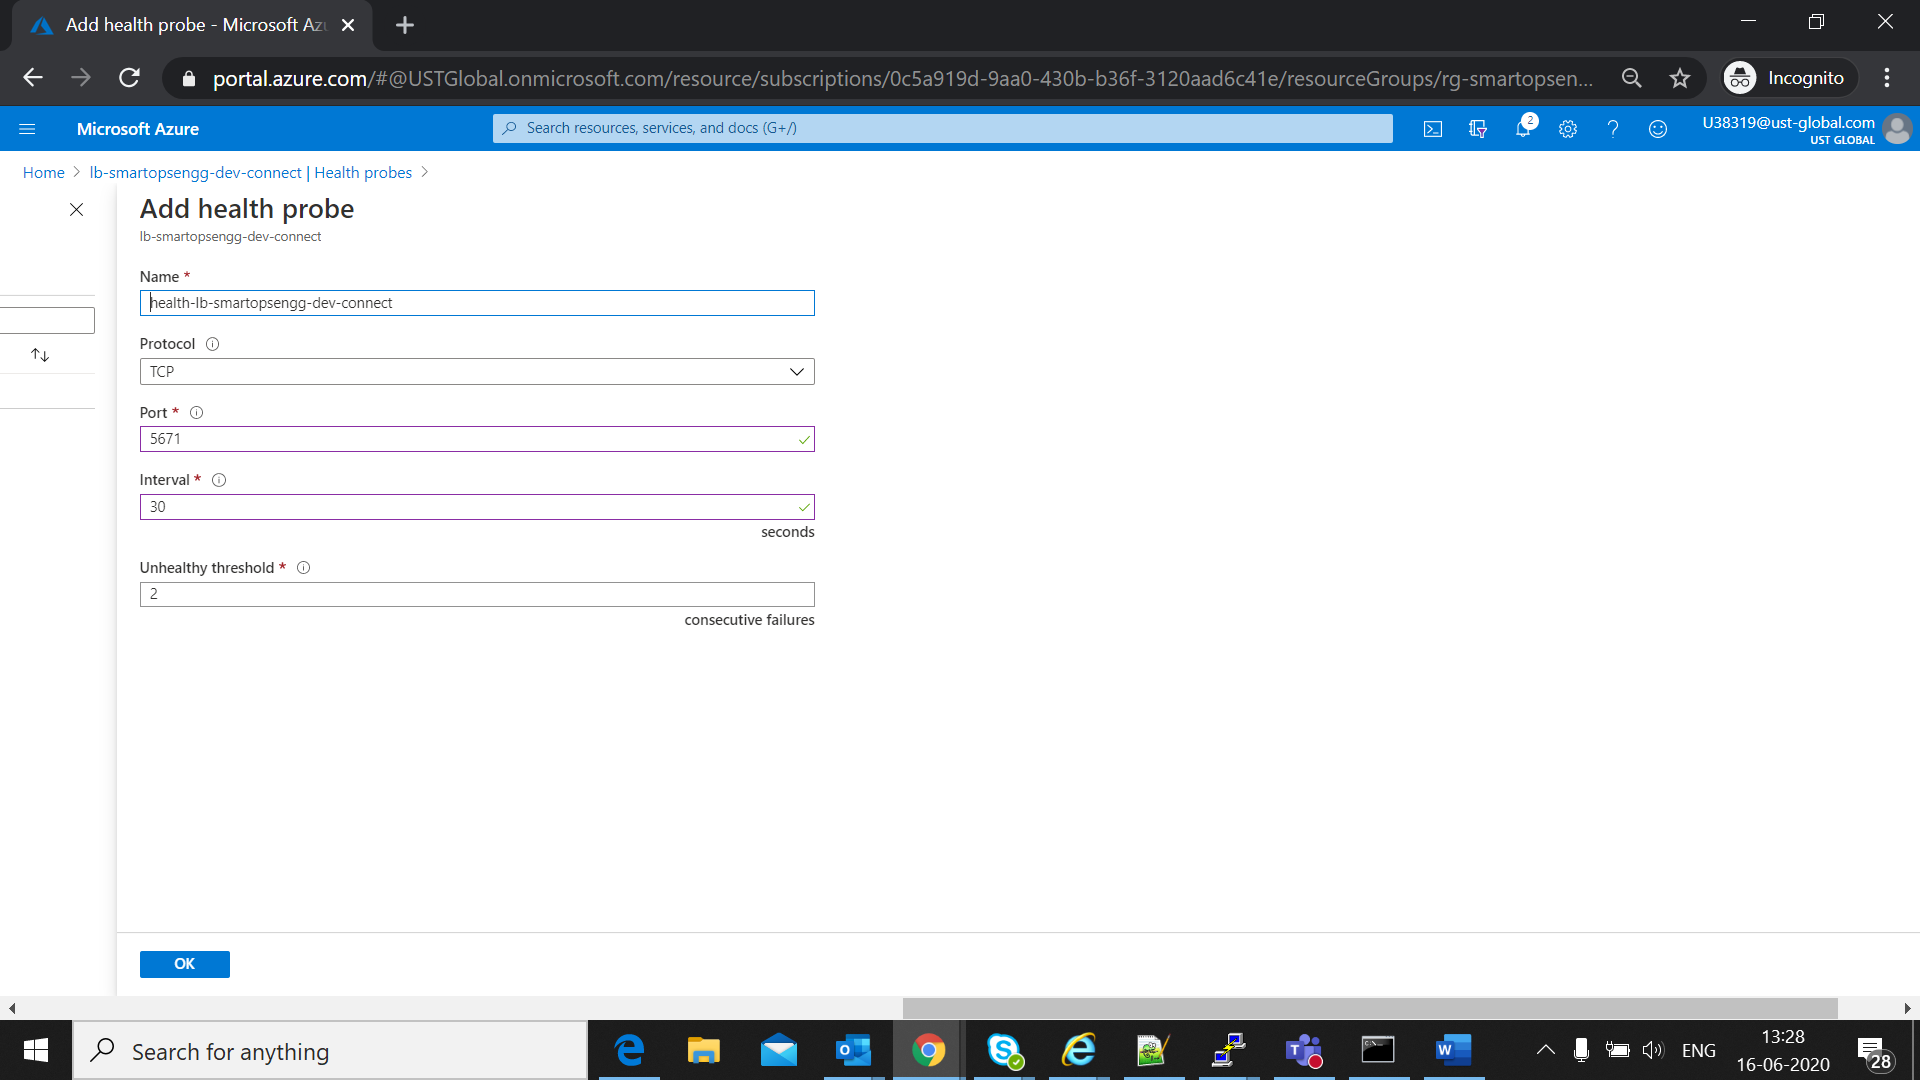
Update Values in ‘Add health probe ’ wizard.
|
Health probe |
|
|
|
Name |
Set a name for the backend pool accordingly |
E.g.: health-lb-smartops-dev-connect |
|
Protocol |
TCP |
|
|
Port |
5671 |
|
|
Interval |
Enter 30 for number of Interval in seconds between probe attempts. |
In seconds |
|
Unhealthy threshold |
Select 2 for number of Unhealthy threshold or consecutive probe failures that must occur before a VM is considered unhealthy. |
Select all infra nodes here as for RabbitMQ |
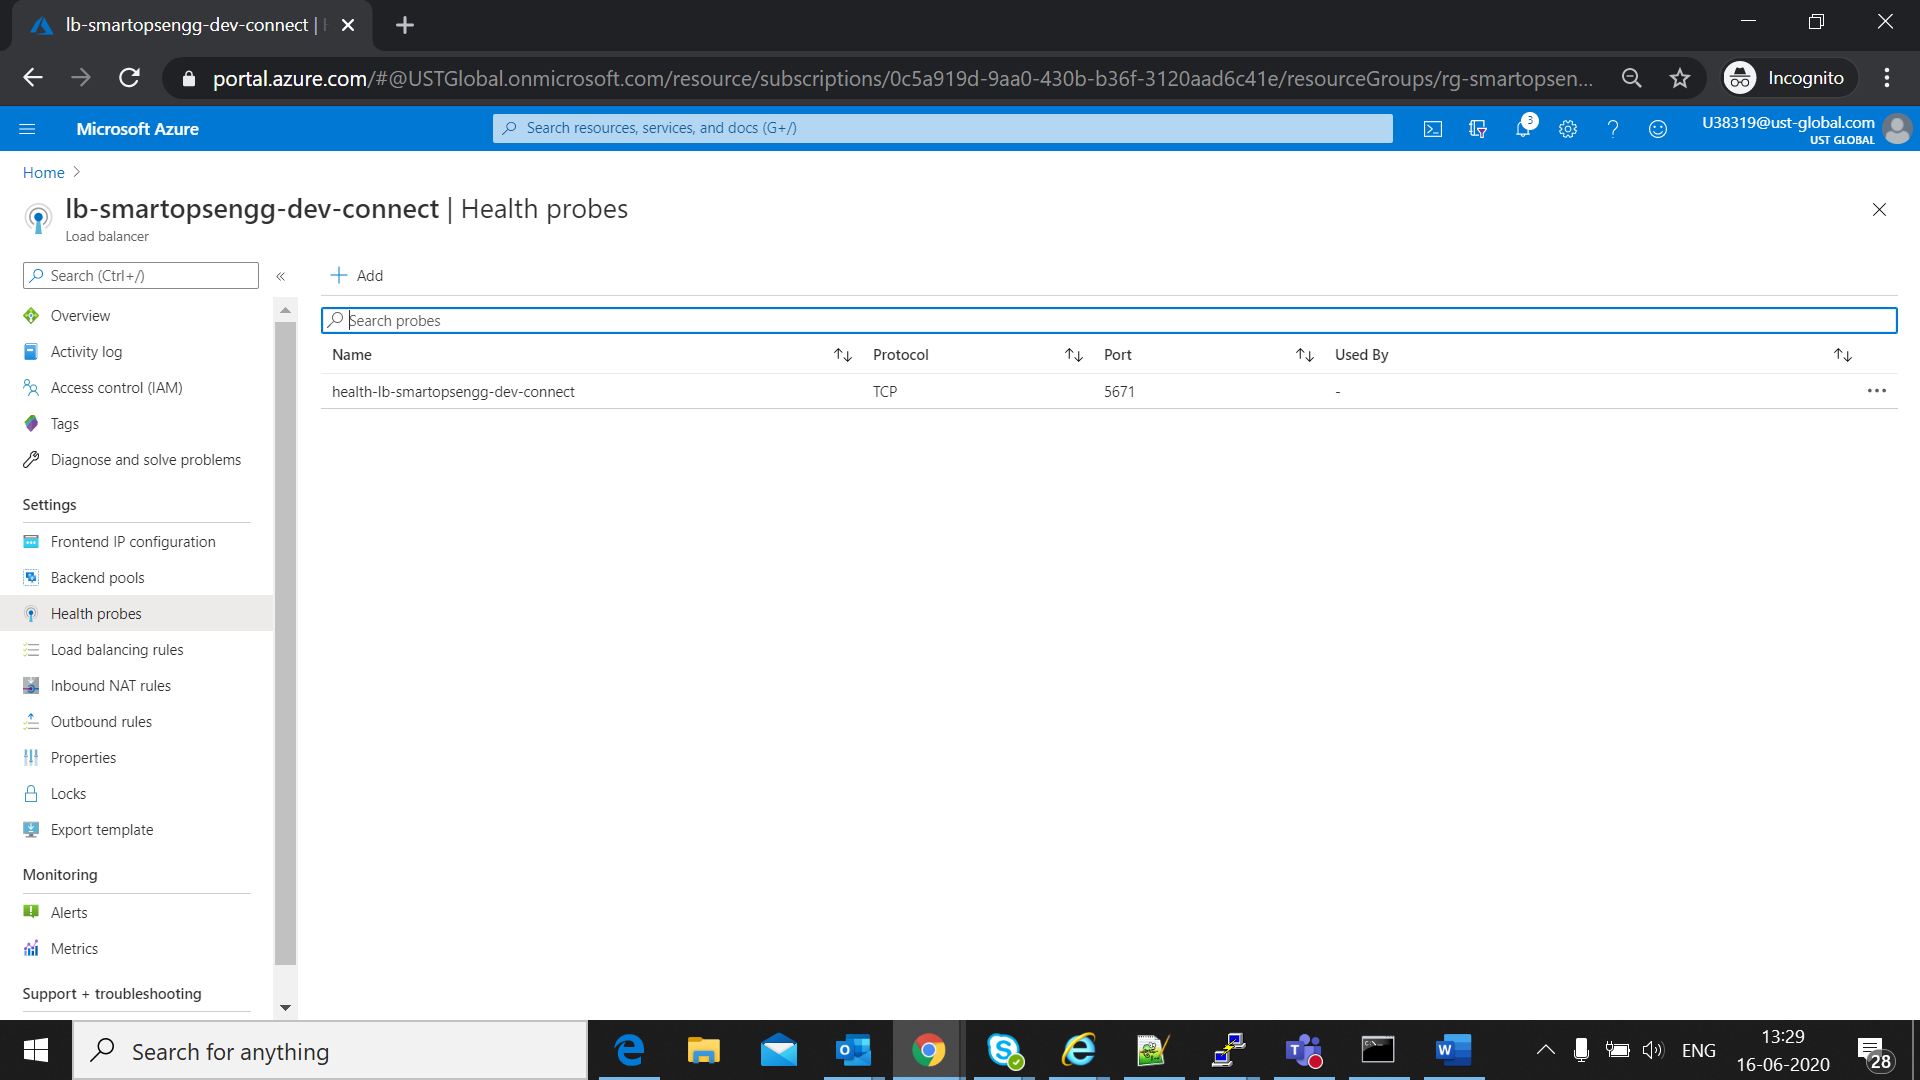
Created health probe as below
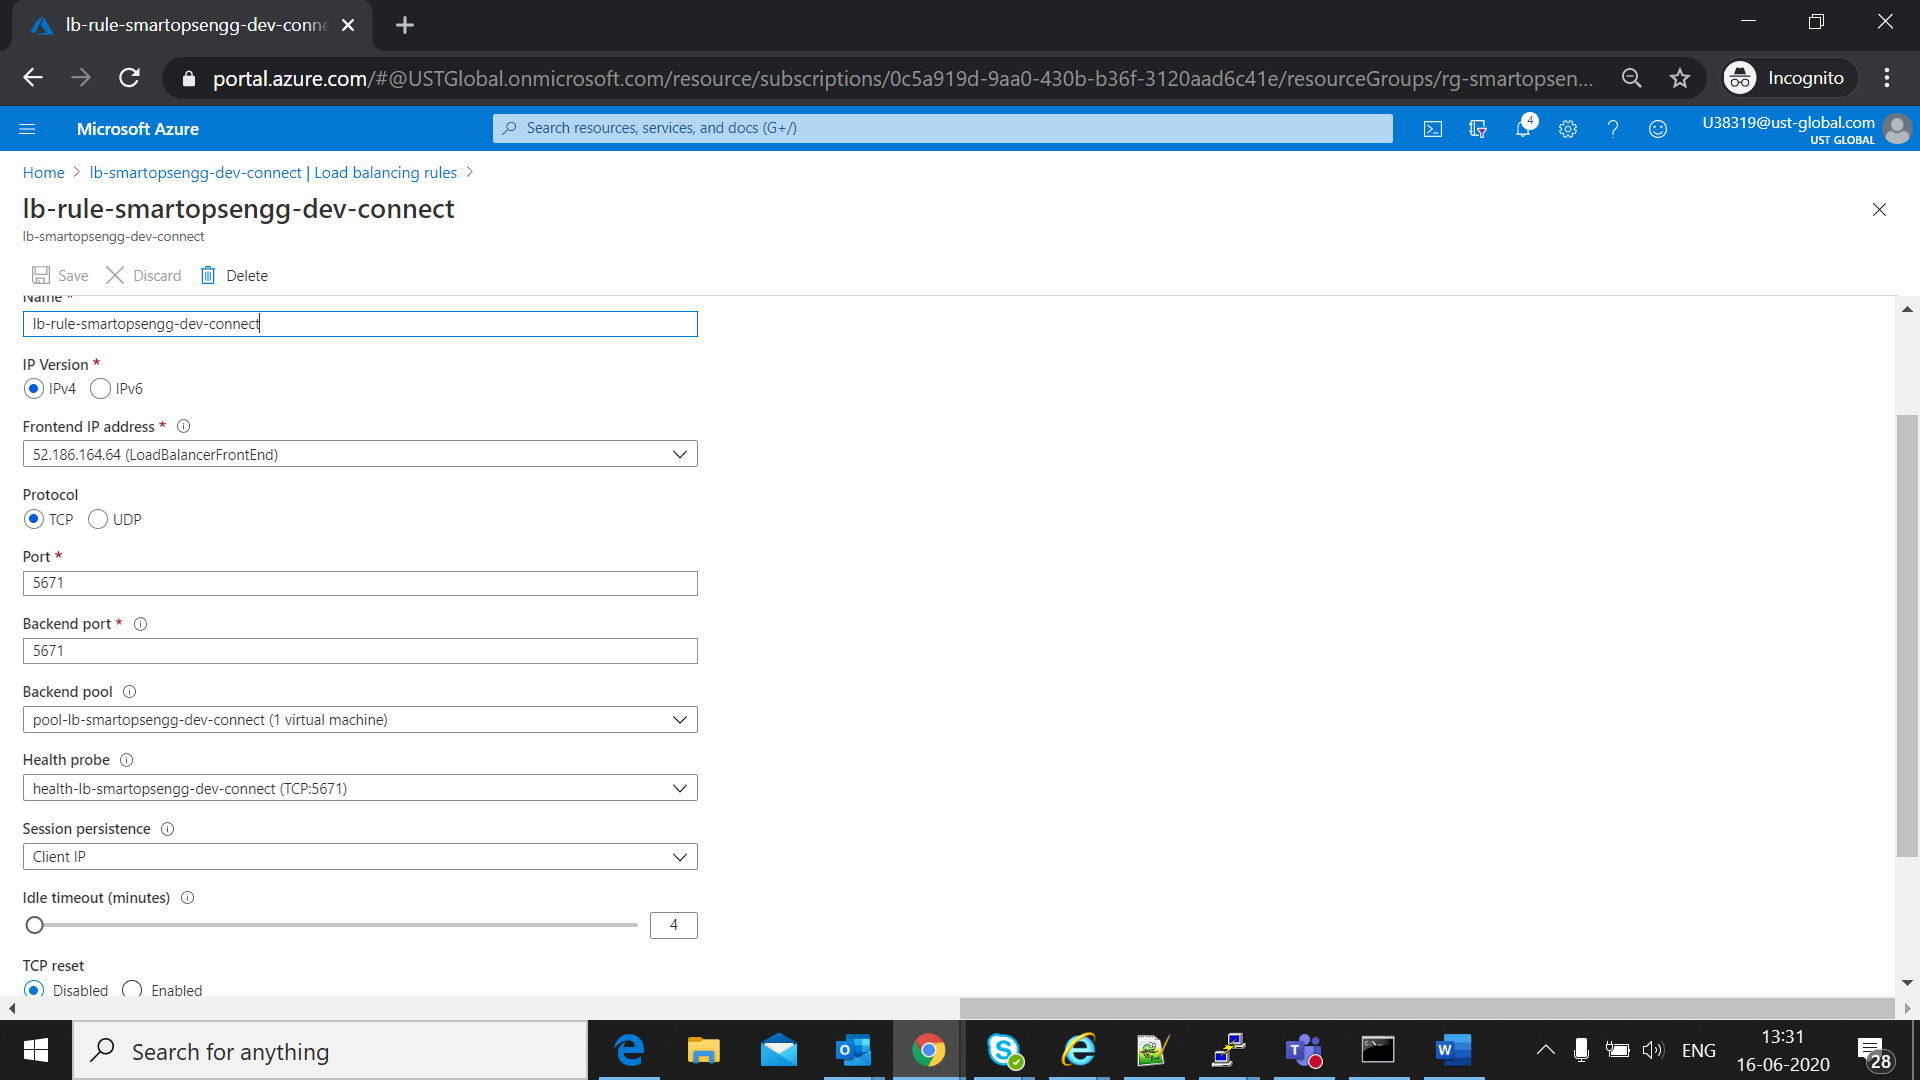
Create a Load Balancer rule
Click on Load Balancing Rules and click ‘+’ Add
Update values in ‘Add load balancing rule’
|
Basics |
||
|
|
|
|
|
Instance Details |
|
|
|
Rule Name |
Set an Rule name |
E.g: lb-rule-smartops-dev-connect |
|
Protocol |
Select TCP |
Varies with respective to client |
|
Port |
Enter 5671 |
|
|
Backend port |
Enter 5671. |
|
|
Backend pool |
Select pool-lb-smartops-dev-connect |
|
|
Health probe |
Select ‘health-lb-smartops-dev-connect’ |
Eg: pip-smartops-dev-connect-gateway |
|
Session Persistence |
Select Zone-redundant to create a resilient Load Balancer. |
"None" specifies that successive requests from the same client may be handled by any virtual machine |
|
TCP reset |
Disabled |
|
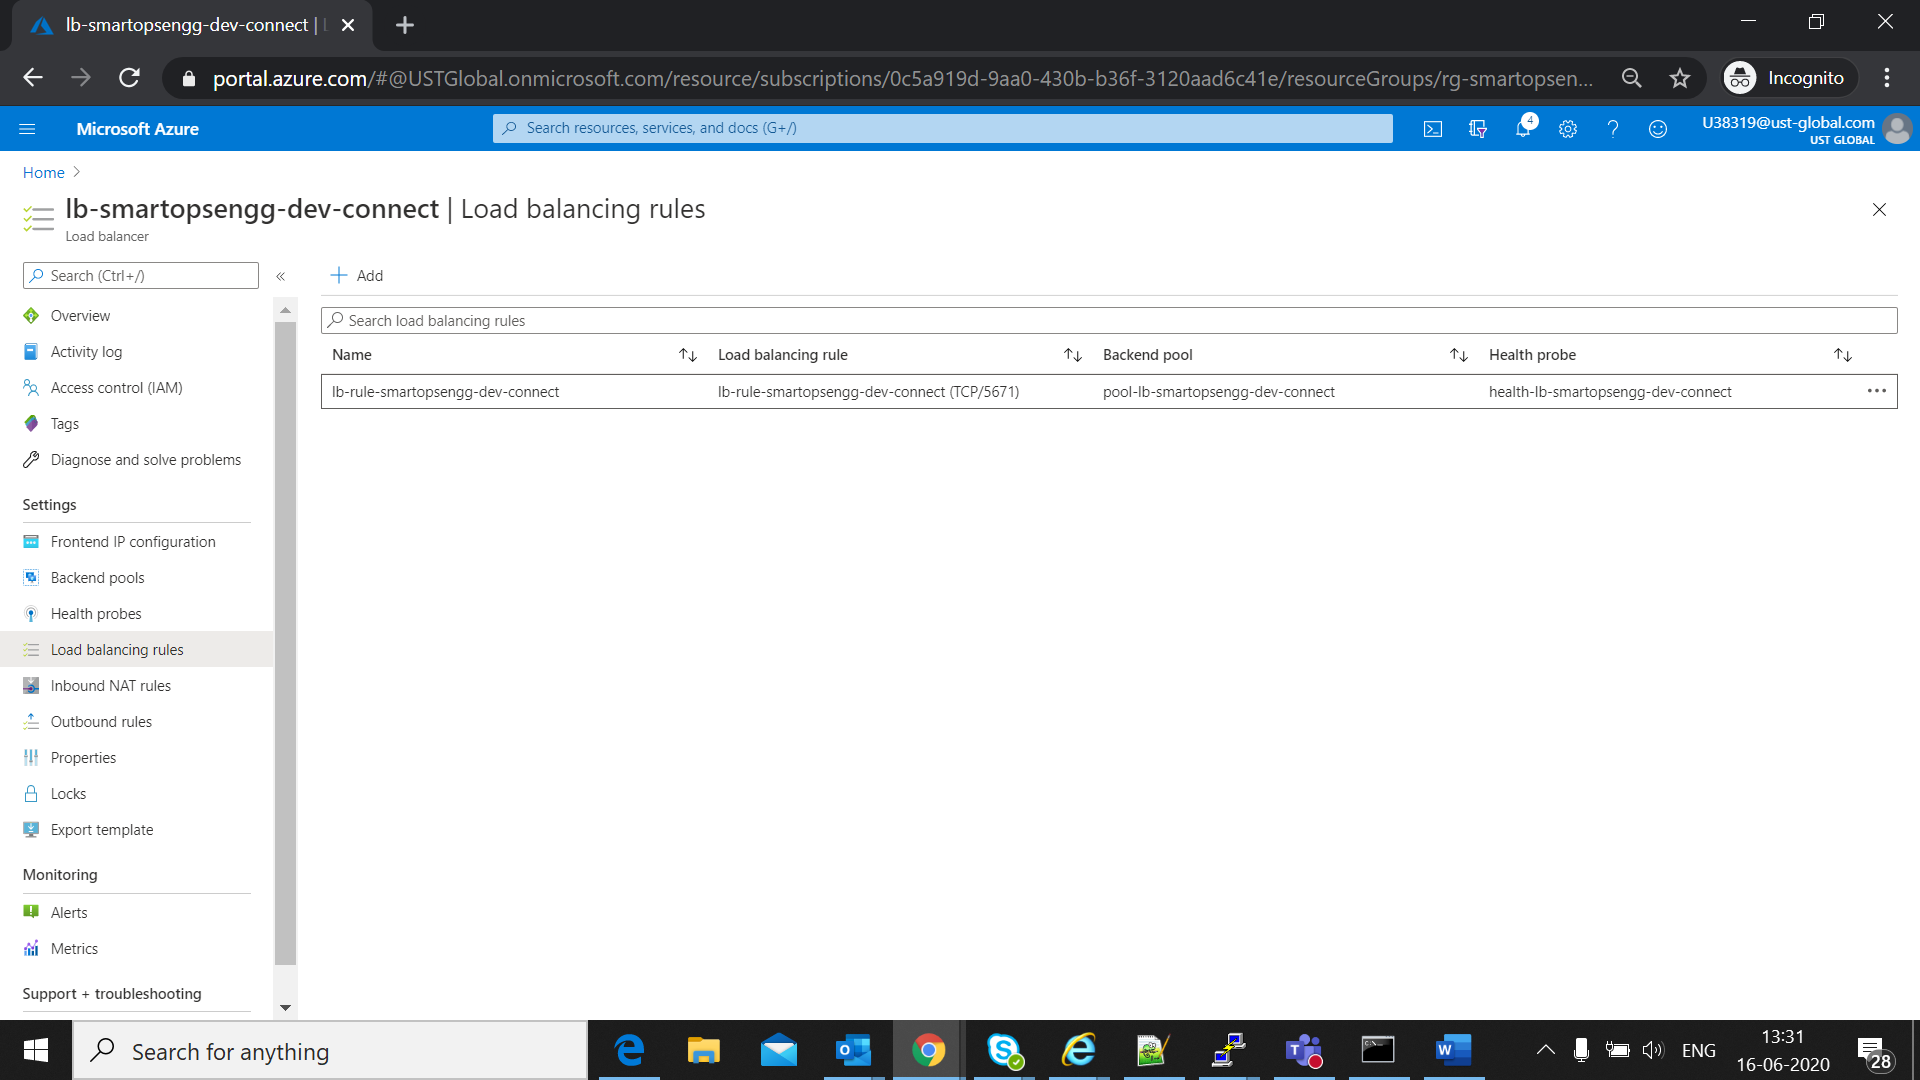
Rule created as below
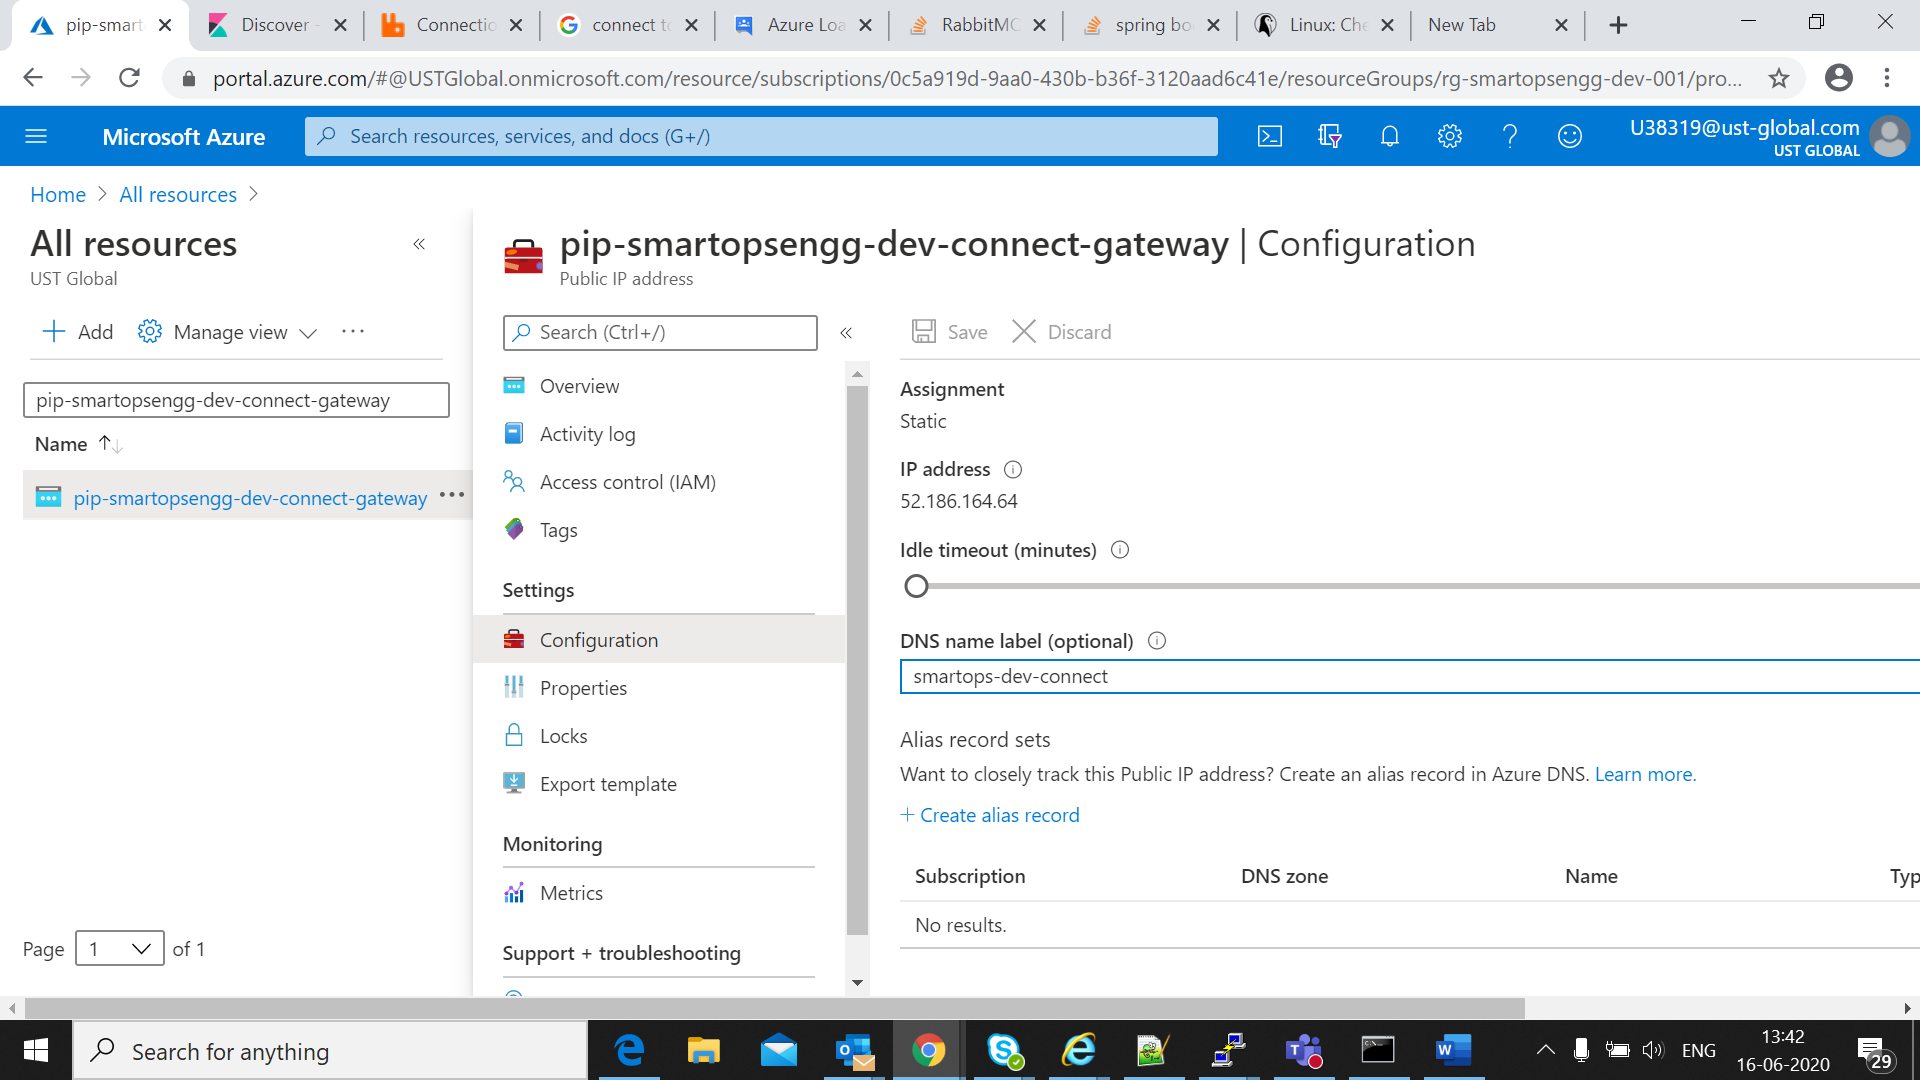
Search for the public ip created with its name (pip-smartops-dev-connect-gateway)and select the resource
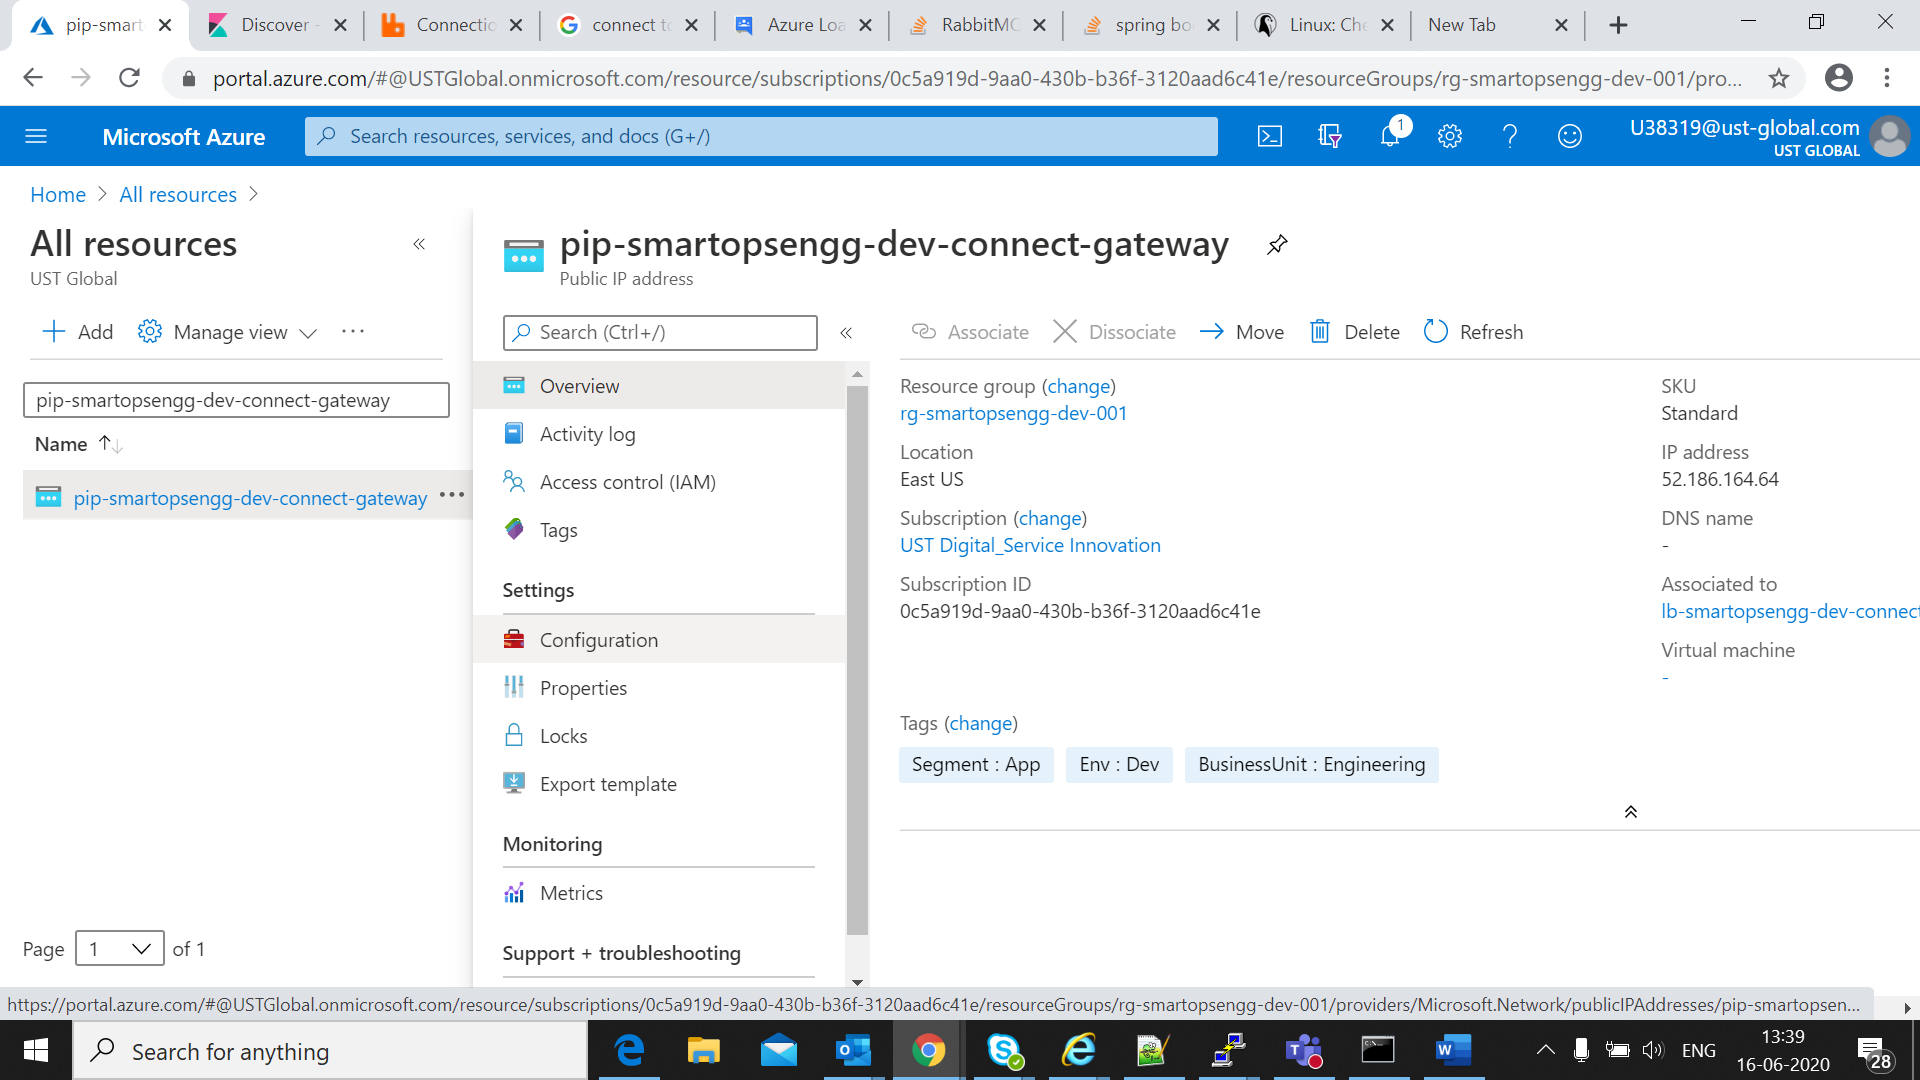
Click on configuration Tab and edit the DNS Name label eg: smartops-dev-connect and save
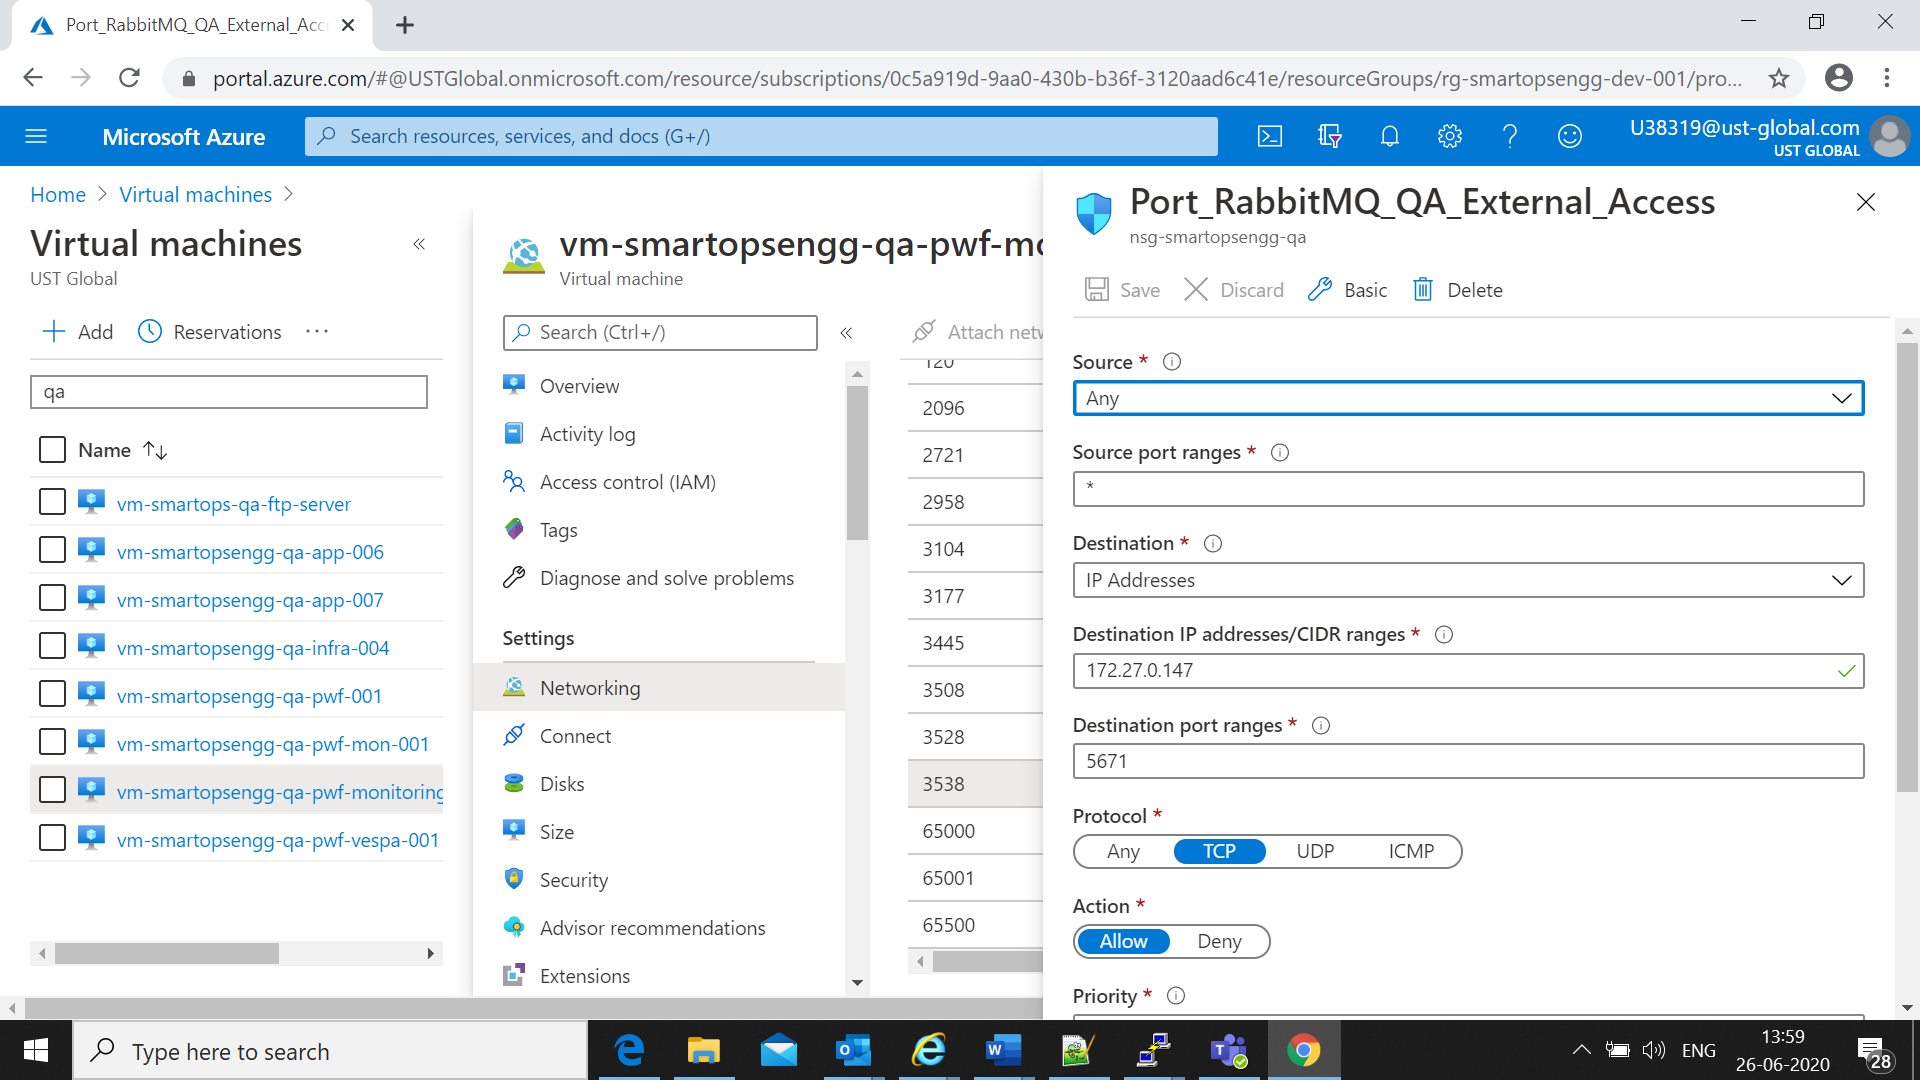
Make sure that port 5671 is open up in NSG for the Back end Pool VM to get Azure load balancer connected to rabbitMQ
Come back to created load balancer and check the health by clicking on ‘Diagonose and Solve problems’
Click on view event resource health
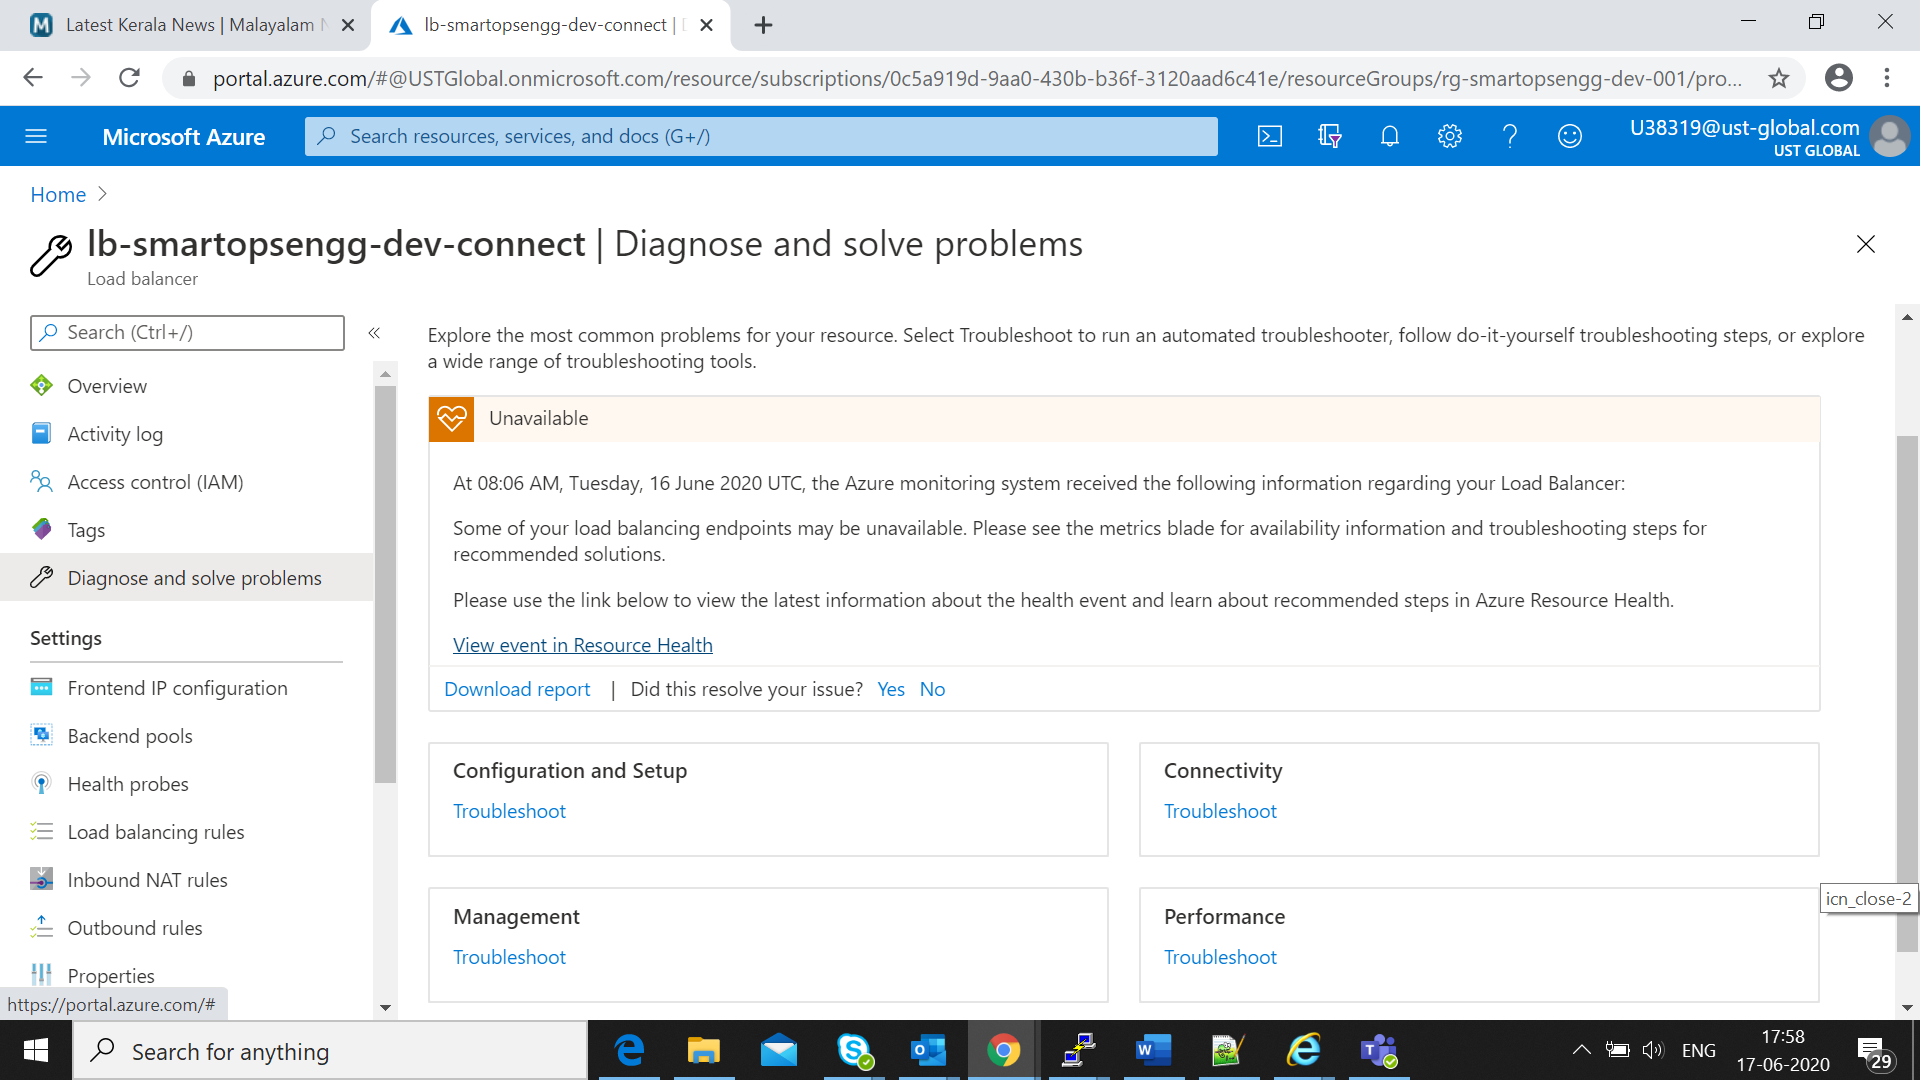
Health will be displayed with status as ‘Available’ .if the configurations are not healthy it will be ‘Unavailable’
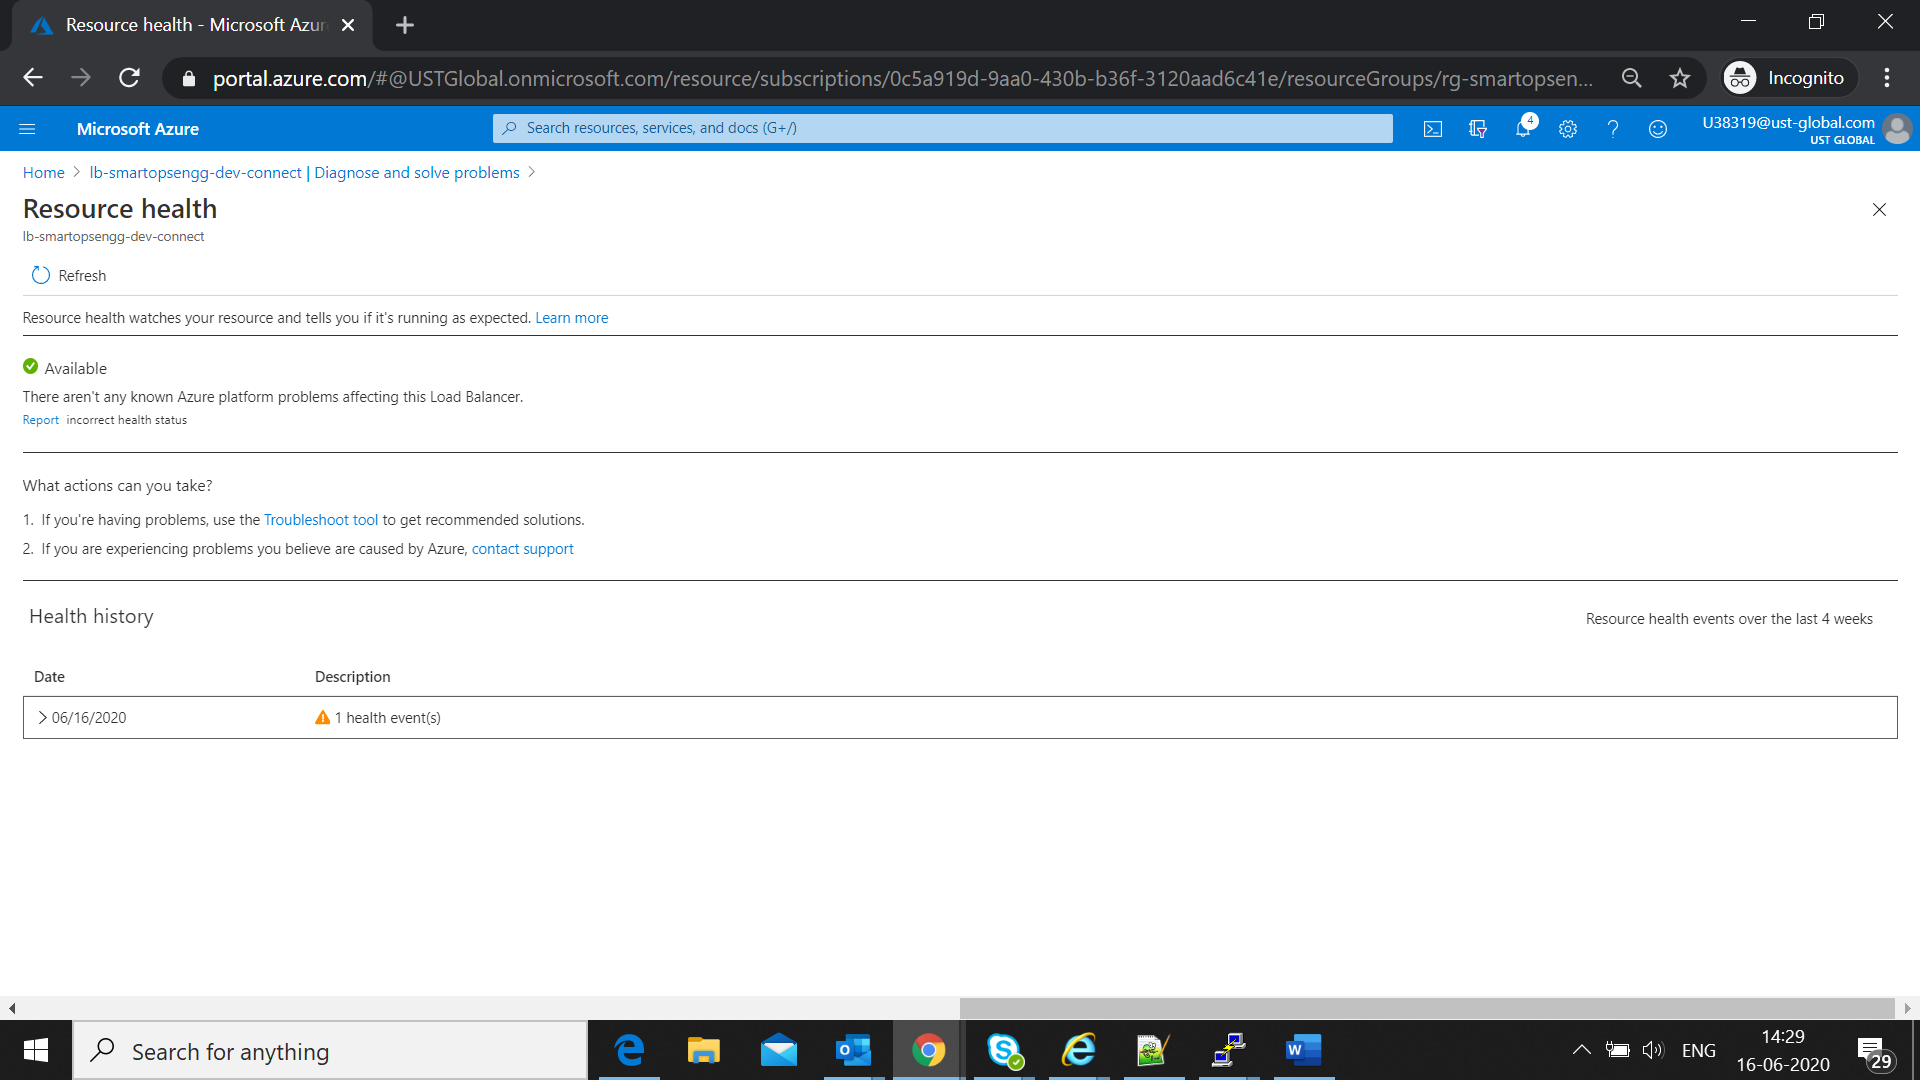
Note: It will take 5 minutes to get the resource health as Available if all configurations are correct. So wait for 5 minutes and check the resource status