Smart Vision v2.5-Post Deployment Process
Contents
- Clear Keycloak Cache
- Roles & Privileges
- PWF/Product/Component Association and De-association with Organization
- Import Smart Vision Golden Skills
- Upgrading workflows for applying changes to old projects
- Applying model upgrades
- #65594: Workflow (PushToDU) failed when file path contains Spanish letters
- Configuring autofill for existing projects
- Soft validation in external service configuration
- Soft validation configuration for existing project having shelf data
- Accuracy improvements SmartVision and accuracy calculation in PWF (US 71715)
Clear Keycloak Cache
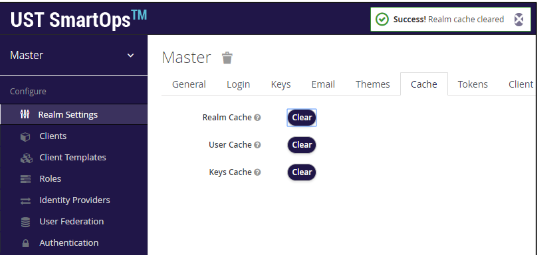
This step needs to be done only if clones-upgrade container was run for the deployment. To clear the Keycloak cache, follow the steps mentioned below:
-
Login to Keycloak Master Admin console.
-
Select any of the Realms and in Realm Settings and go to Cache tab.
-
Click on all the three Clear buttons (Realm Cache, User Cache and Keys Cache) to clear cache in all realms.
Note:
-
This process is required only if the clones-upgrade program was run as part of deployment.
-
In case the person who is doing the post-deployment steps are not aware of the deployment procedures completed, this can be executed.
Roles & Privileges
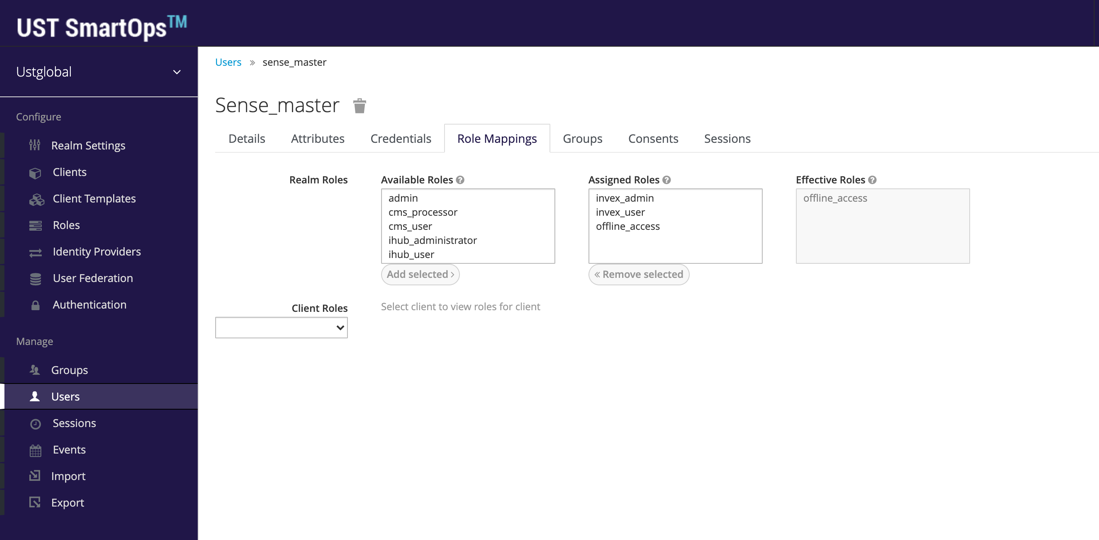
Invoice Extraction requires that the user with offline access (usually sense master) have the following access. Add these roles if they are not available.
-
invex_admin
-
invex_user
-
offline_access
Release 7.5 (core platform specific change): Adding system_flow_executor role for sense_master user in Existing Organizations
For Existing Organizations in existing environments, sense_master needs to be mapped with the new role system_flow_executor. user
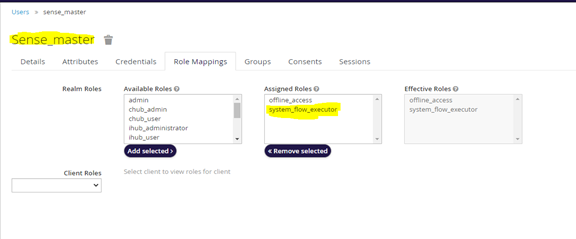
After mapping the sense_master user with new role system_flow_executor offline_token needs to be regenerated for that organization
Note: For newly created organizations the system_flow_executor role will be automatically mapped with the sense_master user.
PWF/Product/Component Association and De-association with Organization
(mandatory step if any of the PWF/Product/Component needs to be de-associated in an organization)
For each environment, the de-association/association of PWFs, products, components in respective environments/instances (namely, core platform, ITOps, Invoice PWF) can be done. This will include the de-association of monitoring/support PWFs after data migration, as well as the association of new ITOps PWF and these steps are done via API.
Attached Postman Collection contains sample request/response samples for the various APIs for association and de-association. It is on need basis that these need to get executed. For actual usage, these should be replaced with appropriate values for host, headers and request body. PFB the details of each of these APIs:
-
Invoke the SmartOps Login API for the applicable Organization.
URL: POST https://<host_name>/pwf/api/smartops/loginBody: {"realm":"<orgname>","userName":"<user_name>","password":"<password>"}
-
Invoke the Get all PWFS, Products and Components (stacks) API with the following parameters to fetch all available PWFS, products and components:
URL: GET https://<host_name>/pwf/api/smartops/pwf/fetch-smartops-capabilities
Headers:
Organization-name–Unique identifier for the organization.
Authorization –Access token generated after invoking SmartOps login API (offline token can also be used)
user –User Id
Note: This API response provides the details of the PWFs, products and components available and it is based on these values the input for the rest of the APIs given below can be derived. -
Invoke the Add Product and PWF association API to add or associate applicable PWFs and Products in the required Organization
URL: PUT https://<host_name>/pwf/api/smartops/pwf/create-pwf-or-product-association
Headers:
Organization-name –Unique identifier for the organisation.
Authorization –Access token generated after invoking SmartOps login API (offline token can also be used)user –User Id
Body: {"componentId": <component_id>,"componentType":"<component_type>"}
Component ID –Unique identifier of the package workflow or product (copied from previous step)
Component Type –pwf / product
Note: Repeat this step for every PWF / product to be associated to the organization.
Import Smart Vision Golden Skills
-
Import all skills from 2.5.0 skill dump location.
-
Publish and mark all workflows as golden skills.
Upgrading workflows for applying changes to old projects
-
Create new space under Smart Vision workspace. Use existing project name while creating new space.
-
Make space public by using Share option.
-
By utilizing skill move functionality in clones, move existing skill to the newly created space.
-
Modify the existing project specific workflows as per the changelog.
-
New micro actions are part of the skill dump and will get automatically imported on importing the golden workflows
-
Save and publish the modified workflows specifically for every existing projects which are relevant.
Applying model upgrades
For new projects/existing projects with no custom field
-
New model is automatically picked up by the DU project
For projects having custom fields along with global fields
-
The new model id is auto assigned to the global fields and can be viewed by editing them.
-
To update the model id for the custom fields.
-
Export the project json
-
Edit the exported json, locate the custom fields in the json and update the model id
-
Import the project json, this will update the project configuration.
-
Note: This method does not impact the custom sort orders
-
If the import fails, edit the project, and rename it to a two or more-word string separated with an underscore. Eg: RPFC_CS_REG_11 and retry the above steps
-
#65594: Workflow (PushToDU) failed when file path contains Spanish letters
Workflow: Invoice_PWF_PushToDUSched
Changes:
-
Micro action attribute changes:
Step name: Fetch_du_project_id
|
Attributes |
Value |
|
response_character_set |
utf-8 |
|
request_character_set |
utf-8 |
Step name: API_to_PWFDB
|
Attributes |
Value |
|
response_character_set |
utf-8 |
|
request_character_set |
utf-8 |
Step name: API_to_DU
|
Attributes |
Value |
|
response_character_set |
utf-8 |
|
request_character_set |
utf-8 |
Workflow: Invoice_PWF_CheckRoleCondition
Changes:
- Micro action attribute changes:
Step name: FetchDetailsFromDU
|
Attributes |
Value |
|
response_character_set |
utf-8 |
|
request_character_set |
utf-8 |
Step name: FetchDataFromDU
|
Attributes |
Value |
|
response_character_set |
utf-8 |
|
request_character_set |
utf-8 |
Configuring autofill for existing projects
For existing projects, the autofill URL text box will come as empty in the du-configuration screen and need to add wherever URL required for the autofill.
Soft validation in external service configuration
As we have a new feature soft validation we are expecting a new parameter "softvalidation_flag" (which can be 1 for enabling and 0 for disabling soft validation) in the external validation URL response. So that we have a change in contract for external service configuration response as mentioned below.

Soft validation configuration for existing project having shelf data
With the soft validation feature, a new flag soft validation is also introduced which will not be present in shelve data saved before 2.5 upgrade. So there will be a possibility for getting an error message with soft validation while approving the document. To overcome the issue we need to load the System extracted data in the saved data button.
Accuracy improvements SmartVision and accuracy calculation in PWF (US 71715)
Some changes in SmartExtract and PWF were implemented in order to get accuracy improvements for FOI. The changes were applied in two different areas:
-
SmartExtract FOI postprocessor: the logic applied in the postprocessor has been changed in order to get an accuracy improvement of at least 10% in multi-line and multi words FOIs
-
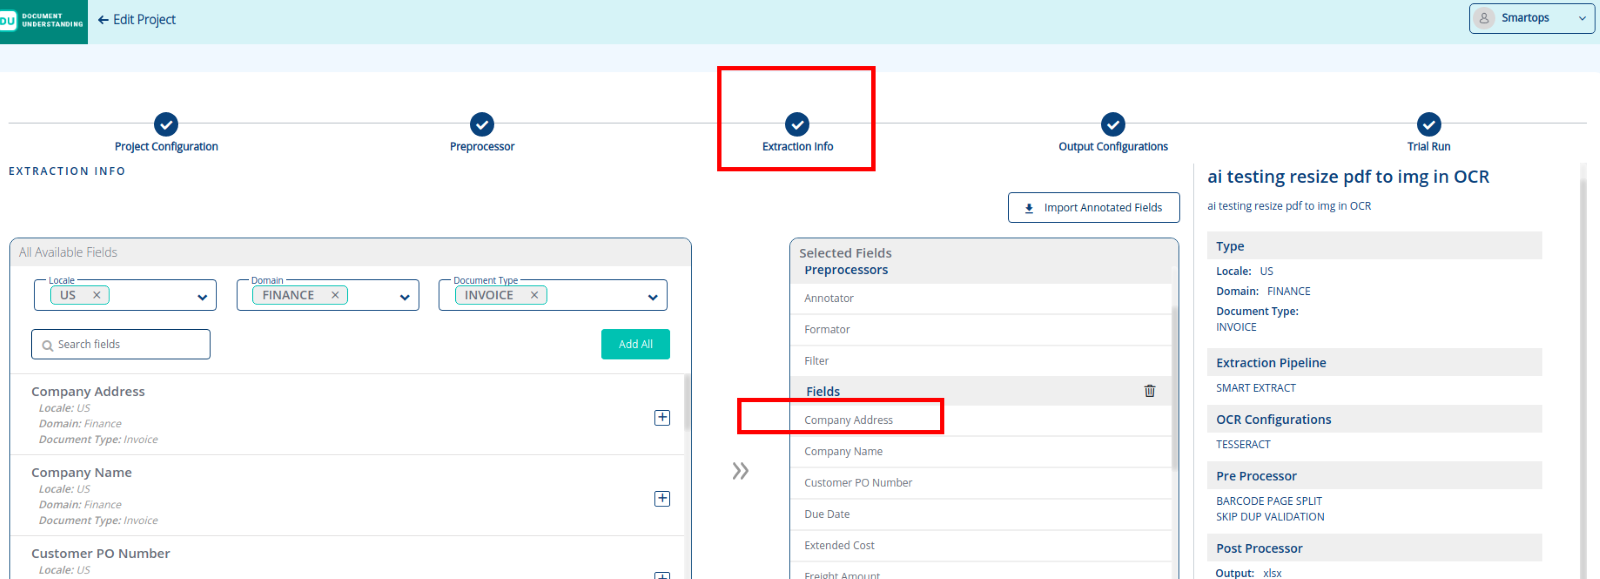
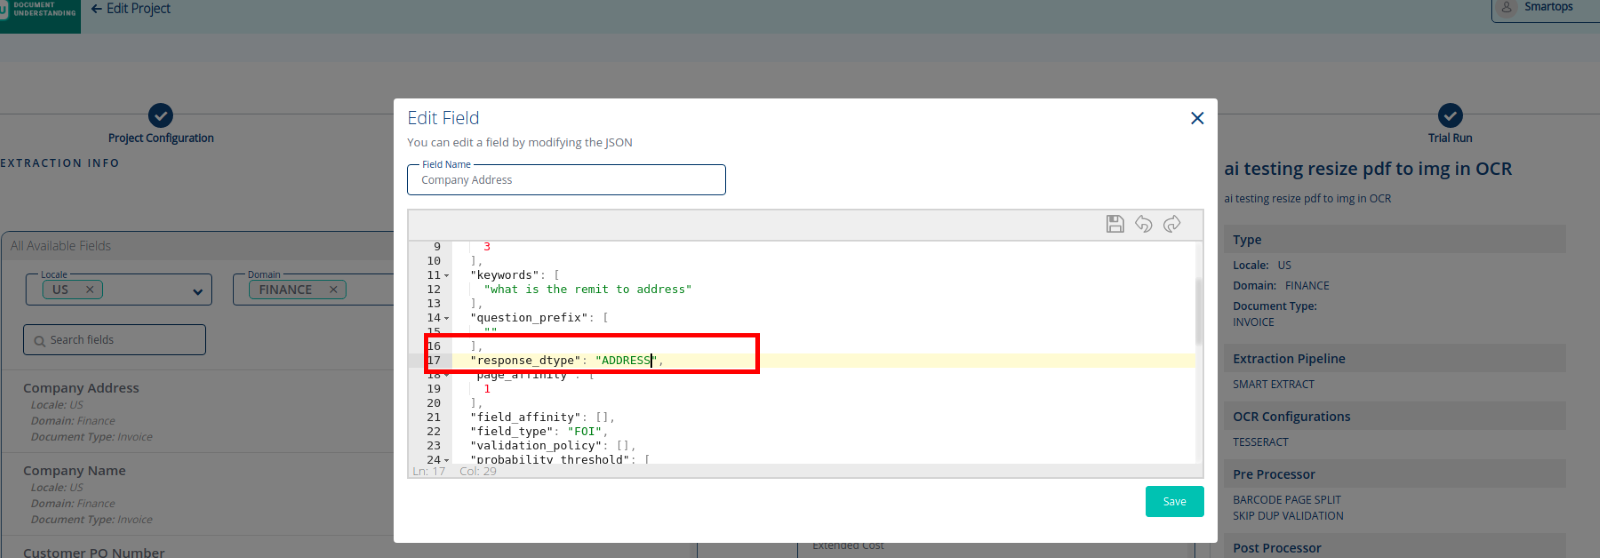
Accuracy calculation: we have added new logics for accuracy calculation based on the field type, this means that we are expecting a proper data type configured in the projects. The following data types are available:
-
ADDRESS: for those fields in which we are expecting addresses. Fields in which we are expecting long values.
-
NUMBER: for those fields which are numbers.
-
ORGANIZATION: for organization names, persons names who contains multiple words.
-
CURRENCY: for those fields with amount of money.
-
DATE: for those fields with dates.
-
ALPHA: rest FOIs in which we are expecting alphanumeric values.
-
All these fields need to be configured in DU projects in "extraction info" in fields configuration.