SmartVision Online- Post Deployment Process
Release 2.6 & 2.7 - General
-
Login to the keycloak admin console using the below URL:
Username: admin
Password: admin
-
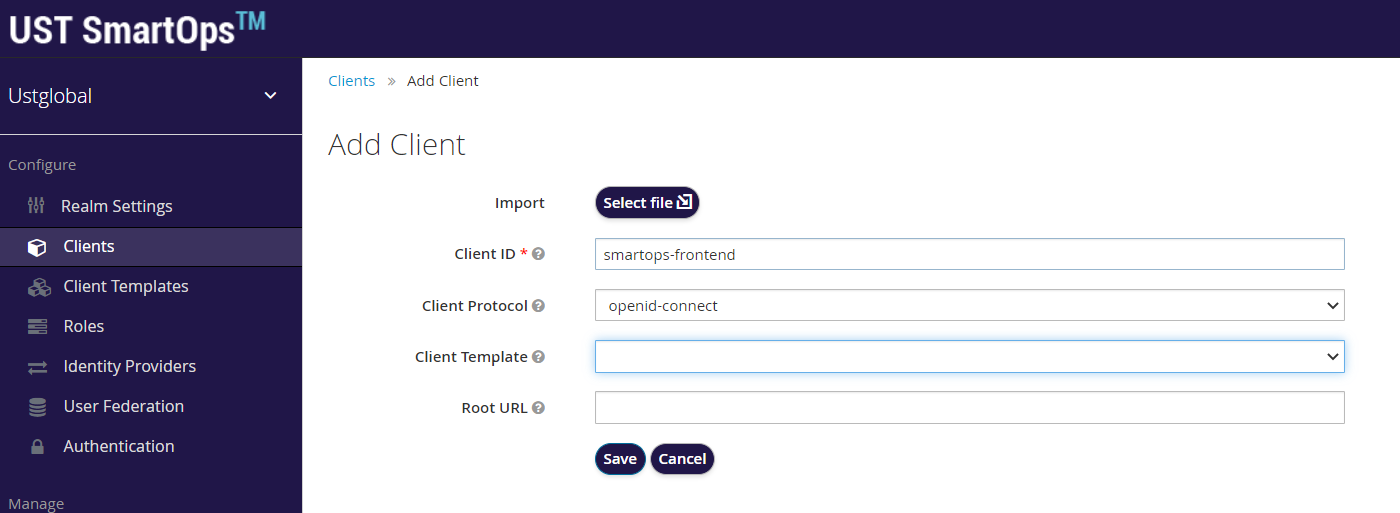
In Clients tab check for smartops-frontend. If not provided, add it as given below.
-
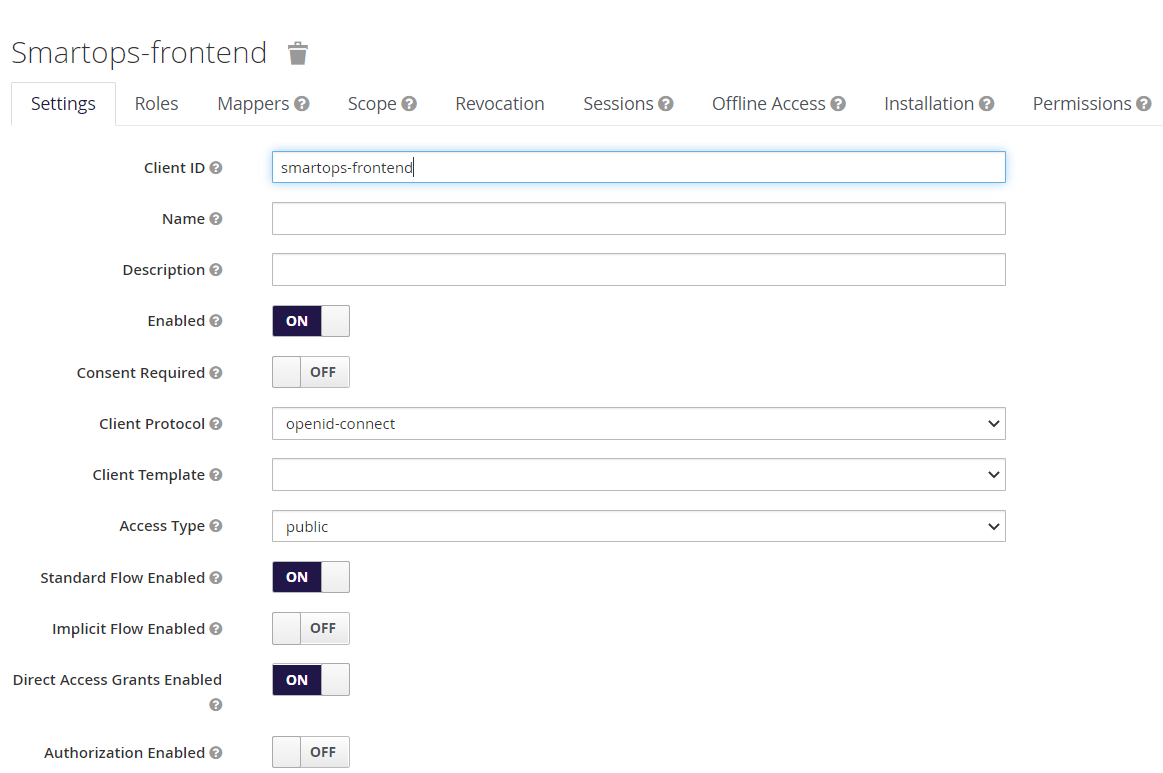
Once saved, make sure that settings are as given below:
Clients -> <Selected Client> -> Settings
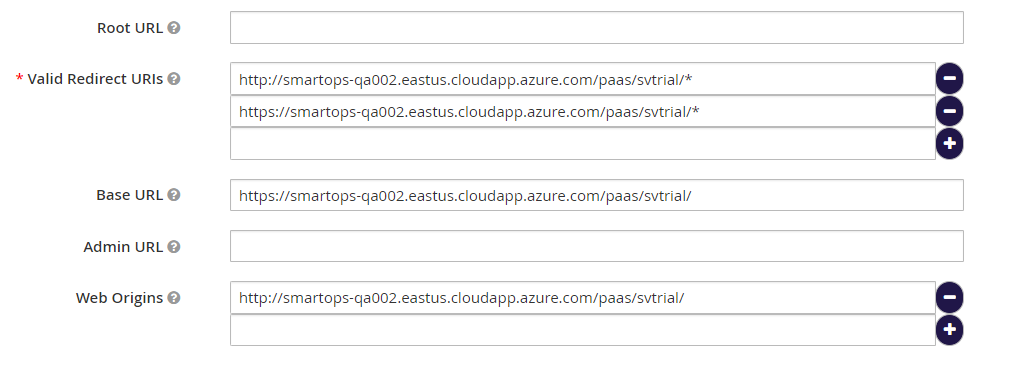
Note: Hostname should be replaced accordingly in the Valid Redirect URIs, Base URL and Web Origins. Maintain the localhost as well as other values. Only those with hostnames need to be replaced.
Base URL: https://<Hostname>/paas/svtrial
Web origins:
Valid Redirect URI: https://<Hostname>/paas/svtrial/*, http://<Hostname>/paas/svtrial/*
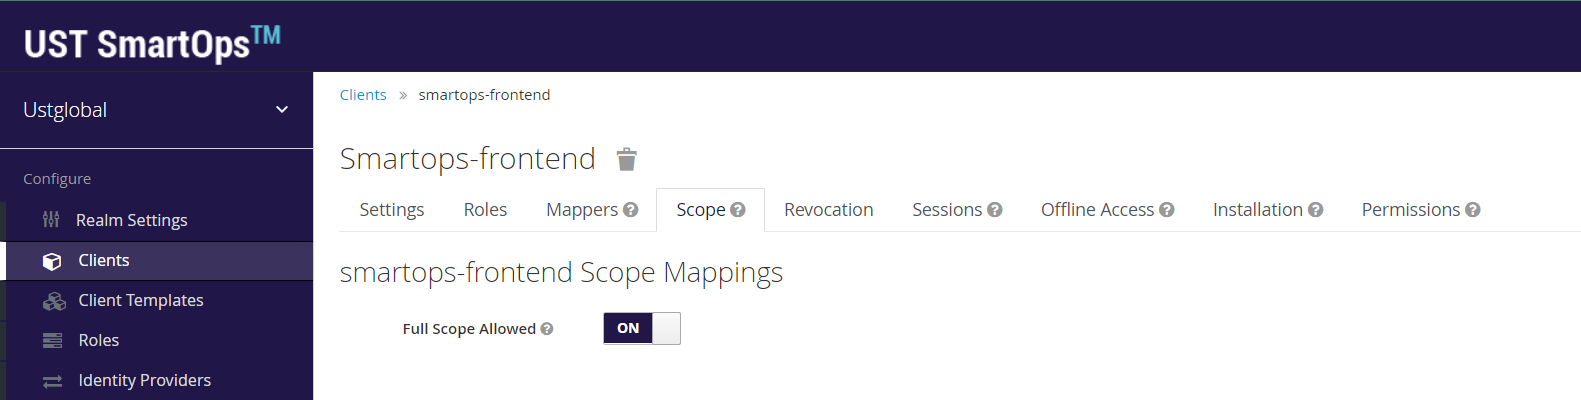
Clients -> <Selected Client> -> Scope
Clients -> <Selected Client> Mappers
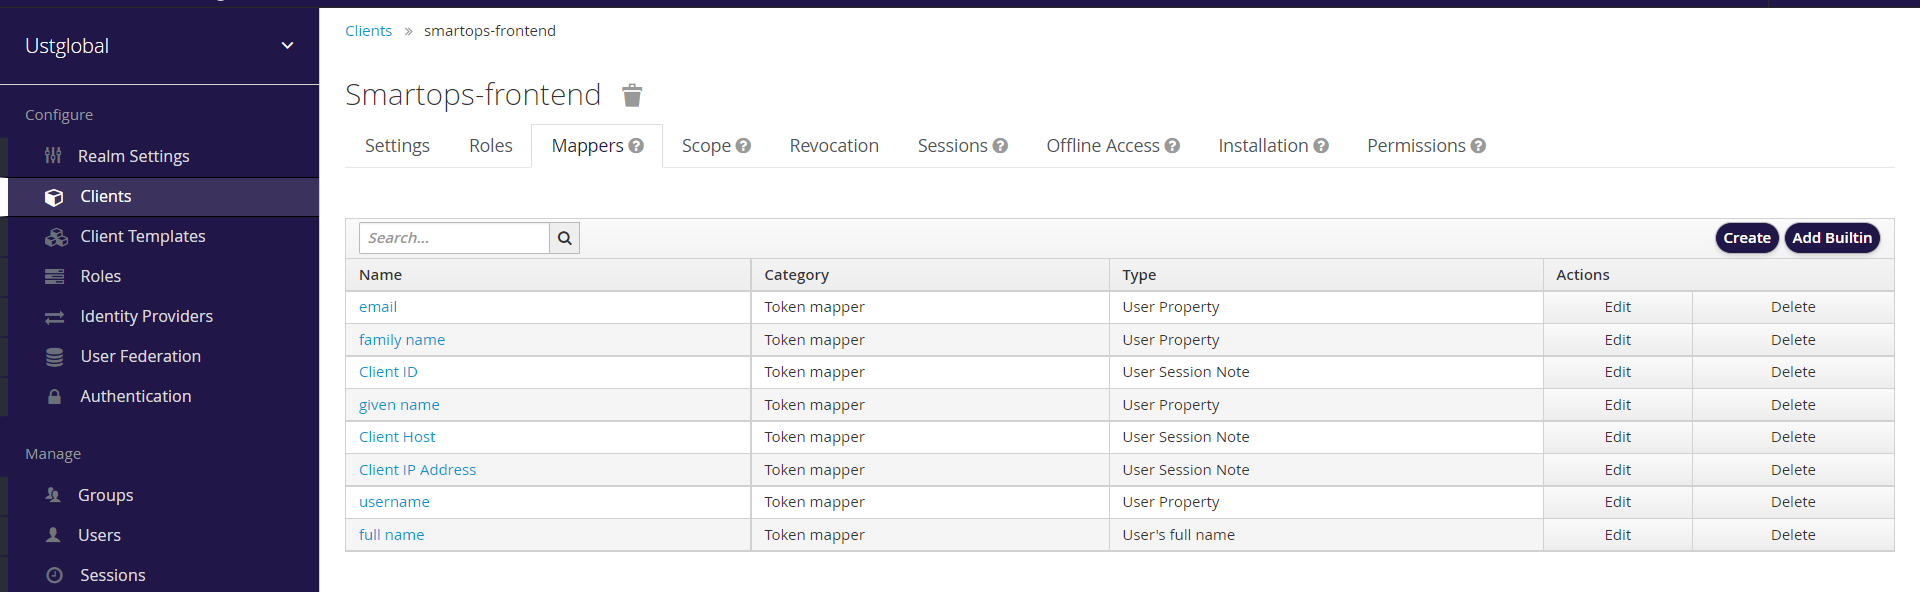
While adding the mappers, please make sure that the mapper values for the following sections should not be empty: User Session Note, Token Claim Note, Claim JSON Type.
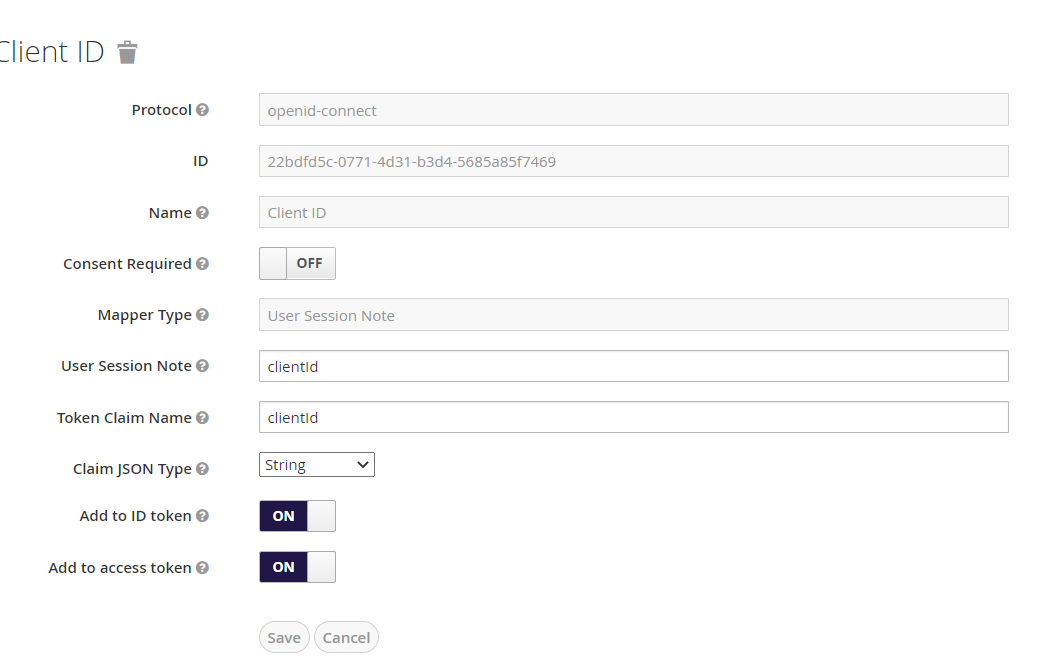
While adding Client ID the following values should be used as shown below:
User Session Note: clientId
Token Claim Note: clientId
Claim JSON Type: String
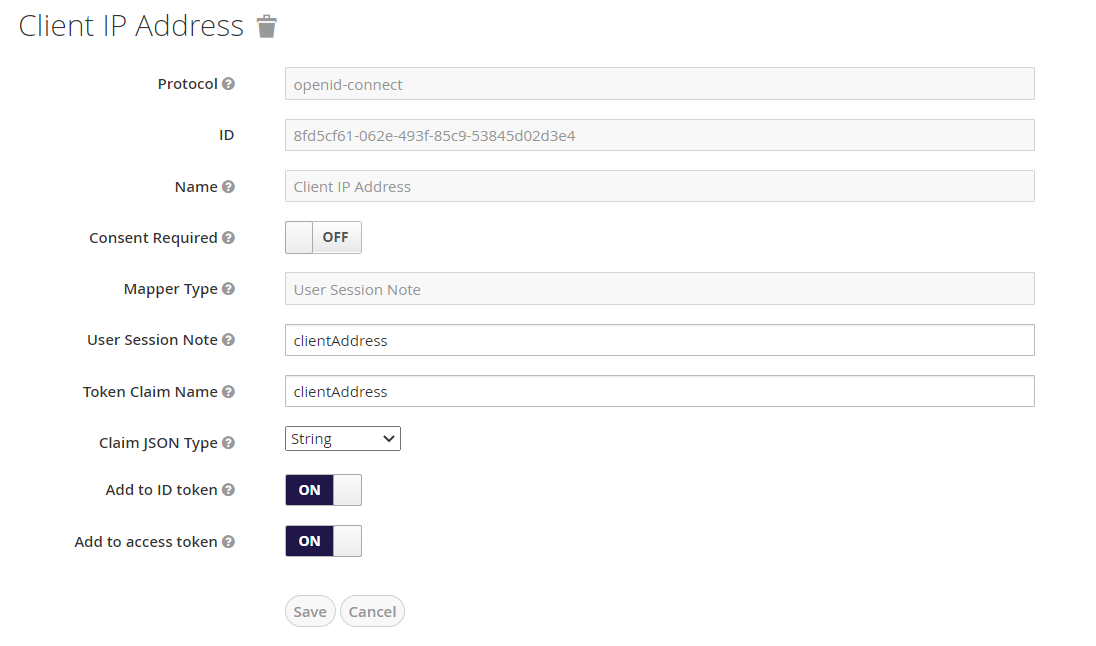
Similarly for adding the mappers for Client IP Address, the values should be
User Session Note: clientAddress
Token Claim Note: clientAddress
Claim JSON Type: String
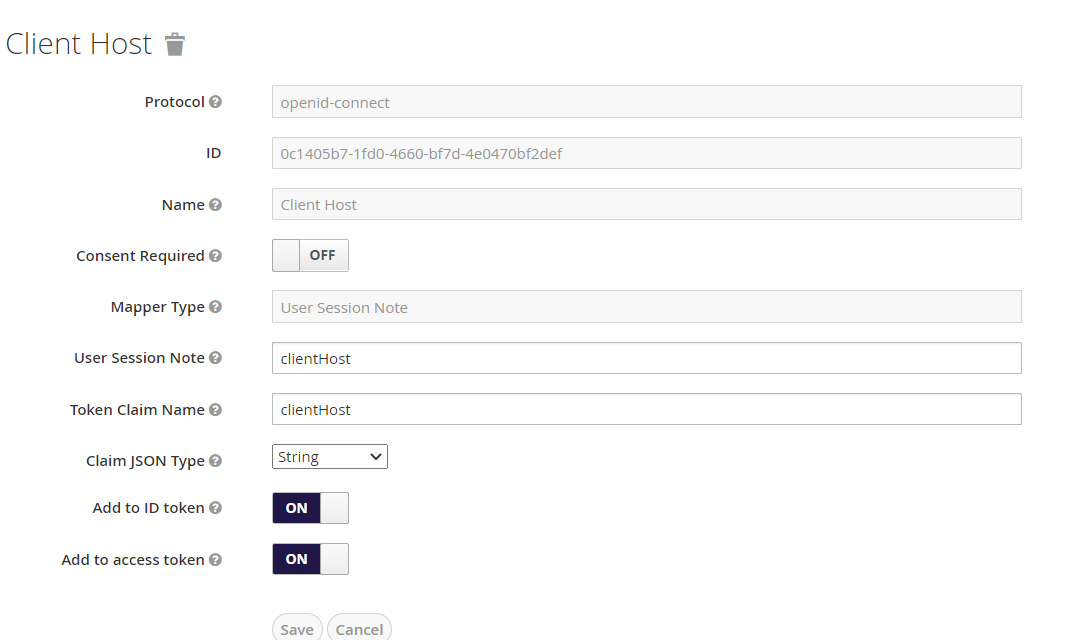
For mapper Client Host mapper, the values should be:
User Session Note: clientHost
Token Claim Note: clientHost
Claim JSON Type: String
-
Make sure trial_user and expired_user roles are available in the keycloak in the Roles tab.
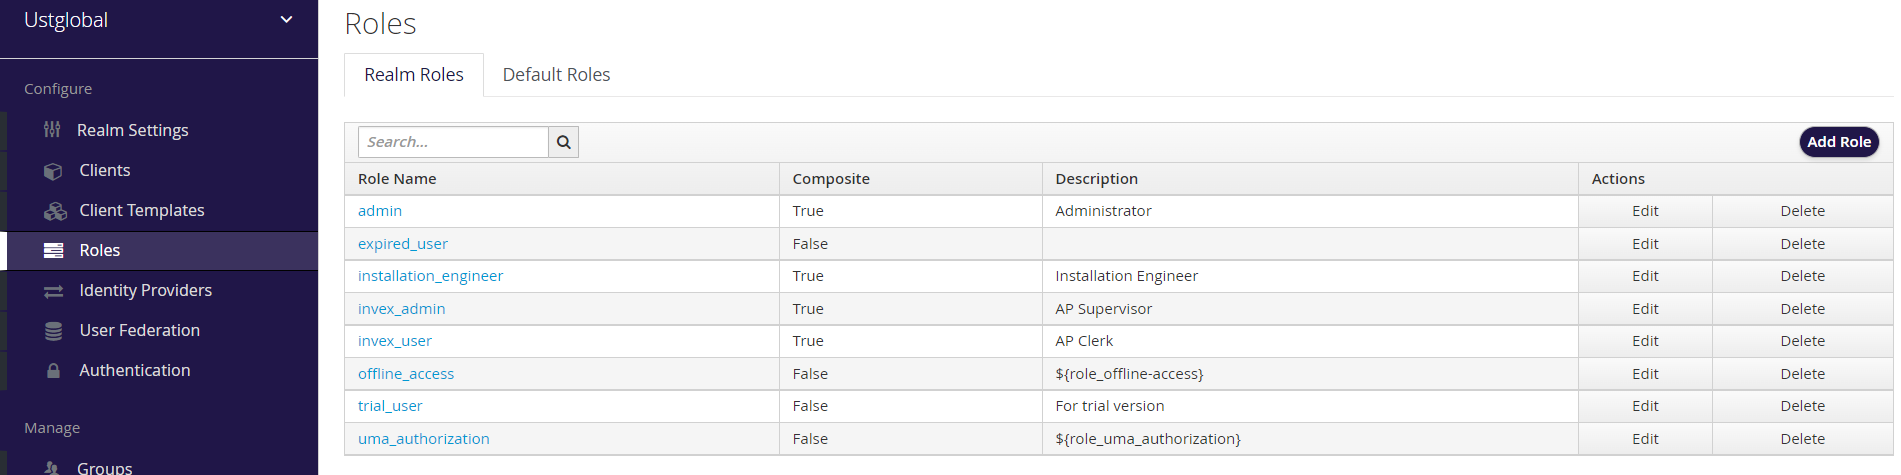 If they are not available, add those roles.
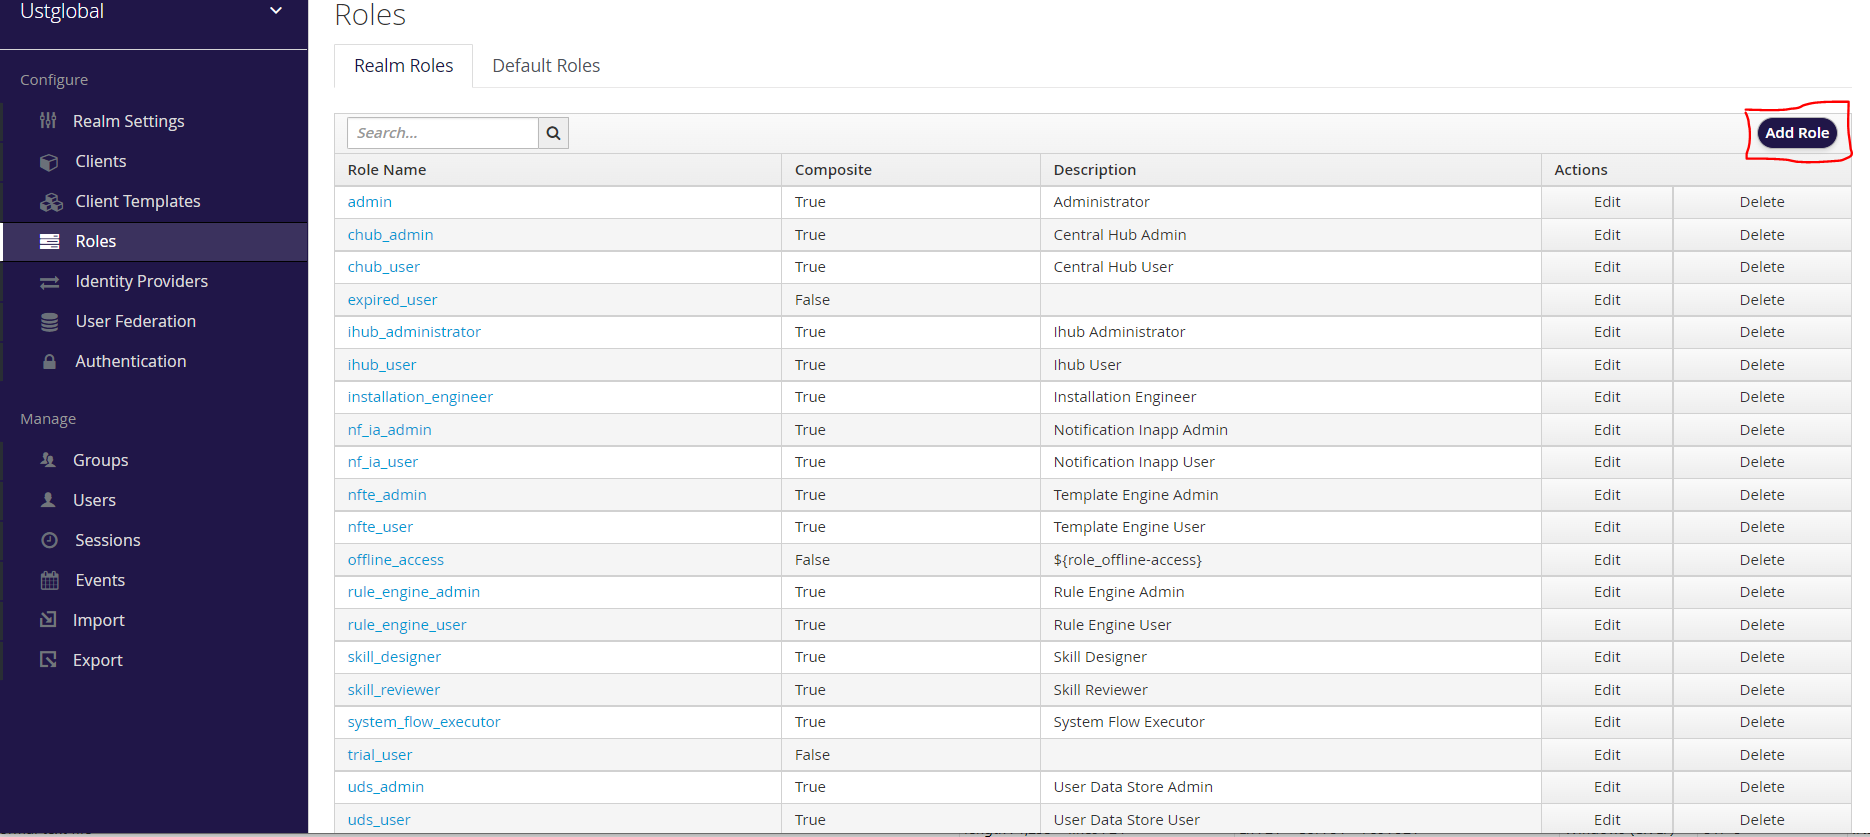
Adding a role can be done by clicking the Add Role button at the top right side of the roles table.
-
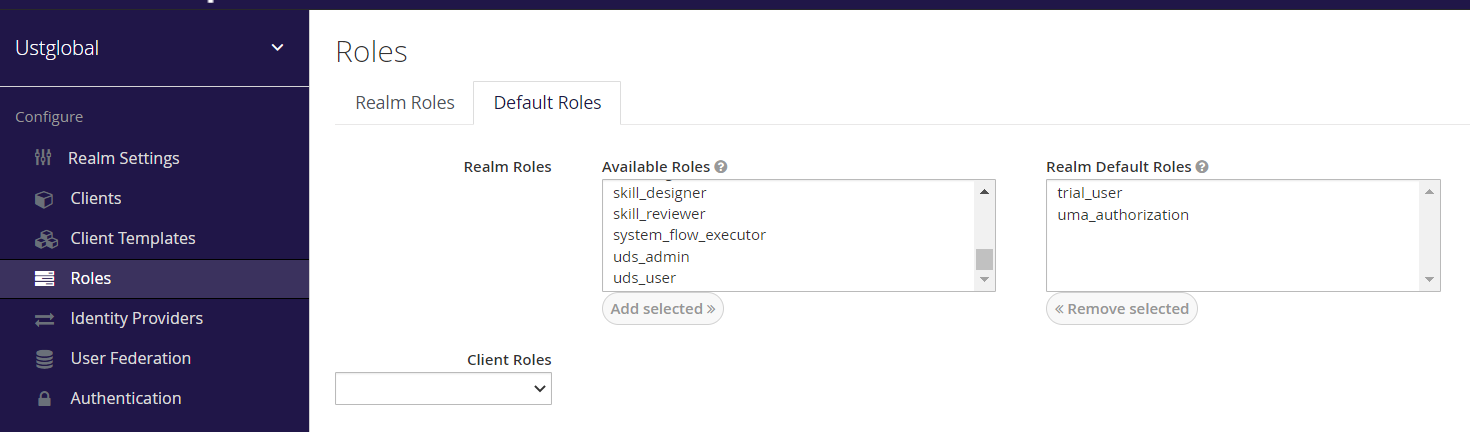
Also make sure that the trial_user is part of the default roles. If not, please add it in the keycloak as shown below.
-
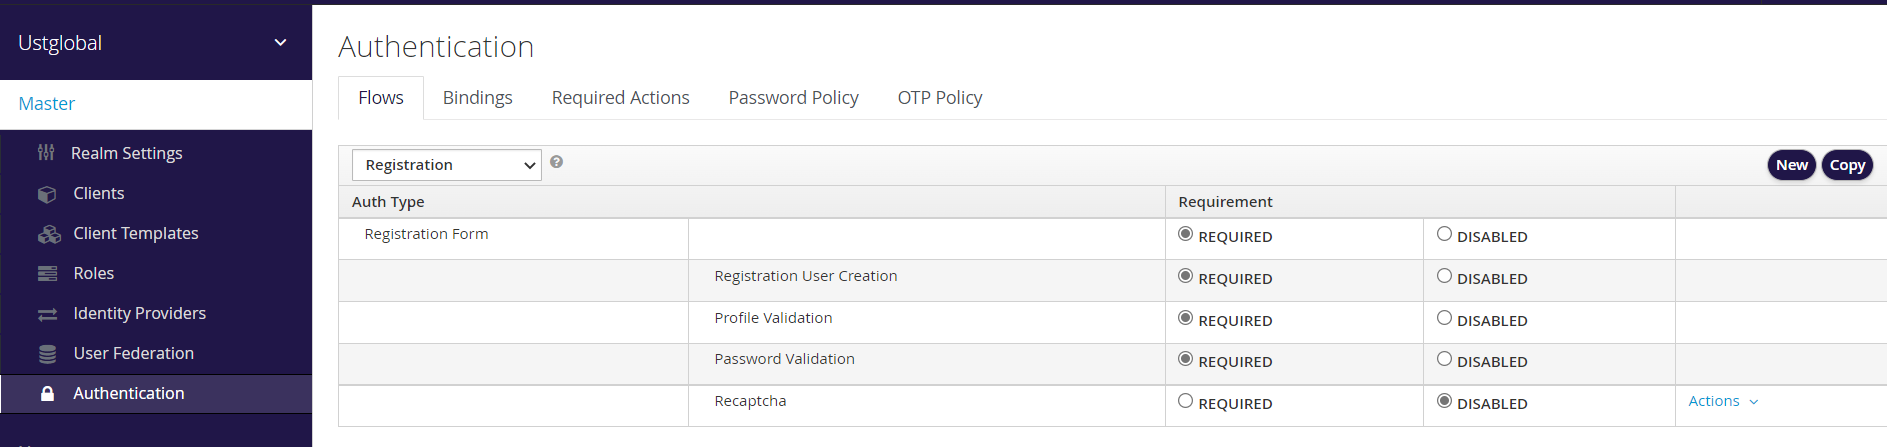
In the Authentication tab, check the flow for registration (Authentication -> Flows). Select the dropdown for Registration.
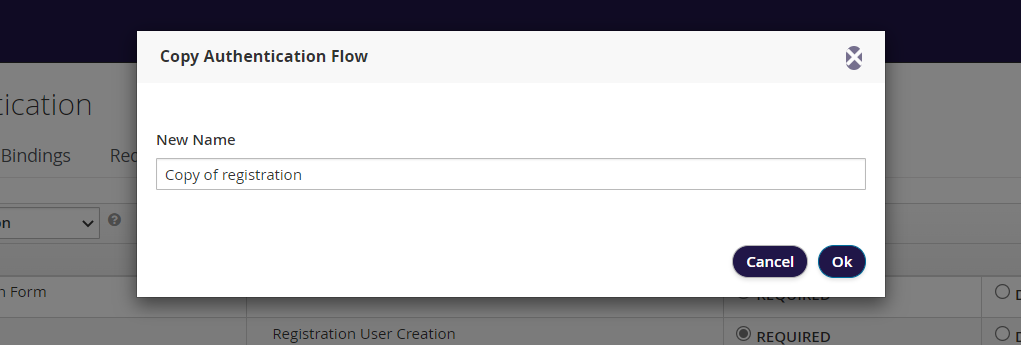
- Copy the registration flow (click the Copy button) and rename it to Custom Registration Flow
-
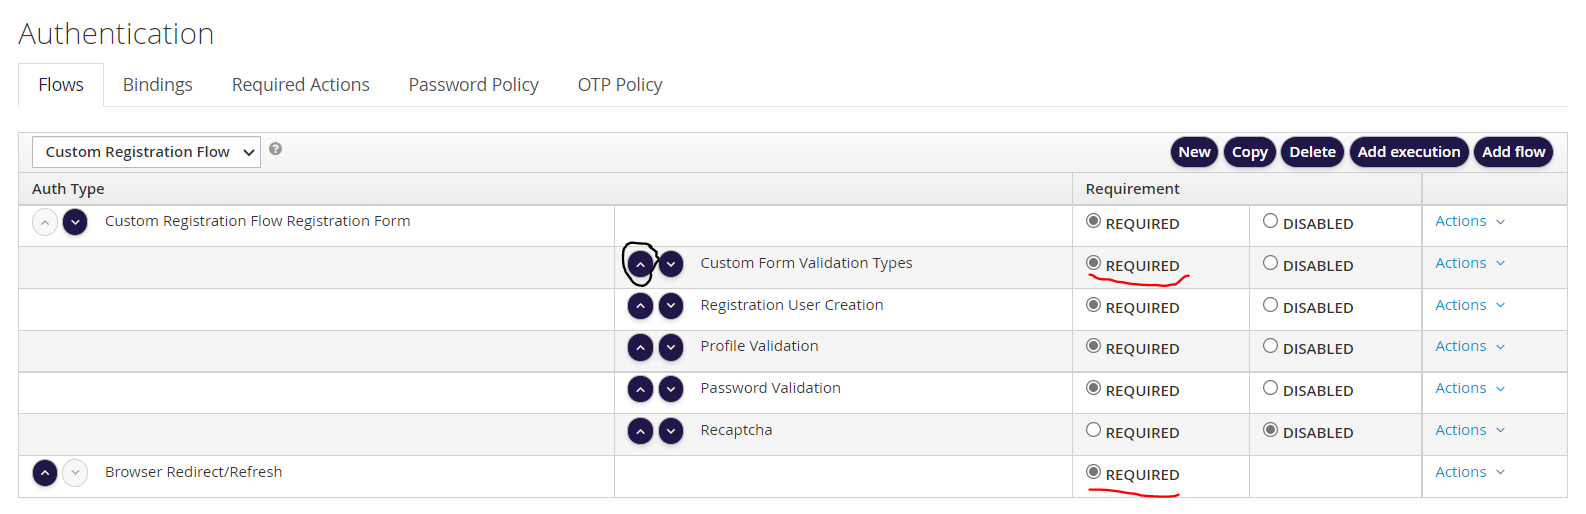
Once the copy is done, it will be shown as below. Next add an execution by selecting the button provided for “Add execution”. Select Browser Redirect/Refresh and Save it.
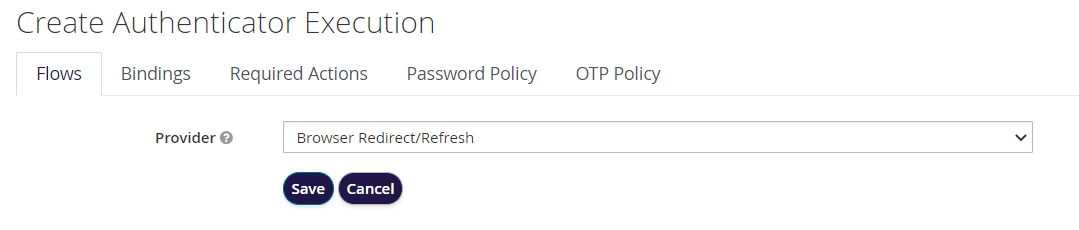
- Add a new execution by selecting the drop down from the Actions (noted by underline).
- On clicking the add execution, a provider drop down is shown. Select “Custom Form Validation Types” from the drop down. Save the selection by hitting the save button.

-
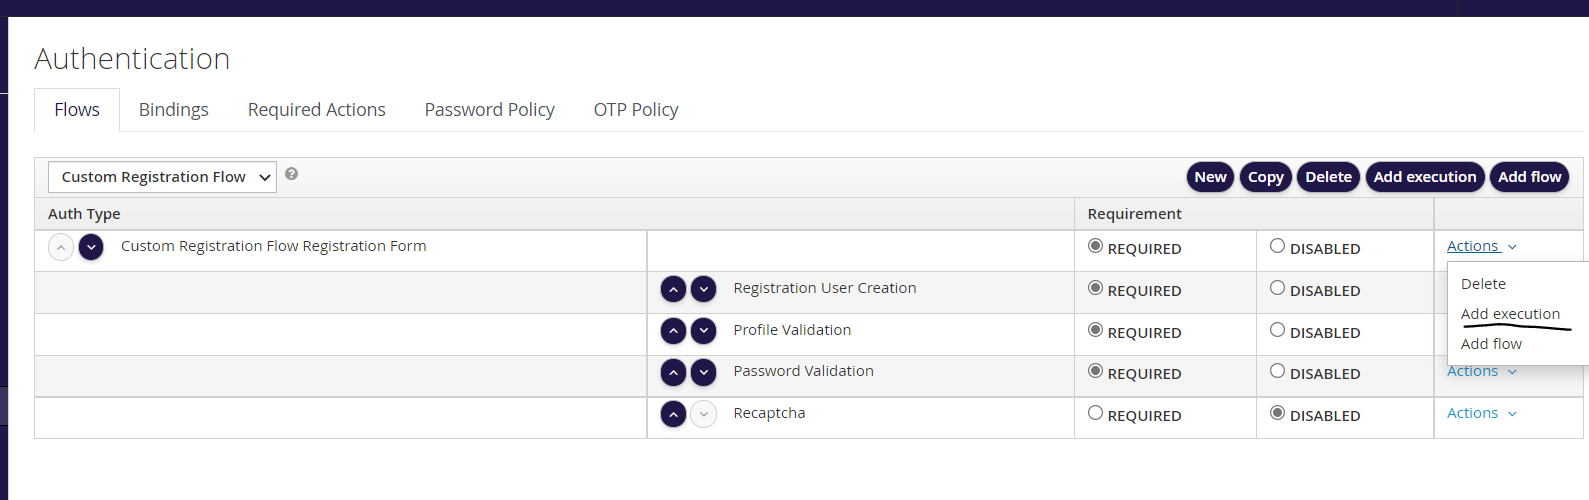
After saving, it will be shown in the Custom Registration Flow list. The entry can be moved to the top by clicking the up button just next to the execution label (as encircled in the image below). Make sure all the newly added executions are selected as REQUIRED (underlined in image below). So, the final custom registration flow will look like the image below.
-
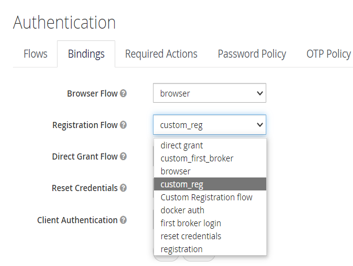
In the Bindings tab, select the registration flow to use the newly created “Custom Registration Flow” and save.
-
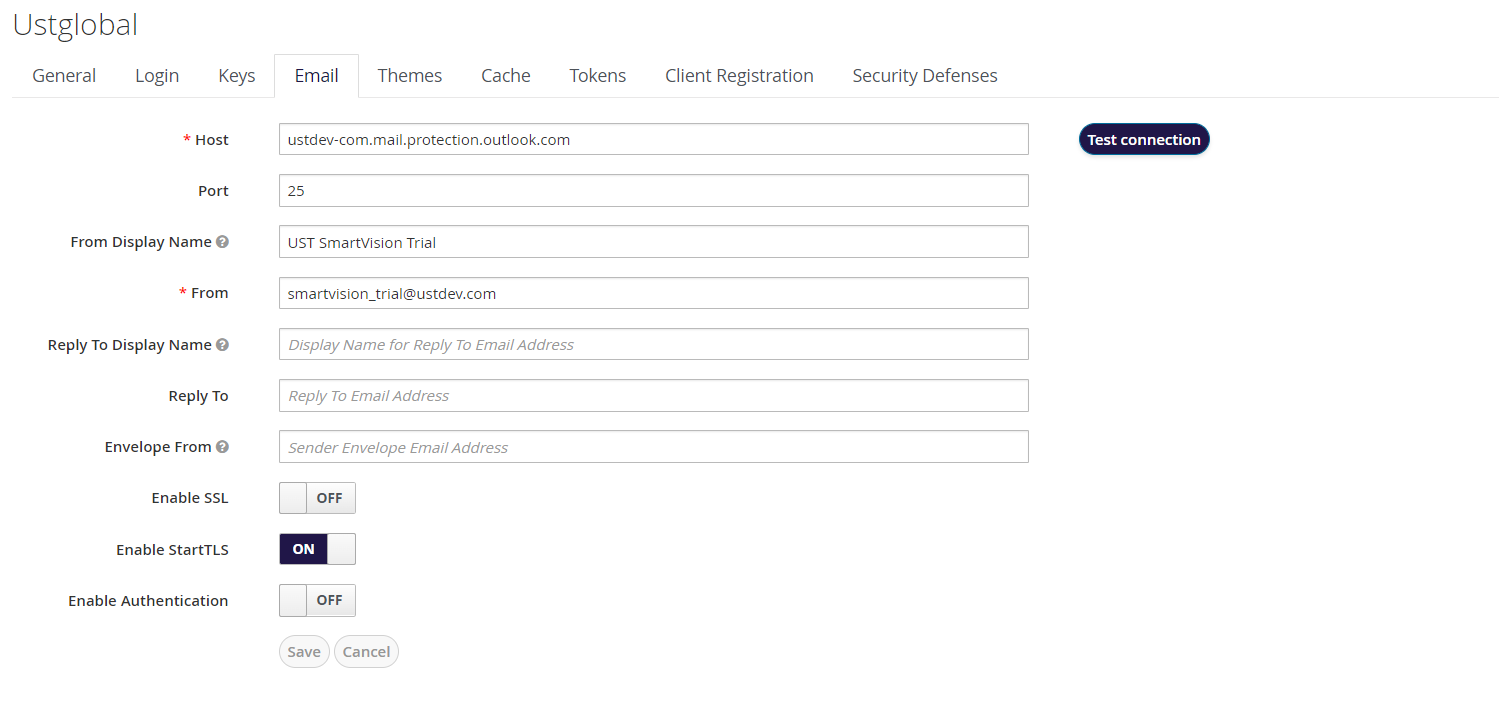
Configure email for the sending verification emails while registration.
SMTP Host: ustdev-com.mail.protection.outlook.com
SMTP port: 25
Mail ID: smartvision_trial@ustdev.com
Password: not given.
This can be done at Realm Settings -> Email tab as shown below.
-
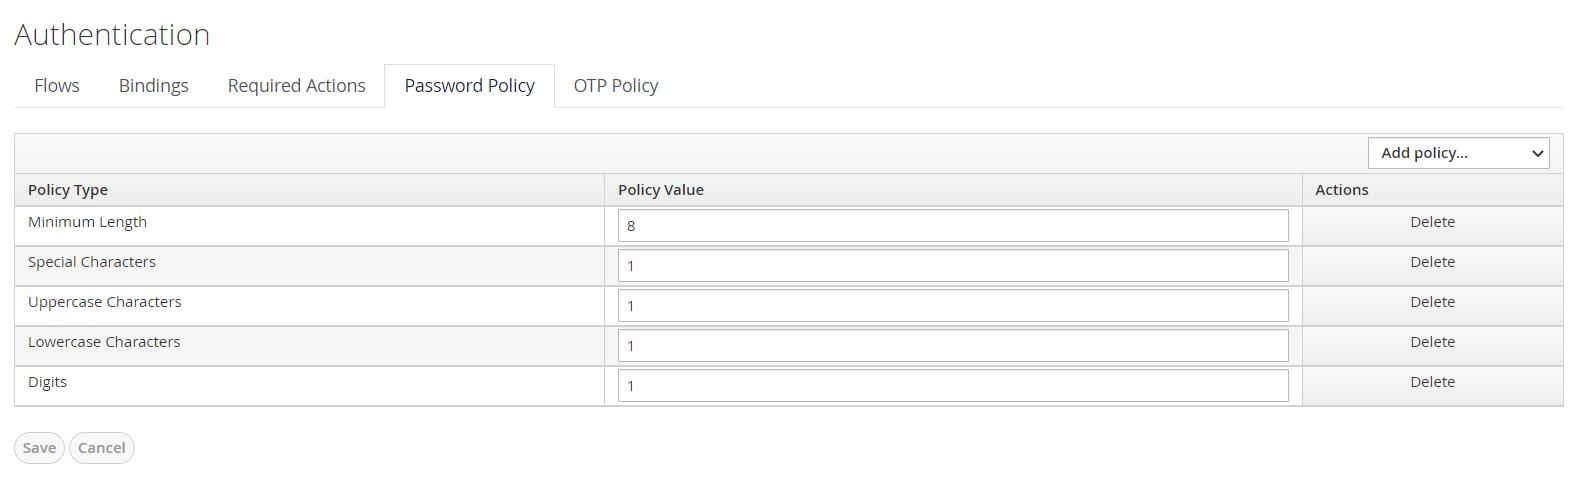
Configure password policy for creating passwords
Add the following password policies from Authentication-> Password Policy tab as shown below
Release 2.7
-
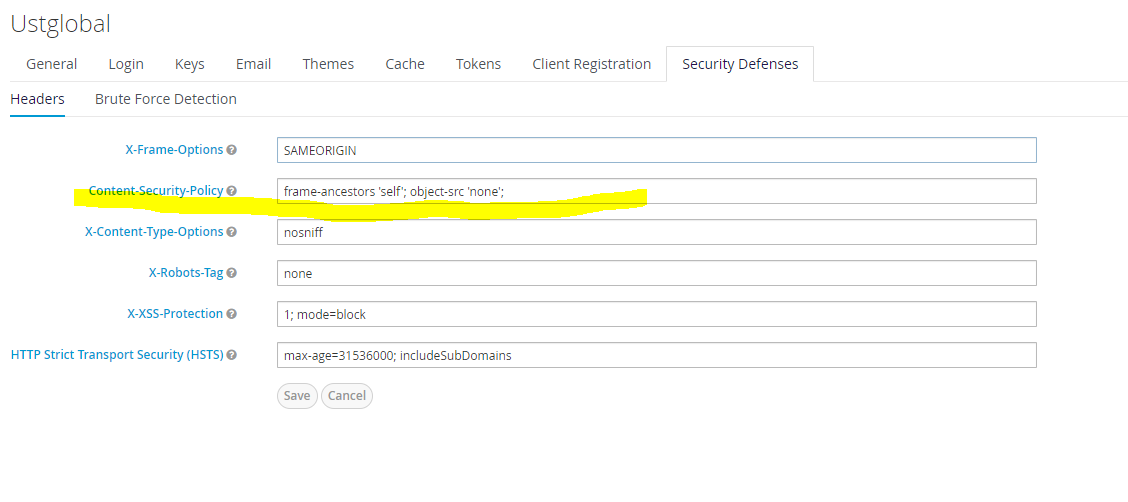
Remove Frame src for playing Vimeo videos for onboarding. Remove frame-src from Security Defences/ Content-Security-Policy to play Vimeo videos for the product tour
-
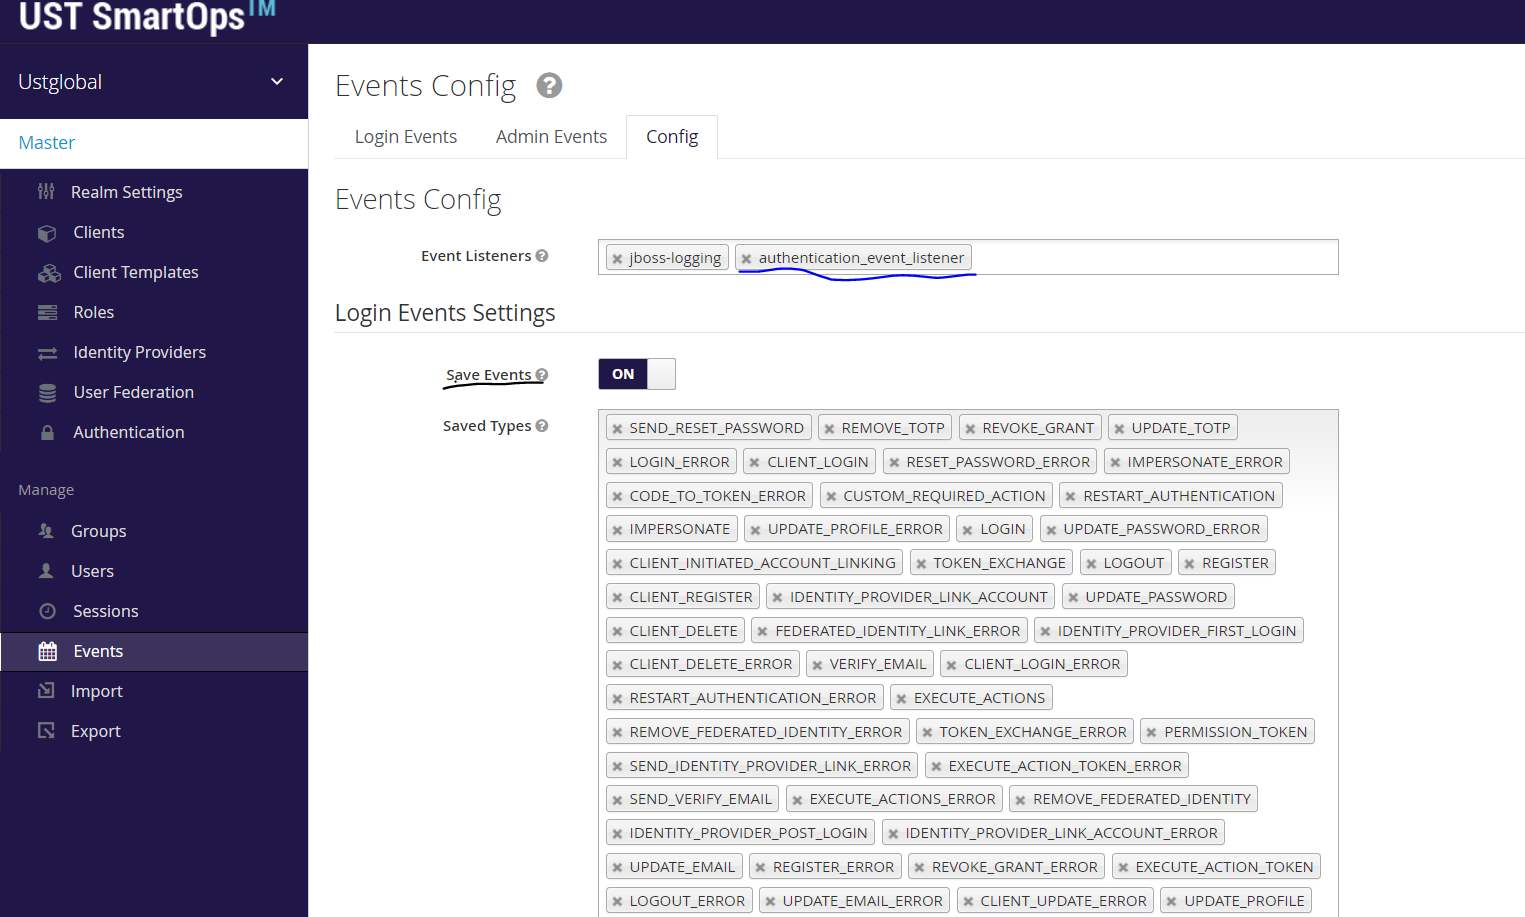
In the Events configuration, include the authentication event listener (blue underlined one). Also, make sure the login event settings are saved by selecting ON for Save events (black underlined one).
-
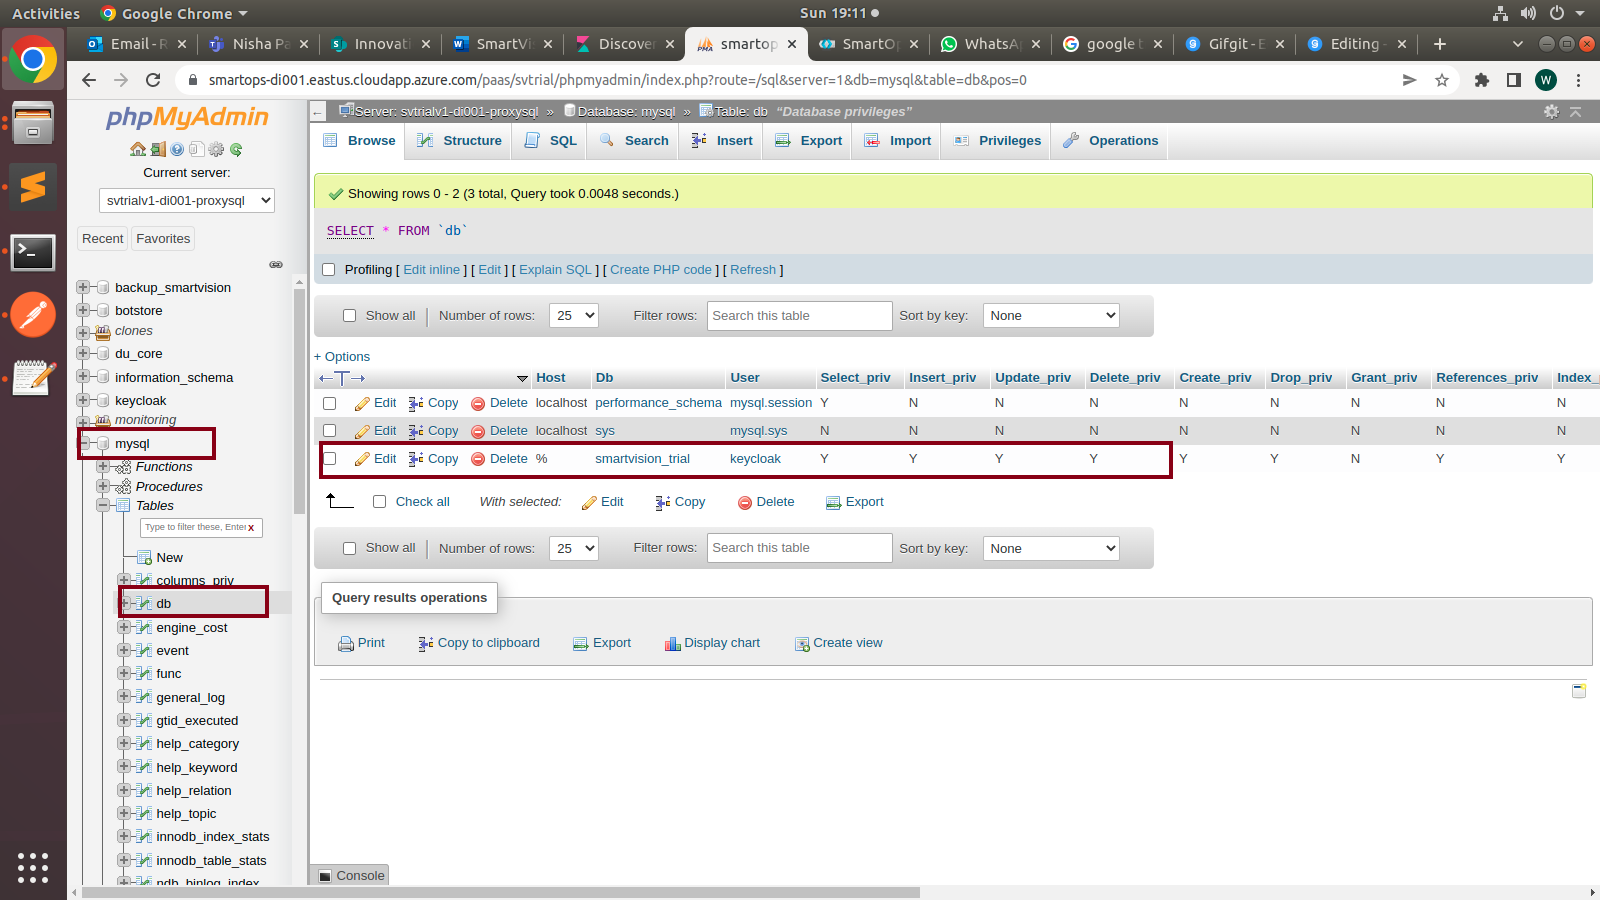
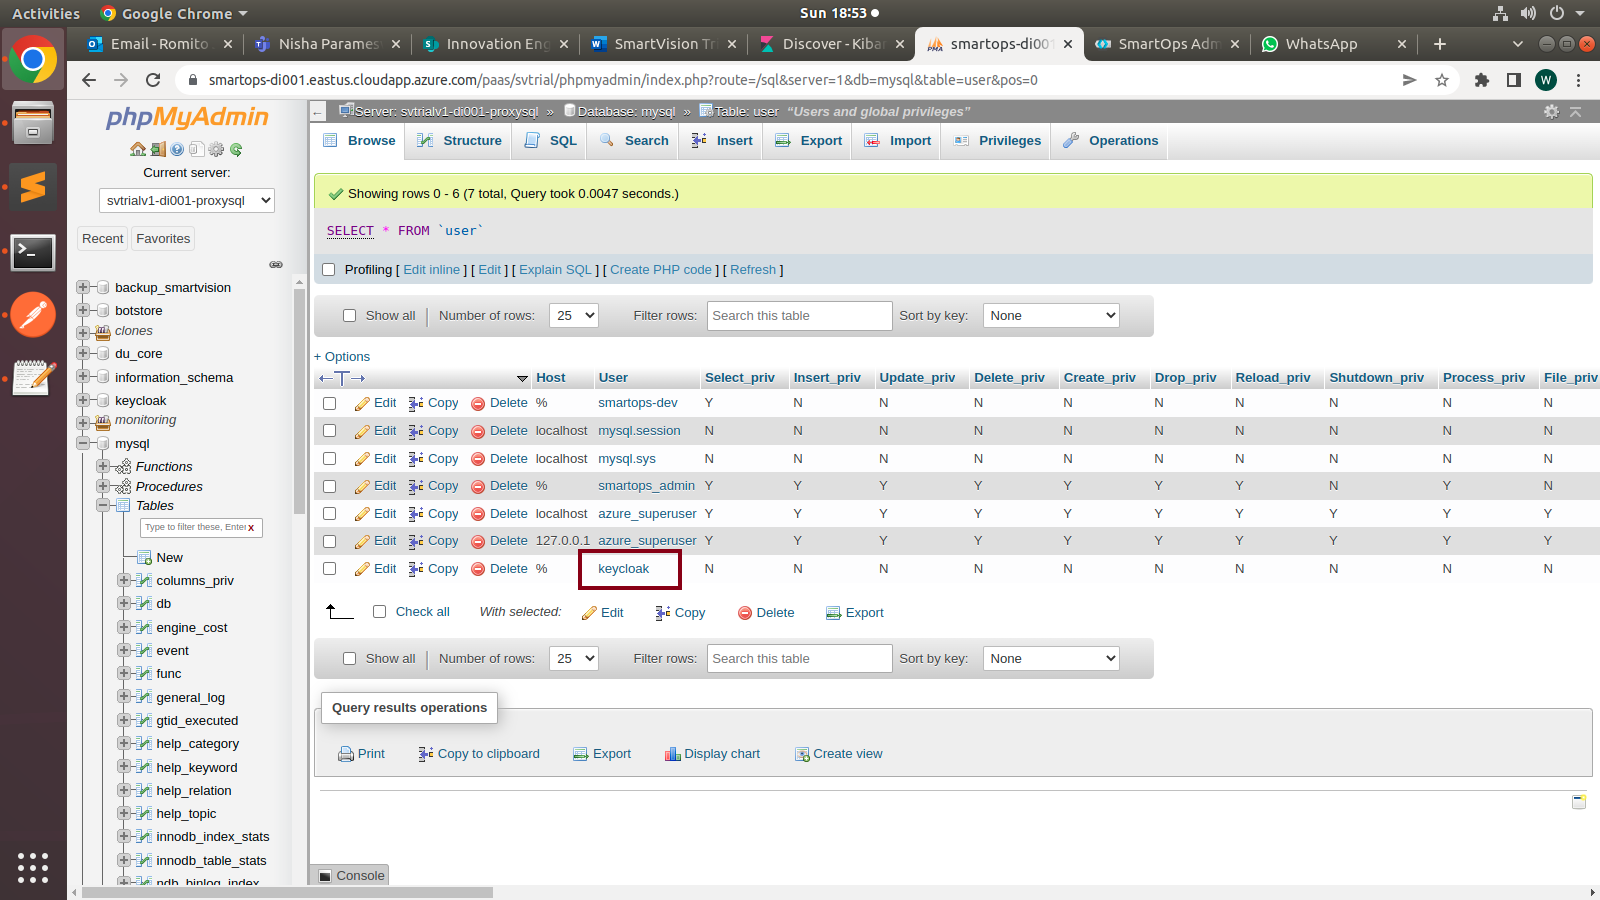
Delete user details from DB
After expiry time out (60 days) if the user logs in, the user is removed from keycloak DB and its details from the SVT DB.|
keycloak user is the one that uses the connection from keycloak app to mysql database. -
Check keycloak user exists or not in database.
mysql > user
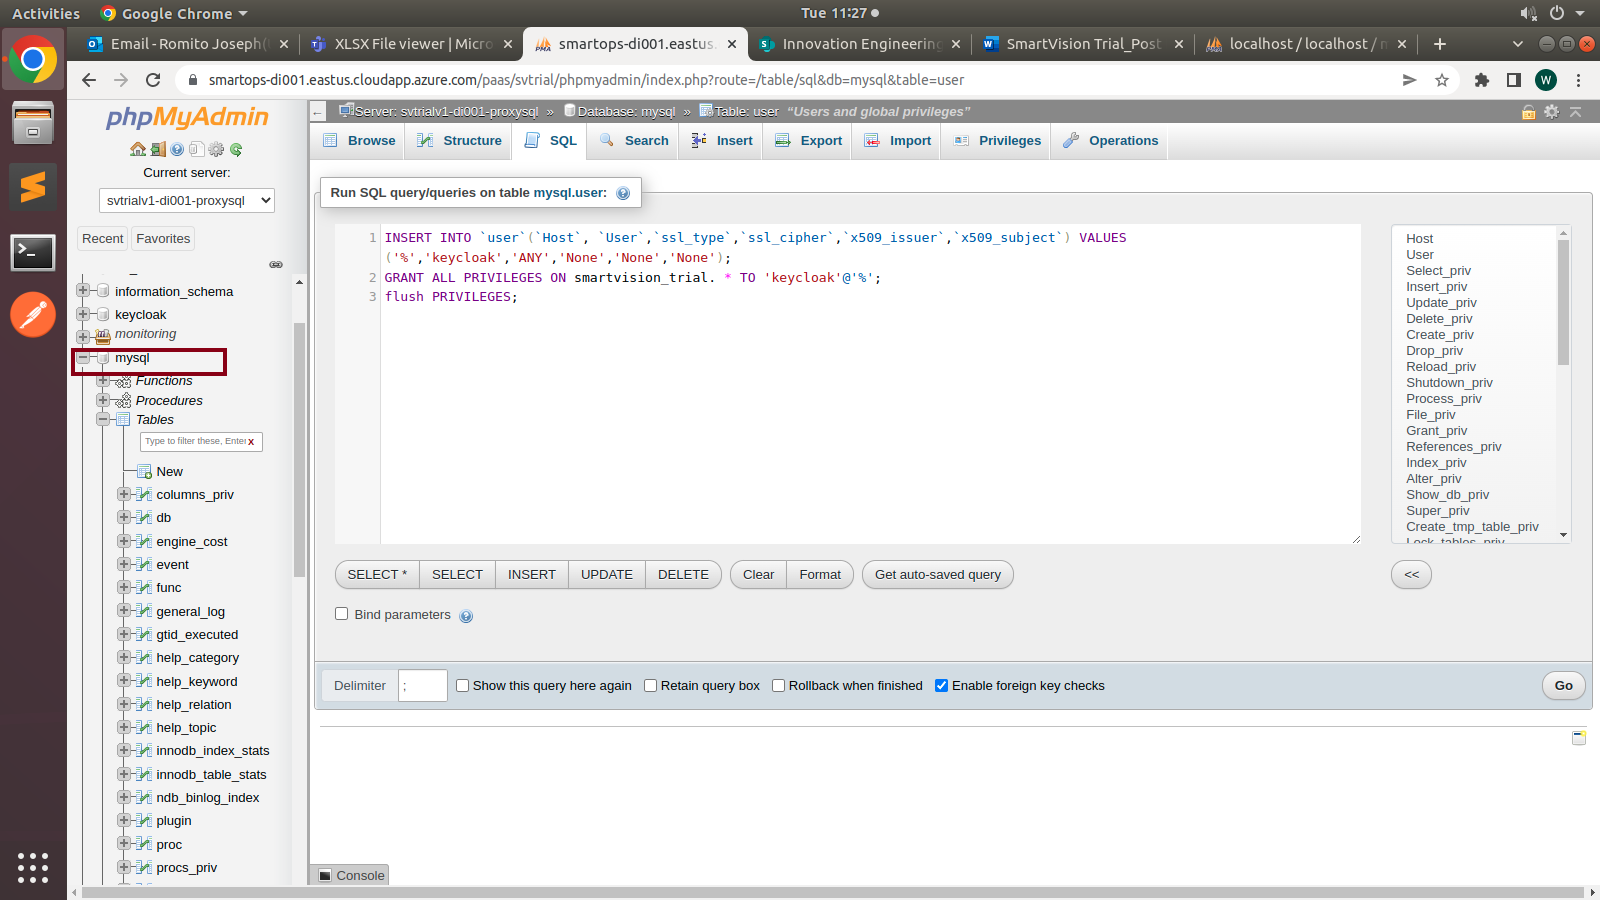
If keycloak user is not exist in user table then need to create a user using following commands
INSERT INTO `user`(`Host`, `User`,`ssl_type`,`ssl_cipher`,`x509_issuer`,`x509_subject`) VALUES (’%,keycloak,'ANY','None','None','None')
And privileges should be supplied by the following set of commands:
GRANT ALL PRIVILEGES ON smartvision_trial. * TO 'keycloak'@'%';
flush PRIVILEGES;
Check privileges added or not in keycloak user
mysql >db