Core Platform v8.0 - Deployment Process
Contents
- Overview
- Existing Environment Migration Using SmartPkg
- Smartpkg Installation in bastion
- kubeseal Installation in Bastion Machine
- Sealed Secret Controller Installation
- 4. Generate sealed secret from the existing secret
- Take a backup for all the helm manifests
- Delete helm releases
- Application Deployment
- Create or update new sealed-secret
- Secret Additions As per Release
- Deploy Core Platform package
Overview
SmartOps product deployment configuration has been revised to support better flexibility and configuration. Products will be packaged in “Smart package” and will be deployable using tool “smartpkg”. This document covers instructions to install core-platform 8.0.1 using smartpkg.
Same set of instructions can be followed hereafter except the migration steps, which applies only for first time.
Existing Environment Migration Using SmartPkg
Smartpkg Installation in bastion
Smartpkg is a python-based tool to help managing and deploying smartops Product packages based on helm charts. This is a prerequisite to deploy smartOps products. SmartPkg should be installed in machine from where the Kubernetes deployment happens which is usually a bastion machine.
Below are the pre-requisites for installing smartpkg:
-
Python3 should be installed in the machine
Installation Steps
-
Login to the machine you want to install smartpkg
-
Execute => sudo apt-get install python3-pip
-
Execute => python3 -m pip install ConfigArgParse wheel pyyaml jsonschema
-
Execute => python3 -m pip install smartpkg==0.0.17 -i https://ci3r7qwshs5jhr6j34yykoi4f3p7f2t3546zju65dmxzkzbl4d5q@pkgs.dev.azure.com/USTInnovationEngineering/SmartOps/_packaging/python-lib/pypi/simple --
-
Verify the installation by => smartpkg –help
Note: If smartpkg: command not found error shows up, logout and login or open a new session
kubeseal Installation in Bastion Machine
-
Install kubeseal using below commands
|
echo "Installing kubeseal..." wget https://github.com/bitnami-labs/sealed-secrets/releases/download/v0.15.0/kubeseal-linux-amd64 -O kubeseal sudo install -m 755 kubeseal /usr/local/bin/kubeseal kubeseal --version |
Sealed Secret Controller Installation
Reference Link: https://github.com/bitnami-labs/sealed-secrets#installation
-
Sealed Secrets is an open-source tool and it is composed of two parts
-
-
A cluster-side controller / operator
-
A client-side utility: kubeseal
-
-
The kubeseal utility uses asymmetric crypto to encrypt secrets that only the controller can decrypt
-
These encrypted secrets are encoded in a SealedSecret resource. Here is how it looks an example:
apiVersion: bitnami.com/v1alpha1
kind: SealedSecret
metadata:
name: mysecret
namespace: mynamespace
spec:
encryptedData:
foo: AgBy3i4OJSWK+PiTySYZZA9rO43cGDEq.....
-
Install sealed-secret-controller after creating namespace from the jfrog
helm repo add smartops-helm-virtual https://ustsmartops.jfrog.io/artifactory/smartops-helm-virtual --username <jfrog-username> --password <jfrog-password>
kubectl create ns sealed-secrets-controller –context kc-smartops-platform-qa01
helm upgrade --install -n sealed-secrets-controller sealed-secrets-controller-rel smartops-helm-virtual/sealed-secret-controller --version 0.0.0 --set global.namespace=sealed-secrets-controller --kube-context kc-smartops-platform-qa01
4. Generate sealed secret from the existing secret
-
Create a folder and switch to that folder
mkdir core-platform && cd core-platform
-
Get a copy of the existing secret to a file
-
Seal the secrets using kubeseal command
kubectl get secret smartopsv1-qa01-secret -n smartopsv1-qa01 --context kc-smartops-platform-qa01 -o yaml > smartopsv1-qa01-secret.yaml
kubeseal --controller-namespace=sealed-secrets-controller --controller-name=sealed-secrets-controller --context kc-smartops-platform-qa01 --format=yaml < smartopsv1-qa01-secret.yaml > smartopsv1-qa01-sealed-secret.yaml
Note: Please make sure to include extra secrets added for each Release in secret.yaml file before it is sealed using kubeseal command.
-
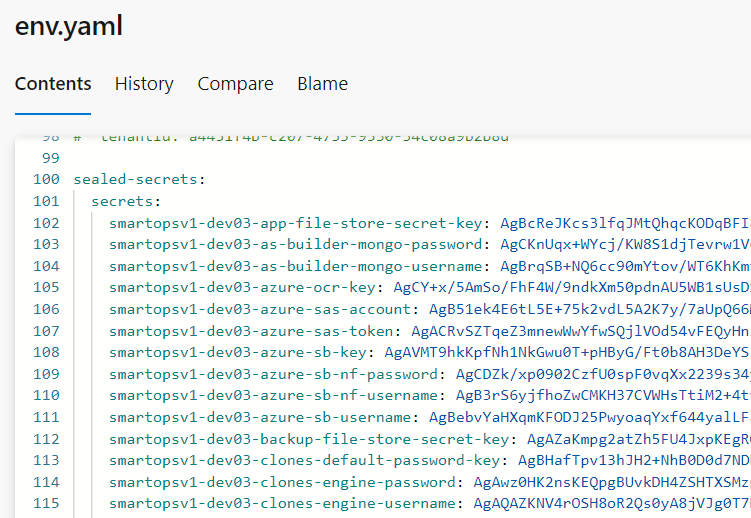
Copy the generated sealed-secrets to the external configuration file in env.yaml as below.
Take a backup for all the helm manifests
-
Fetch the manifest of all the helm releases using below script (Please substitute namespace and kube-context wherever required)
manifest.sh
#!/bin/bash
helm ls -n smartopsv1-qa01 --kube-context kc-smartops-platform-qa01 | cut -d' ' -f1 > releases.txt
mkdir cp-backup
while read line; do helm get manifest $line -n smartopsv1-qa01 --kube-context kc-smartops-platform-qa01 > "cp-backup/$line.yaml"; done < releases-cp.txt
-
Provide execution permission and execute manifest.sh
|
chmod +x manifest.sh bash manifest.sh |
-
Fetch manifest for logmon which is in different namespace
|
helm get manifest smartops-logmon-logmon-rel -n smartops-logmon --kube-context kc-smartops-platform-qa01 > cp-backup/smartops-logmon.yaml |
Delete helm releases
-
Execute the script to uninstall all the releases from releases.txt file
delete_release.sh
#!/bin/bash
while read line; do helm uninstall $line -n smartopsv1-qa01 --kube-context=kc-smartops-platform-qa01; done < releases-cp.txt
-
Provide execution permission and execute delete_release.sh
|
chmod +x delete_release.sh bash delete_release.sh |
-
Uninstall all the remaining releases
|
helm uninstall smartops-logmon-logmon-rel -n smartops-logmon --kube-context kc-smartops-platform-qa01 helm uninstall sealed-secrets-controller-rel -n sealed-secrets-controller --kube-context kc-smartops-platform-qa01 helm uninstall smartops-common-gpu-setup-rel -n smartops-common --kube-context kc-smartops-platform-qa01 helm uninstall smartops-common-secret-setup-rel -n smartops-common --kube-context kc-smartops-platform-qa01 |
-
Cleanup of CustomResourceDefinition and Registrykey secret needs to be manully
-
The nginx service may show error while deleting Load Balancer due to a dependency on a node-pool with 0 instances
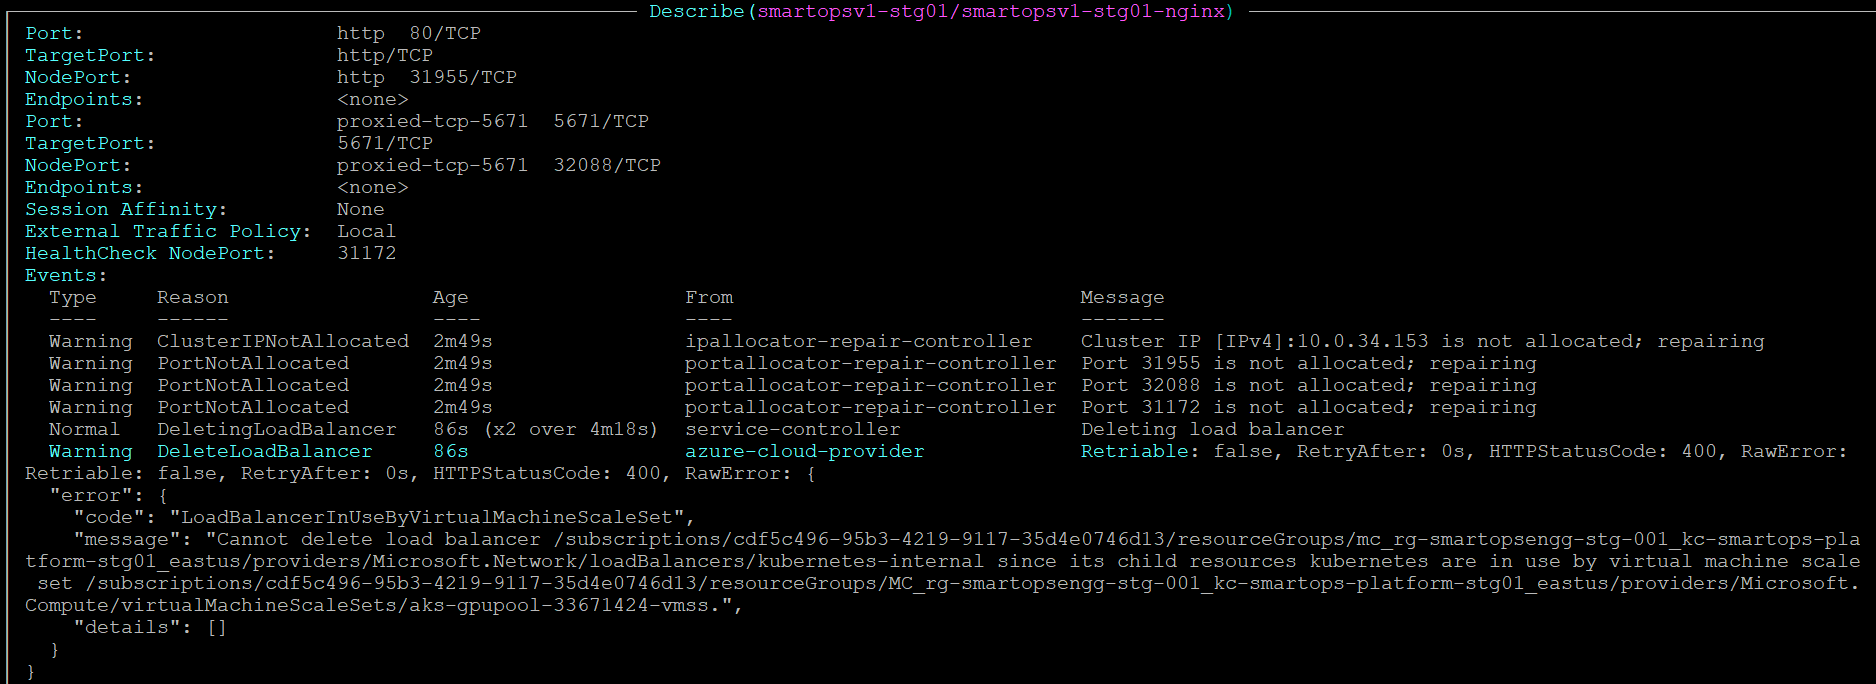
Resolution: Scale the gpupool vmss from 0 to 1 and wait till the instance gets created. Automatically the Load Balancer will get deleted and nginx service will get deleted.
-
Migrate environment.json to env.yaml (external configuration files)
Application Deployment
Update smartpkg in bastion
python3 -m pip install smartpkg==0.0.17 -i https://ci3r7qwshs5jhr6j34yykoi4f3p7f2t3546zju65dmxzkzbl4d5q@pkgs.dev.azure.com/USTInnovationEngineering/SmartOps/_packaging/python-lib/pypi/simple --
Create product and env files
-
Create core-platform-prod folder and switch to that folder, if not created
|
mkdir core-platform-prod && cd core-platform-prod |
-
Update product.yaml as shown below. Please update the namespaces and version accordingly.
|
package: core-platform version: 8.0.1-34 nameSpace: smartopsv1-stg01,smartops-logmon,sealed-secrets-controller helmCharts: cluster-config: helmParams: --namespace smartopsv1-stg01 --timeout 120s deploy: "true" values: env: env.yaml logmon: helmParams: --namespace smartops-logmon --timeout 120s deploy: "false" smartops-infra: helmParams: --namespace smartopsv1-stg01 --timeout 120s deploy: "true" values: env: env.yaml,env_secrets.yaml core-platform: helmParams: --namespace smartopsv1-stg01 --timeout 20m0s deploy: "true" values: env: env.yaml rhub: helmParams: --namespace smartopsv1-stg01 --timeout 20m0s deploy: "true" values: env: env.yaml xd: helmParams: --namespace smartopsv1-stg01 --timeout 20m0s deploy: "true" values: env: env.yaml |
-
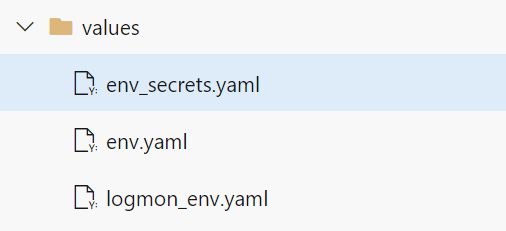
Include multiple external configuration files under values folder.
For References 
Create or update new sealed-secret
-
Generate a sealed secret by passing the Secret Value as plain text "$SECRET_VALUE” and the Secret Key as $SECRET_KEY using sealed-secrets-controller and kubeseal
|
echo -n "$SECRET_VALUE" | kubectl create secret generic ${NAMESPACE}-secret -n ${NAMESPACE} --context $KUBE_CONTEXT --dry-run=client --from-file=${NAMESPACE}-$SECRET_KEY=/dev/stdin -o json | kubeseal --controller-namespace=sealed-secrets-controller --controller-name=sealed-secrets-controller --context $KUBE_CONTEXT --format=yaml > ${NAMESPACE}-sealed-secret.yaml |
-
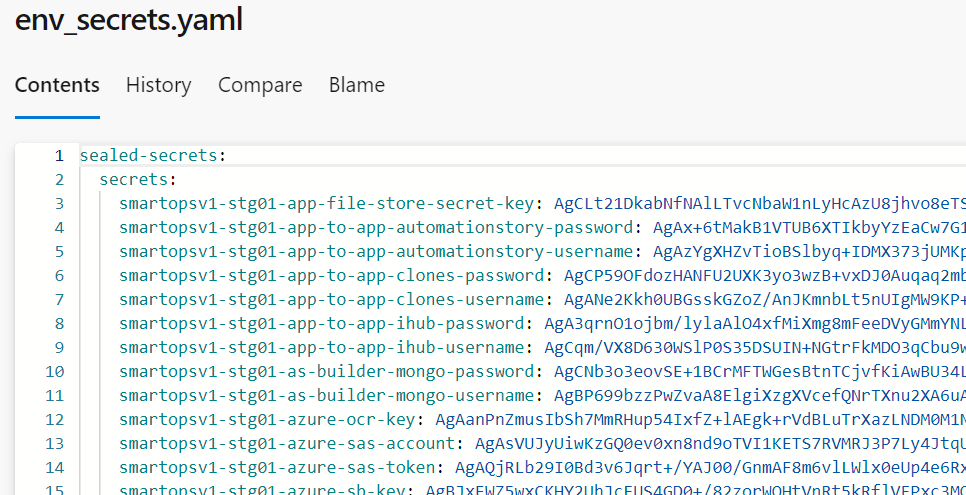
Copy the sealed-secrets from env.yaml to a new external configuration file env-secrets.yaml and include the new secret generated in above step as below.
Note - for updating new secrets follow the same steps above and update sealed-secrets block in env-secrets.yaml and redeploy.
Secret Additions As per Release
Platform 8.0
<namespace>-rabbitmq-keda-url: amqp://admin:kJ4zK9nC3bT4qN9w@<namespace>-rabbitmq. <namespace>.svc.cluster.local:5672
Platform 7.8
<namespace>-rhub-adapters-rabbitmq-amqp-password with value “pqmaqmtibbar”
<namespace>-rhub-adapters-rabbitmq-amqp-username with value “rabbitmq_amqp”
<namespace>-app-to-app-clones-password with value “M@$terClones”
<namespace>-app-to-app-clones-username with value “clones”
<namespace>-app-to-app-ihub-password with value “M@$terIhub”
<namespace>-app-to-app-ihub-username with value “ihub”
<namespace>-rhub-adapters-api-agent-password with value “tnegaipa”
<namespace>-rhub-adapters-api-agent-username with value “api_agent”
Deploy Core Platform package
Note: Please ensure that data backup is taken and validated as part of Pre-Deployment Activities
Run the smartpkg deploy command from the path where values folder and product.yaml file are present.
|
smartpkg clean,deploy --kubeContext <kubeconfig> --jfrogUser ${JFROG_USERNAME} |