The purpose of the document is to describe the steps to integrate SmartOps with Azure AD.
The document explains the following:
SmartOps - Azure AD Integration – Architecture
Implementation Process
Contents
This document details the process and steps involved in integrating Azure AD with SmartOps. This covers the following sections:
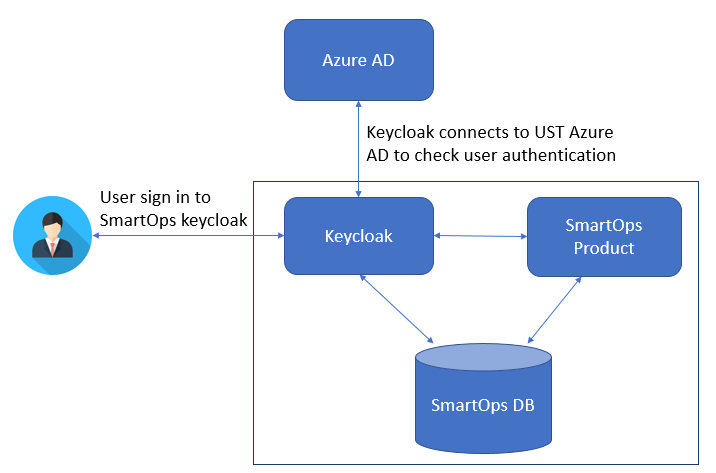
The following image depicts the architecture of SmartOps - Azure AD Integration:
Follow the steps below to implement Azure AD integration with SmartOps:
Register SmartOps application in Azure AD.
Provide the below details to Azure AD support team to register SmartOps application in Azure AD.
Reply / Re-direct URL - https://<keycloak_host>/keycloak/auth/realms/<realm_name>/broker/oidc/endpoint
Sign-on URL / Home Page URL - https://<mux_ui_host>/uimux/smartops/<realm_name>
Logout URL - https://<keycloak_host>/keycloak/auth/realms/<realm_name>/protocol/openid-connect/logout
Secret Key is required? – Yes
Note: Reply / Re-direct URL value should be same as the Redirect URI that is generated in Keycloak for the new identity provider.
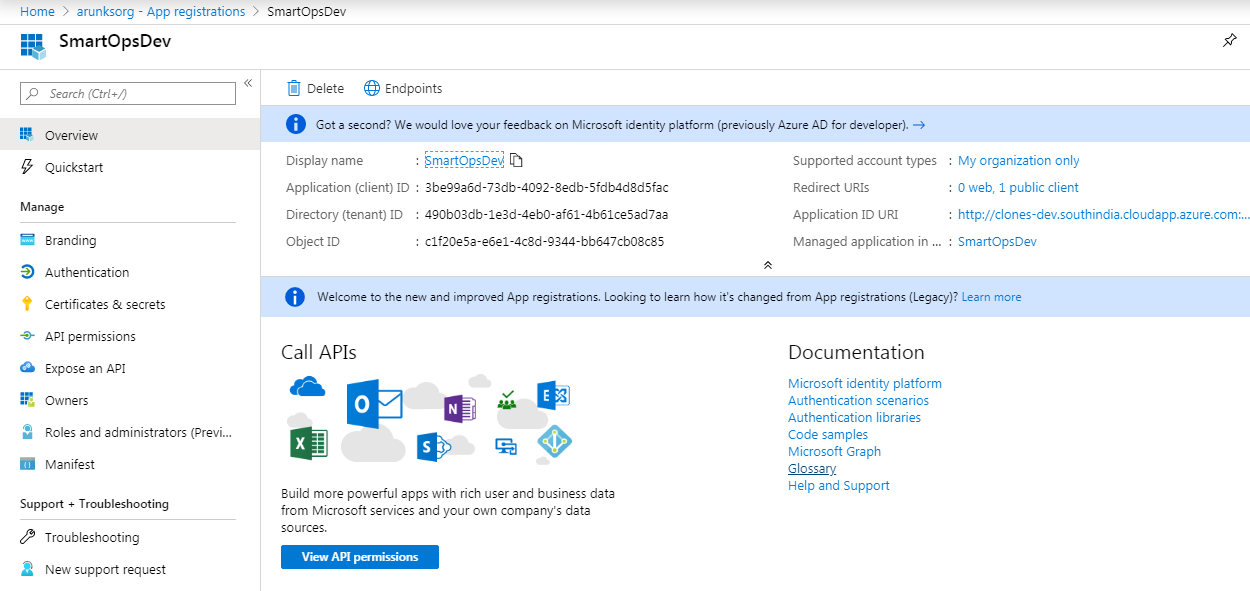
Add Identity provider in SmartOps Keycloak with UST Azure AD details like
Directory (tenant) ID
Oauth 2.0 authorization endpoint (v1)
Oauth 2.0 token endpoint (v1)
Application (Client) ID
Client Secret
Add Identity provider in SmartOps Keycloak with UST Azure AD details like
Directory (tenant) ID
Oauth 2.0 authorization endpoint (v1)
Note: If user tries to access SmartOps from UST network then UST Azure authentication will be successful and SmartOps home page will be displayed. If user tries to access SmartOps from outside UST network then he/she will be redirected to UST Azure authentication page and on successful login, SmartOps home page will be displayed.
Oauth 2.0 token endpoint (v1)
Application (Client) ID
Client Secret
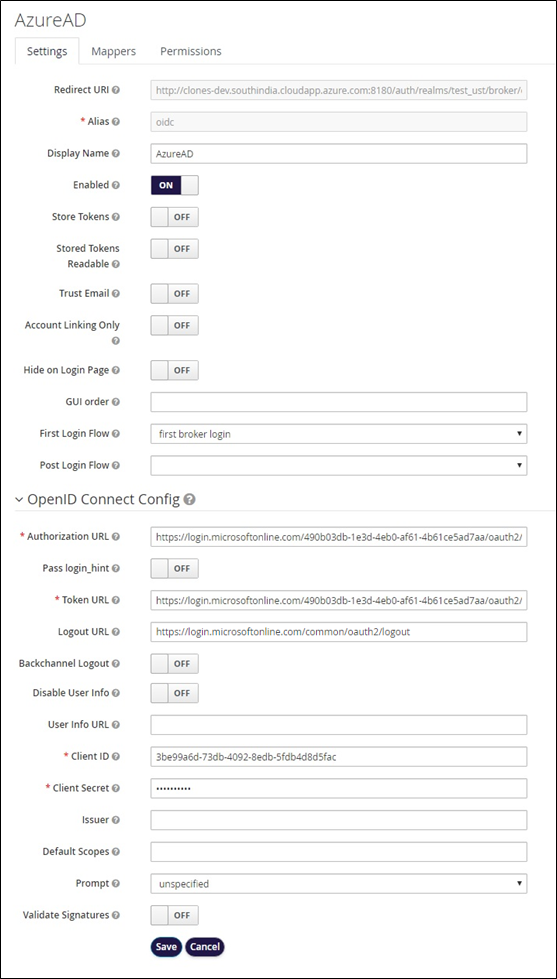
Configure Keycloak based on information from Azure.
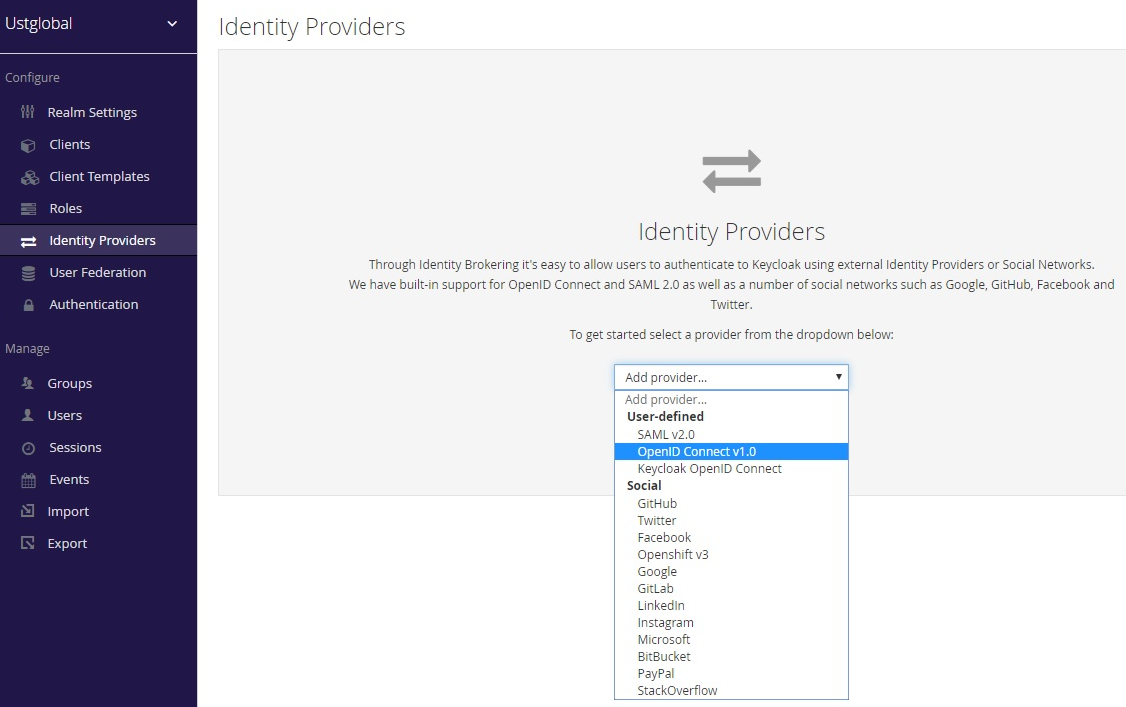
Add new identity provider.
Go to Realm (corresponding organization) -> Identity Providers -> From dropdown select ‘OpenID connect v1.0’
Add the below values and click on Save button.
Add Identity Provider Mappers
Add a mapper for username, otherwise some random string will be displayed as username.
Go to configured identity provider -> Mapper -> Create
Mapper Type - Username Template Importer
Template - ${CLAIM.unique_name}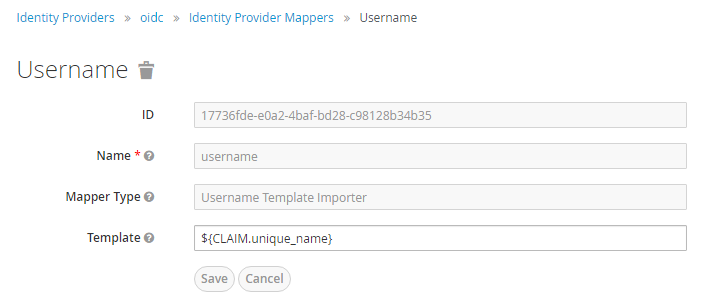
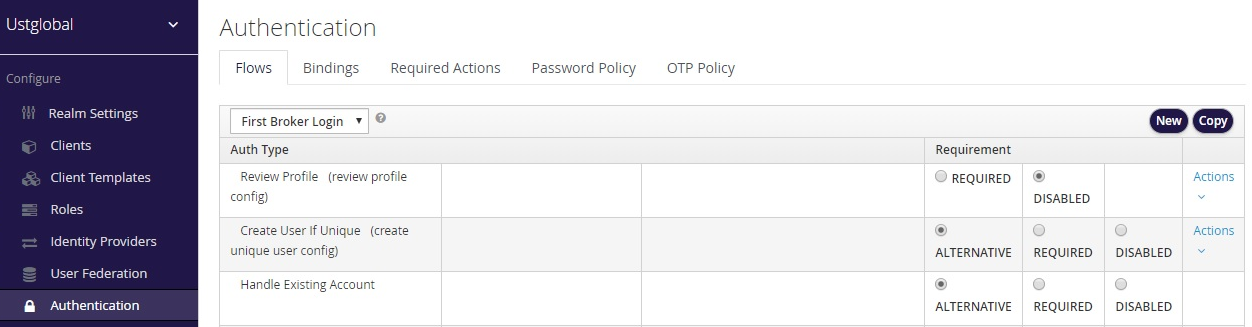
Skip Review profile screen for duplicate username
Got to Authentication -> Flows tab -> From dropdown select ‘First Broker Login’
For Auth Type Review Profile (review profile config) select DISABLED radio button.
Skip login page for Azure AD integrated organizations. Go to Authentication -> Flows tab -> From dropdown select ‘Browser’ -> Identity Provider Redirector(oidc) -> Actions -> Config
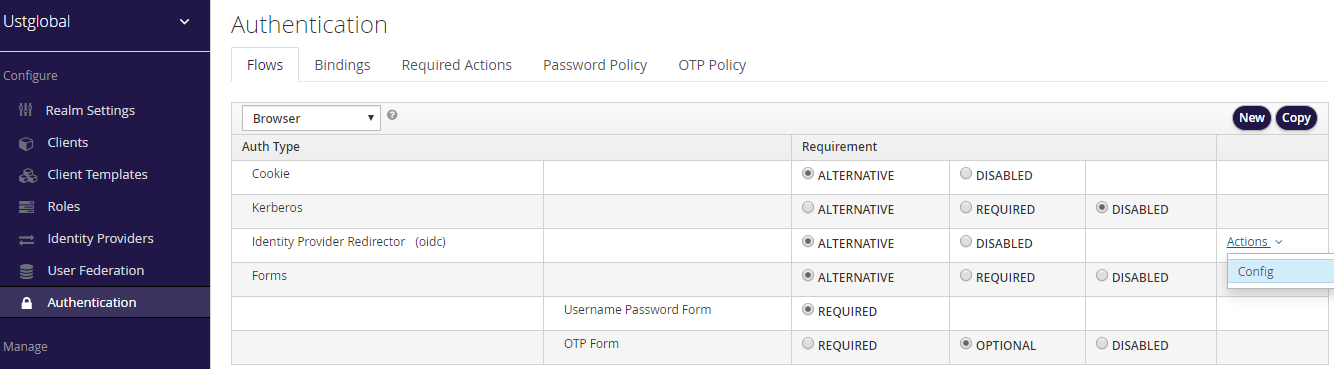
Add the below values and click on Save button.
Alias – An alias name for the config
Default Identity Provider - identity provider alias that you have created for the realm in Step 4, in our case ‘oidc’.
